Pleasant Bay Columns
Spring 2012

GET STARTED
FREE PRINT & DIGITAL EDITIONS
Spring 2012
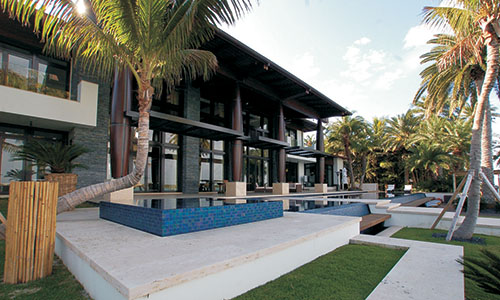
In 2006, I was contacted by a wood consultant whose client was looking for a shop to turn solid Ipe architectural columns. He’d found out about our company through the Federal Reserve project. STA Architectural Group was the principal designer of a private residence under construction in South Florida. Their trademark motif was tropical hardwood architectural columns resembling palm trunks. This design called for unusual dimensions for eight columns.
Prior to this I’d been making spars and was creating a niche for the business. With a lot of help and advice along the way, I developed an efficient system to make hollow “bird’s mouth” poles that were turned into masts, booms, and gaffs for sailboats, and flagpoles. The machinery didn’t know the difference. Working with boat builders and designers pushed us to go further. The crew expanded to include Doug Ingram, our full-time spar maker. The masts got longer and more complicated. Flagpoles were shipped as far away as Bermuda or installed on the facade of the Federal Reserve Bank in New York. Our reputation grew exponentially with the level of experience.
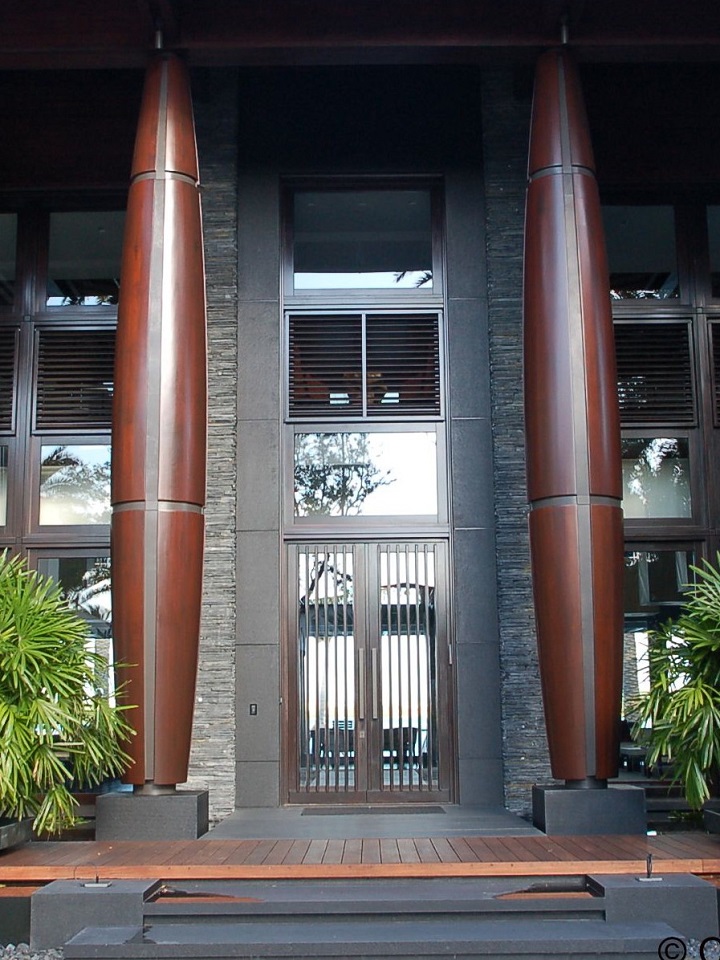
The smaller four columns were to be 30″ in diameter and 18′ high. The larger four measured 36″ in diameter and 24′ high. I made a scaled hollow model based on our bird’s mouth staved construction, and mailed it to the architect but didn’t hear back from them. I was certain that Ipe that size would not be found, nor would a lathe capable of turning those dimensions be easy to locate.
In 2008, the client came back. Working with my crew, we set out to build a column to their specifications using real mahogany, cut precisely by CNC to achieve the tapered shape as shown in the drawing. The first column was a prototype. One difficulty with the design was a series of “reveal” or insets that would later receive brass flat stock as a decorative motif. The prototype was accepted and the contract was drawn up to stipulate the following criteria:
We were under pressure to build eight columns, meeting all the criteria within a short time frame, all while we were also building and commissioning boats, spars, and flagpoles and finishing up a major restoration of a 1946 Coast Guard motorized lifeboat.

The first step was to transfer the architect’s drawing into Rhino software which enabled Tom Olsen of Olsen Marine, Inc. to program his CNC router appropriately. This was a critical prerequisite to fabricating the columns. Without the exact machining of the CNC, we could not have come close to the budget or time frame of such a complicated project.
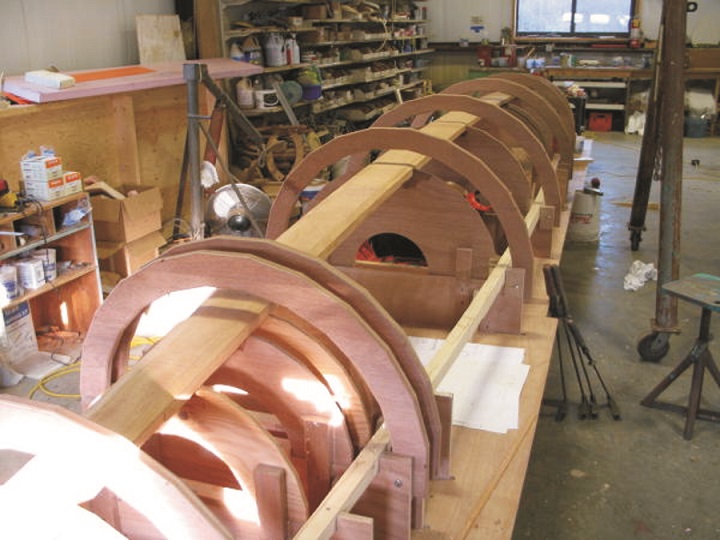
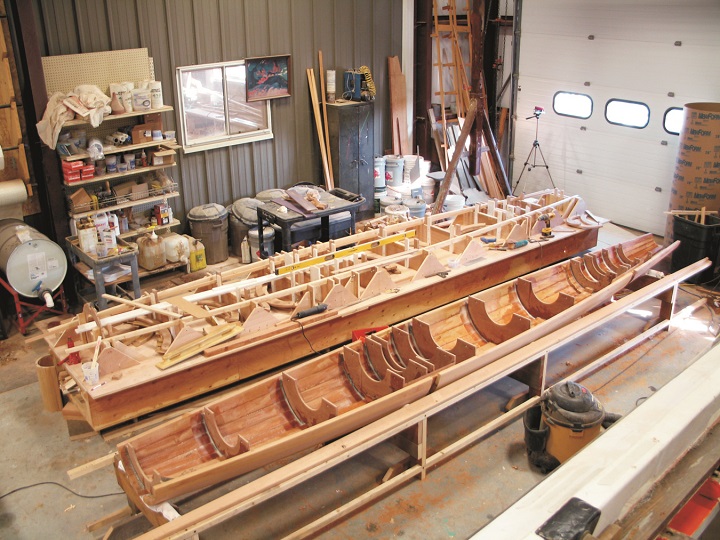
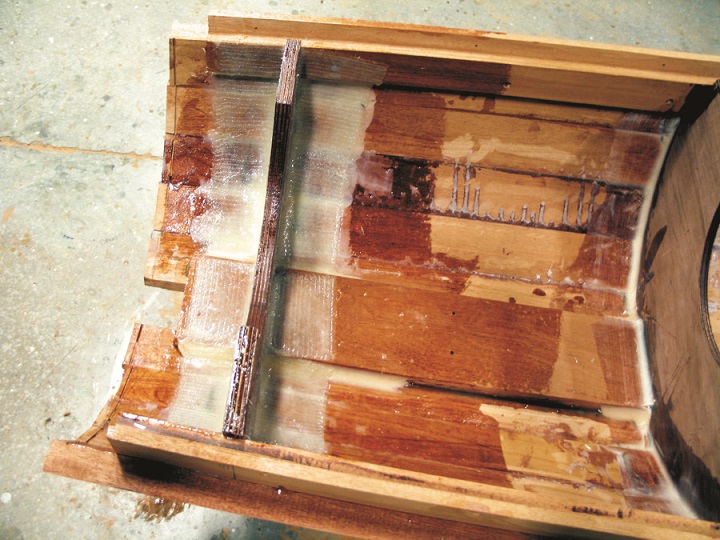
Next, we constructed a building frame, similar to what we do in boat building. We built each half of each column separately, then joined them post finishing, making the setup a little bit easier on Tom. He cut faceted Meranti half bulkheads that conformed to the shape of the column in both vertical and horizontal planes and reflected the facet of each stave at each station. They were then keyed into plywood bases located along stations.
We had Tom cut 1″×2″ plywood brackets which clamped down the staves. These were bolted to the plywood bases and swung into place as needed. The half bulkheads slid into place without fasteners. That would become an obvious but necessary requirement later when the half column was lifted from the building jig.
Each column was comprised of a total of 126 pieces of mahogany cut, beveled, tongue-and-grooved to the exact angle and shape needed to make the taper and diameter. But they needed the half bulkheads to hold all of those parts together: the backbone and reveal sections. Needless to say, the first column took many hours of head-scratching and worry, not to mention second-guessing the architect.
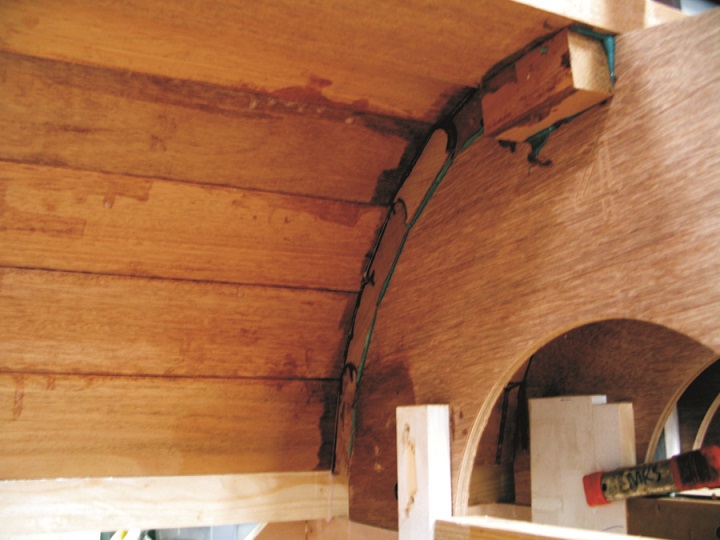
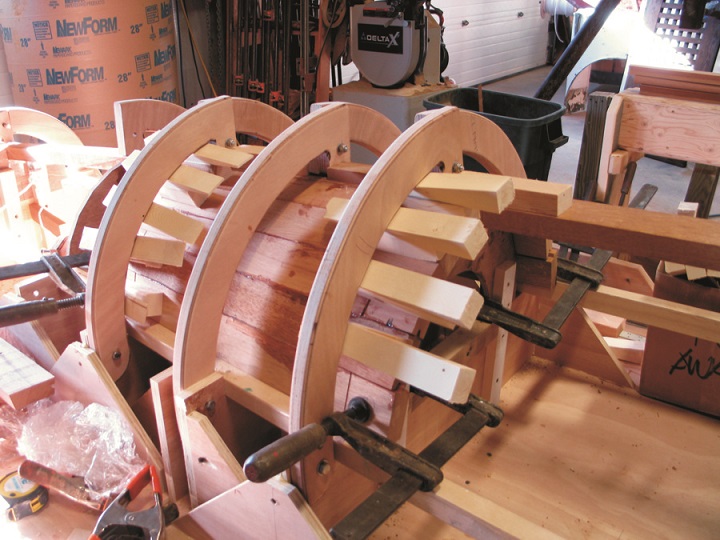
The backbone became the first part laid in the jig, just like the backbone of the boat. That was glued to Meranti half bulkheads with PRO-SET® 175/275 Adhesive (very similar to WEST SYSTEM® Six10® Thickened Epoxy Adhesive.- Ed). This proved to be the best invention since glue itself. The ease of application and the gluing integrity was paramount to the success of this first step. We would have far less cleaning up to do later.
Once the backbone was set, the horizontal reveals had to be set. These were cut to sit under the outer staves, and their facets had to match surface for surface. These reveal sections were critical to the overall structure. They were dry fitted, adjusted then glued and clamped in place with the Pro-Set adhesive and edge-glued with WEST SYSTEM 105 Resin/205 Fast Hardener®, then clamped in place.
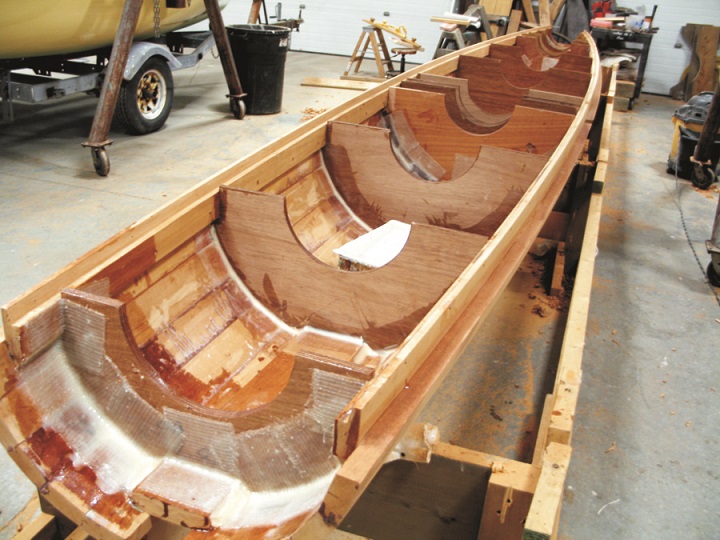
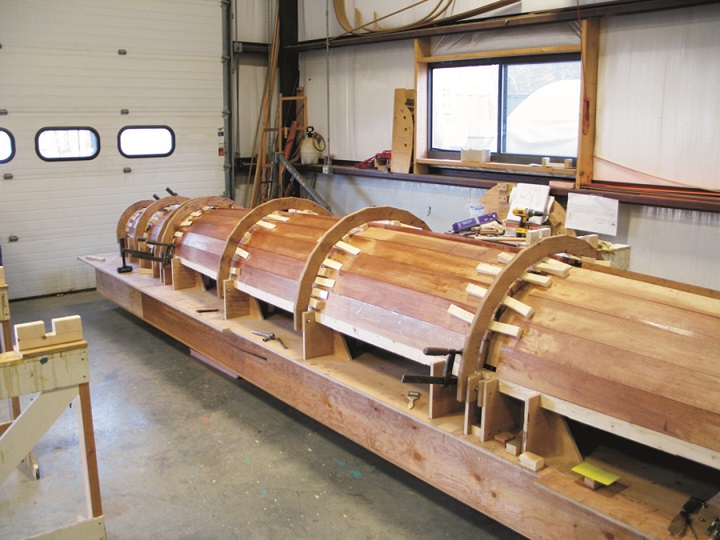
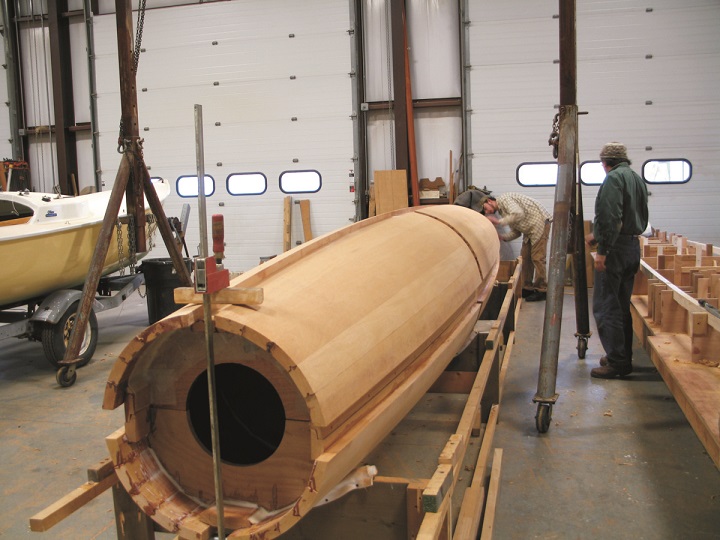
When the reveals were set and cleaned, the arduous task of dry fitting each section of outer staves began. Again using PRO-SET Adhesive and WEST SYSTEM 105/205, our crew got into a rhythm of gluing each half in a day. To clamp, we simply drove wedges between the staves and plywood brackets, hence the need for really strong material. We were literally bending 6/4 mahogany around not-so-subtle curves and needed a lot of clamping pressure until the epoxy cured. Once the half column had set, it was flipped then the half bulkheads were tabbed in place with 1708 Biaxial cloth and a mixture of WEST SYSTEM 105 Resin and 206 Slow Hardener®.
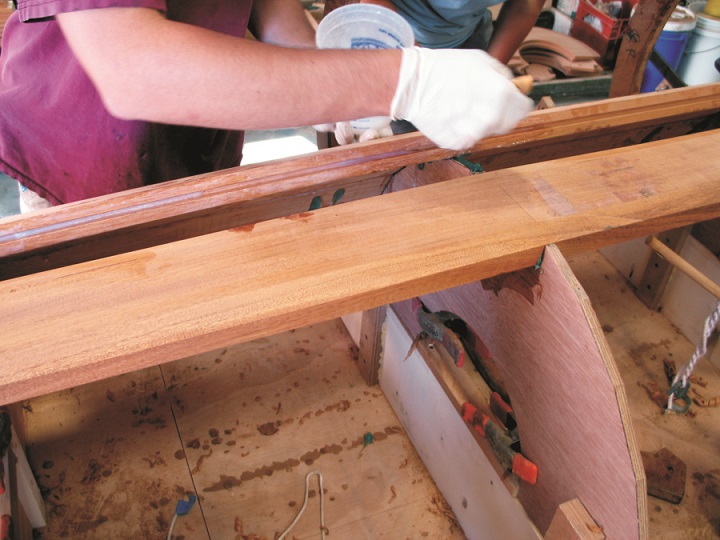
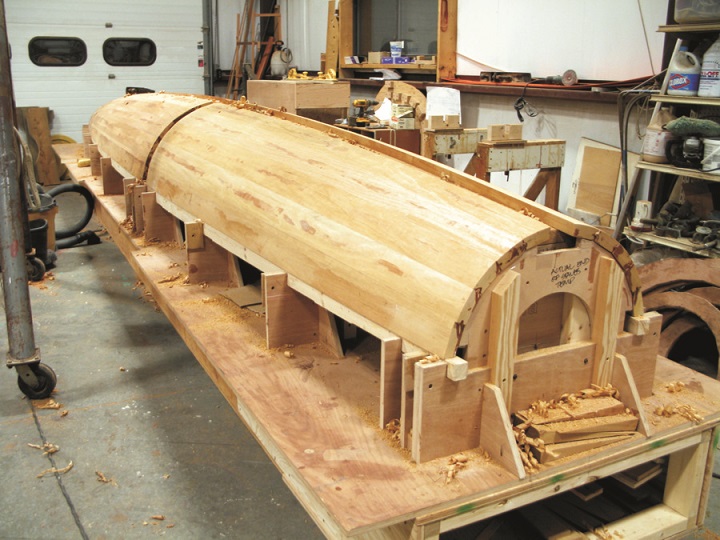
The half column was ready to be shaped, and we were far from done. This was the most dreaded job. Beginning with a power plane, we shaped, faired, sanded, shaped, faired and sanded again. The columns were getting a natural finish so there was no room for chip, planer cuts or sanding swirls. The reveals were coated with epoxy and then sanded fair, with the idea that a decorative brass sheet metal was going to collect moisture at some point and therefore needed protection. Our rule was to ere on the side of caution at every step.
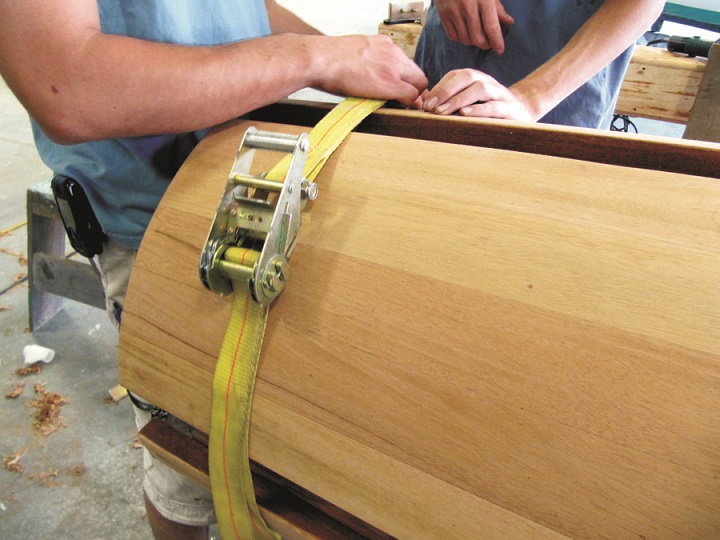
The entire process was repeated for the second half. Once both parts were finished, completely faired, and sealed, they were made ready to fit together. The vertical and horizontal reveals had to line up perfectly. Two of the vertical backbones were ship-lapped in order to fit the halves together. Often they had to be hand-shaped to get all the surfaces to align.
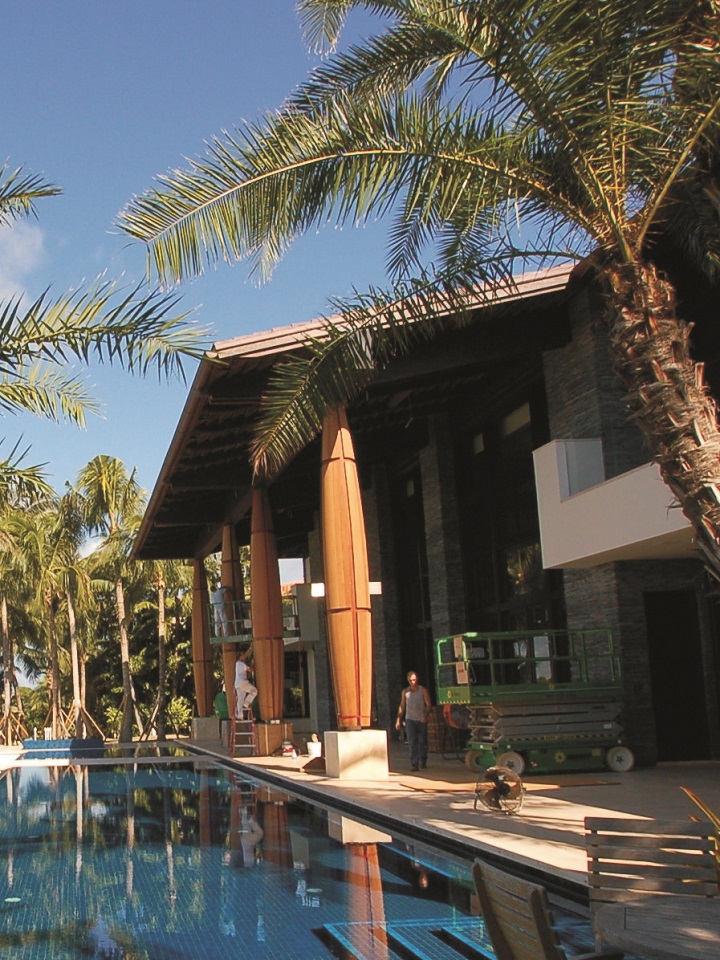
The columns were fastened temporarily for transit to Florida, where they would be disassembled and installed on site. This step was all hands-on deck, fitting, shaving off a bit here and there, and refitting. The joints had to be perfect. The big question was how they could install these halves precisely in a vertical position. Judging from the photos, they look fabulous and the installation was pretty smooth.
In all respects, we met the design criteria except for the time frame. Putting a boat building shop through that level of exacting and repetitive work, on top of our many other projects was painful. The duration of the project was too long, due in part to the learning curve and management. Once we got down to it we were averaging a column per month, which had been my original goal. The first four averaged one every 2.75 months, too long to sustain the crew’s enthusiasm.
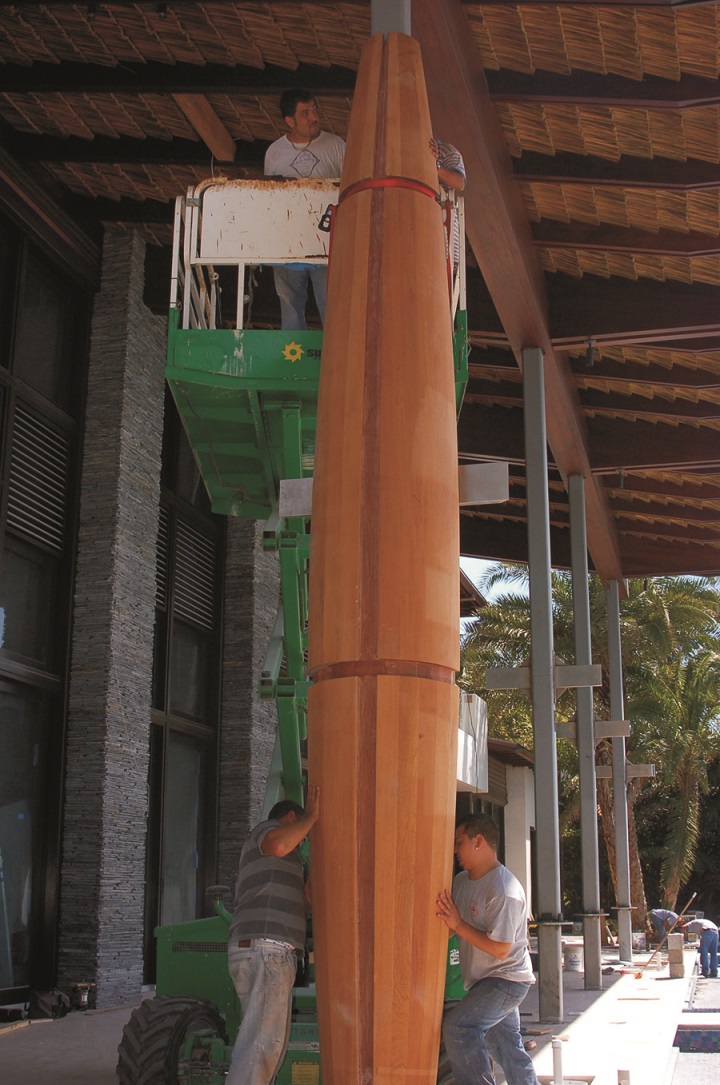
The challenge for our shop was to meet the criteria and build better and smarter than the client’s expectations. With a top-notch crew, beautiful mahogany, and the indispensable help from Tom Olsen, we were able to build some pretty wild columns.
I am extremely grateful to my crew: Doug Ingram and Brian Porter, with help from Molly Avellar, Ryan Benoit, Ned Chamberlain, and Alex Holmes of Olsen Marine, Inc., and with the knowledge and assistance we received from Gougeon Brothers, Inc., whose WEST SYSTEM and Pro-Set products we could not survive without.
Pleasant Bay Boat and Spar Company is a boat building and spar fabrication shop located in Orleans on beautiful Cape Cod. We have been building, restoring, and repairing boats on the Cape since 1999.
Pleasant Bay Boat and Spar Company
PO Box 1174
Orleans, MA 02653
pleasantbayboatandspar.com


