by Brian Knight—GBI Technical Advisor
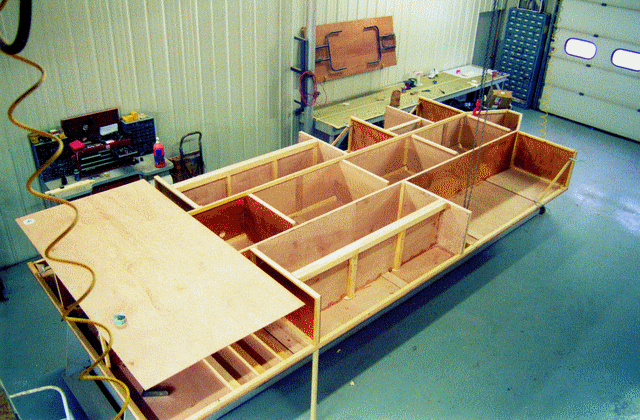
Above: Shown upside down, the base of Jon Staudacher’s trailer is a series of plywood torsion boxes, doubling as storage compartments. The depth of the boxes makes a very lightweight, rigid structure.
Over the years, we have featured some of Jon Staudacher’s more innovative projects and ideas. From his extreme house, to race boats, to aerobatic airplanes, to a gate at the end of his driveway, to something as simple as a paint roller brake, Jon has always sought the simplest method to build his projects. Jon’s latest project is no exception.
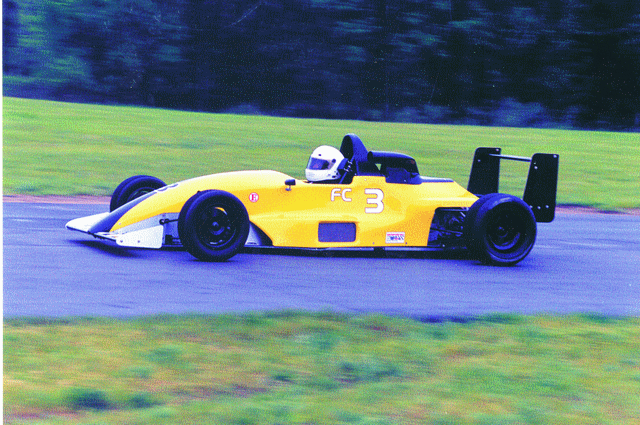
Jon is currently campaigning a Formula Continental C, an open-wheel, Ford Pinto-powered car capable of straight away speeds of 160 mph. The following projects took place in Jon’s shop over the last two years and all relate to his Formula car; however, the concepts described here can be adapted to many other projects.
Jon Staudacher’s trailer innovations
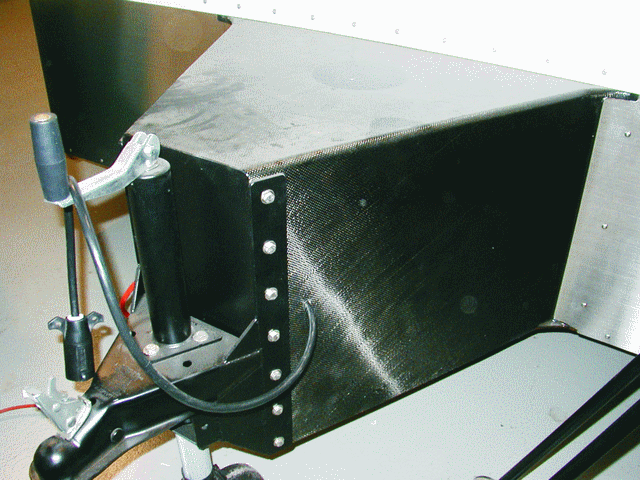
Jon designed and built a unique and very practical trailer to haul his car. The unique thing about this trailer is that it is constructed mostly of Okoume plywood. Where the loads are great, e.g. the tongue, the plywood is reinforced with
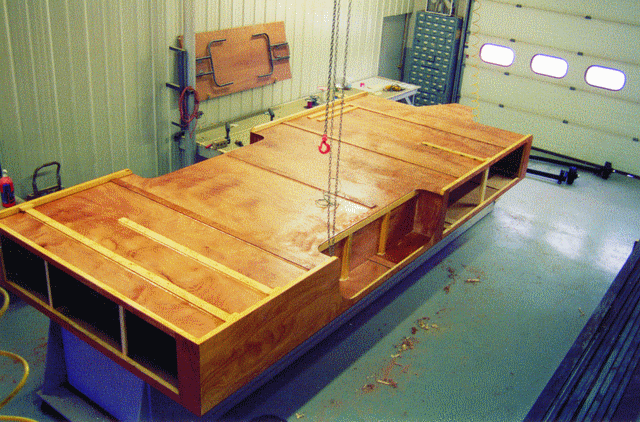
carbon fiber. Why did he choose wood? A race campaign not only requires hauling the car, but also the large volume of consumable items required to race it. Extra sets of tires, gasoline, tools, folding chairs, and coolers for between race downtime, etc., all of these items require storage space. To keep the weight of the trailer to a minimum and at the same time provide covered storage, Jon used the storage area(s) as a structural element of the trailer.
In the top two photos, the trailer is under construction. The top view shows how the storage compartments are really a series of plywood torsion boxes glued together to make the base of the trailer. The depth of the boxes makes a very lightweight structure, rigid enough to support all the rest of the trailer. The plywood is 6 mm (¼”) thick for the torsion boxes and 12 mm (½”) for the surface where the car sits. Jon used steel on this trailer only for the axles, suspension, hitch, and the uprights used to support the walls and ceiling of the upper part of the trailer.
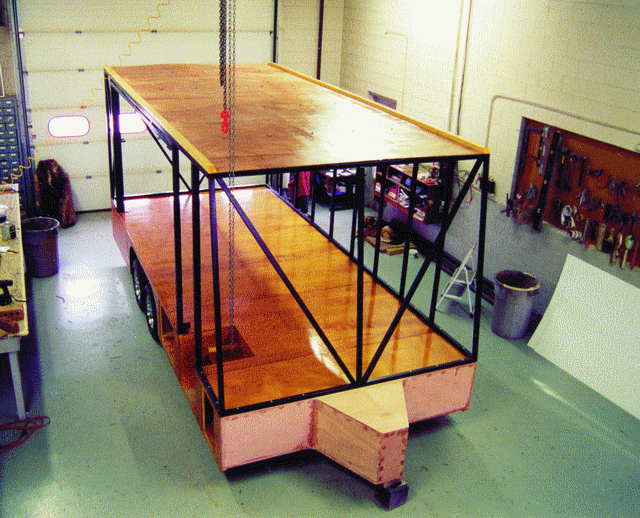
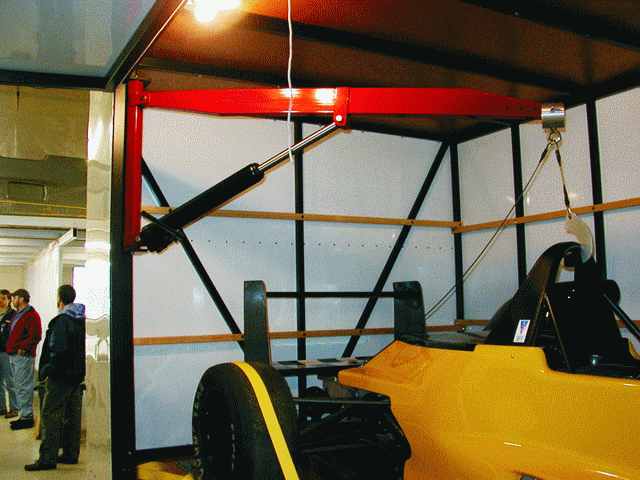
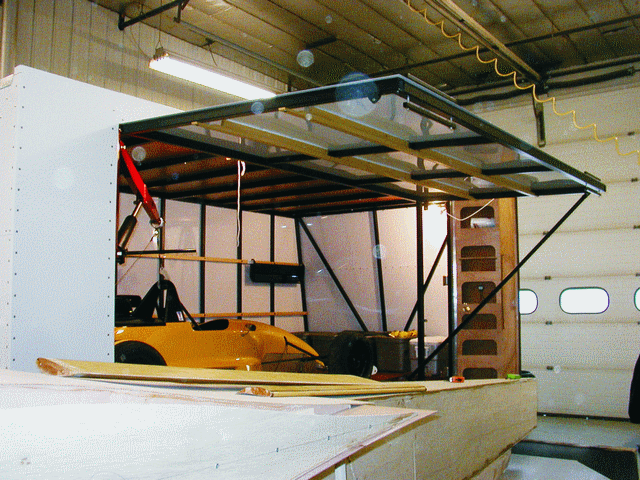
Other interesting features include a hoist system to load and unload the car, an entire side of the trailer that swings up to make a sheltered area to work on the car between races, an entry door that contains storage for wrenches, and doors to the storage area that are plywood covered with carbon fiber.
One of the more innovative ideas on this trailer is the car hoist. Formula cars have minimal ground clearance so, traditionally, the trailers have been built with the bed as close to the ground as possible and a long ramp is used to roll the cars on and off. If the bed were too high, the car’s underbelly would drag as it was loaded and unloaded. Jon’s trailer eliminates this problem by using a come-along attached to a swinging arm. He attaches a cable at the center of gravity of the car, lifts the car, and swings it onto the trailer.
Male mold techniques
When Jon bought this car, he found that the bodywork was built of chopped strand mat/polyester resin. This combination is heavy and not very fatigue resistant. Hairline cracks were a constant problem. So he used the existing body as a male mold for a new body.
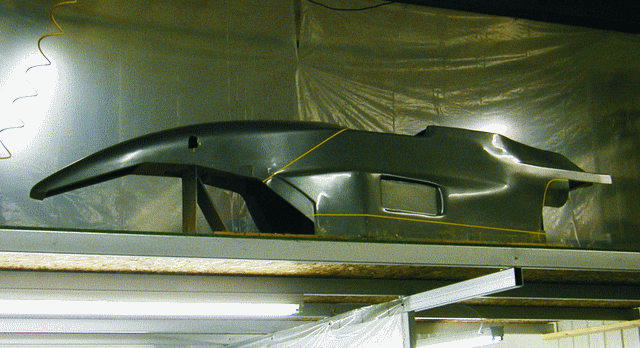
He used fiberglass cloth instead of fiberglass mat to increase the strength and decrease the weight. He used WEST SYSTEM® Epoxy instead of polyester resin to increase fatigue performance.
Using a male mold for this part makes a lot of sense. Jon is not building multiple parts, and it is easier to release the part from a male mold. Additionally, because of the shape of the body, it would be difficult to reach to the bottom of a female mold to laminate the part.
First, Jon modified the existing car body slightly to make it more to his liking, installed a couple of bulkheads to stiffen the structure, and mounted it to a hollow-core door. A hollow core door makes a cheap and stiff strongback. Next, he applied mold release to the surface. Then, he applied three layers of 6 oz cloth to the surface of the car body, squeegeeing the cloth thoroughly to remove the excess resin and to reduce the number and size of air bubbles trapped between the layers of fabric. When the epoxy had cured, Jon gently pried the part loose from the mold but did not remove it. The new body at this point was still flimsy and needed to be supported on the mold.
Jon added some fiberglass tape at the high-stress points and then began fairing. He uses the unusual method of filling the weave of the cloth with a runny mix of 410 Microlight™ and epoxy. The consistency of this mixture is brushable. Jon says when he is done with this step, the weave does not appear to be filled, but when he sands it, there is enough epoxy to prevent damage to the fiberglass. His next step is to spray the rough-sanded surface with a high-build primer. He does the final, close fairing on the primer and finishes the part with Ditzler Acrylic modified Urethane. As you can see below, the car body looks great.
Small wing construction
Jon’s car has wings both at the front and rear to generate downforce for better handling. He has a number of foil shapes that he uses depending on the type of racecourse he is driving. Because of the drag these wings create, the correct foil has to be chosen to suit the average speed for the track. Fast courses require different foil shapes than slow courses with lots of tight turns. Jon also likes the wings to be lightly mounted to the car so they will break away in the event of a collision. Finally, the wings must be lightweight.
Because he needs an inventory of different foil shapes, Jon has come up with a technique to build wings that is quick, easy, and inexpensive. He begins with a board that has the approximate shape of the flat or convex side of the wing. Using very thin aircraft plywood for skins-1/16″, 5 ply-he lays the bottom skin over the form and defines the top surface of the wing with either a shear web or a few frames.
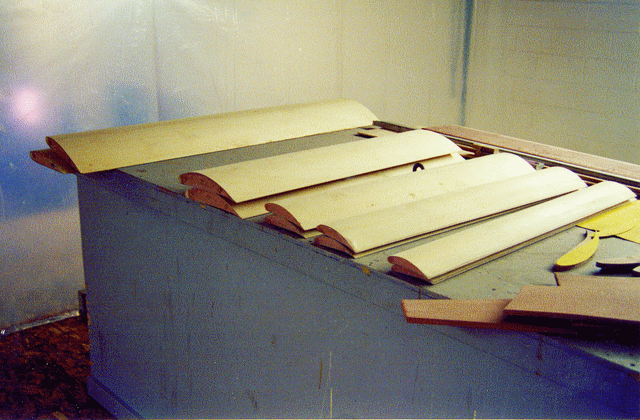
At this point, the leading and trailing edges (if there are any) are also bonded to the bottom skin. It becomes a very easy process to glue the interior in place on the bottom skin and then glue and clamp the top skin in place. Jon has built some extremely rigid wings by applying carbon fiber cloth to the plywood to further stiffen the wings. After it is faired, the typical wing is finished with 1¼ oz fiberglass cloth. Jon uses the same finishing technique as described above in the bodywork section.
Several characteristics are common to all of these projects. All are about as lightweight as you can build them. All are built as simply as possible. All use easily obtained, fairly inexpensive materials. Since this is a race car, most parts don’t last long so there must be a way to keep replacement costs in line or have an inexhaustible budget.

