Saving the Deck
Spring 2009

GET STARTED
FREE PRINT & DIGITAL EDITIONS
Spring 2009
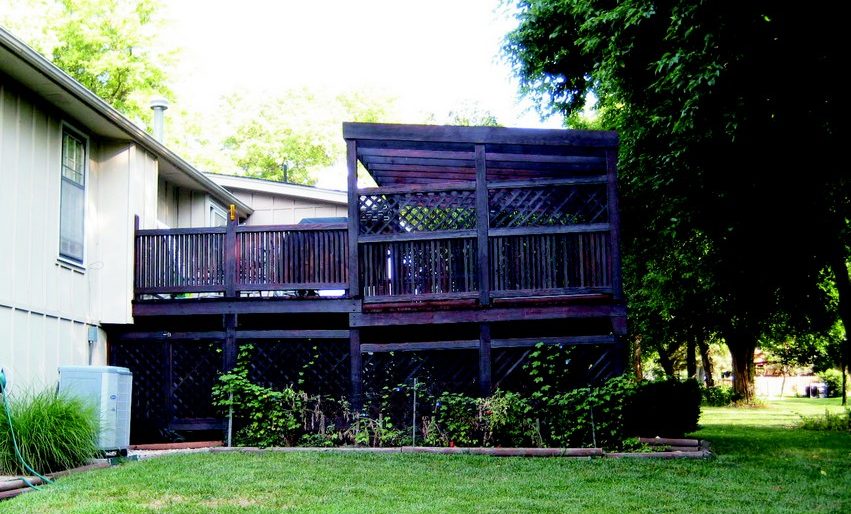
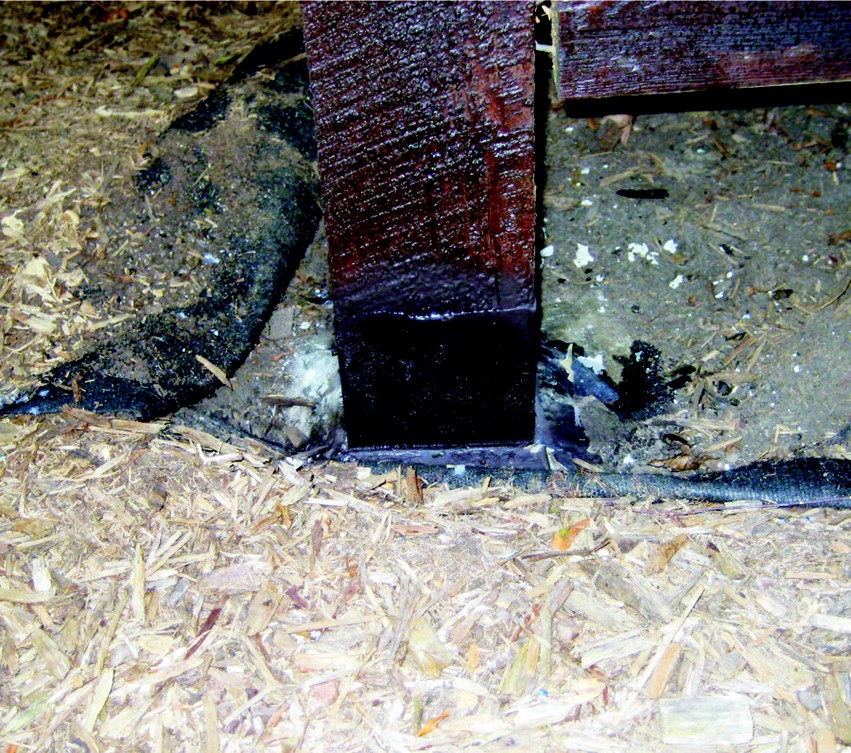
I needed to make a deck repair because there was wood rot at the bases of the support posts for my large, two-story patio deck. This bi-level deck has patio furniture on the top level and a built-in hot tub on the lower level. The deck is constructed of 6×6 support posts, 2×12 flooring supports and 2×4s for the finished floor. All of this is redwood.
Last spring after power-washing the deck, I began the once-every-three-or-four-years jobs of staining it. This deck is twenty years old now but still holding up well. As I applied the stain to the 6×6 support posts, I noticed severe wood rot in some of the posts. Over the years I’d neglected proper landscaping around the base of these, which lead to soil surrounding the bottom two or three inches of the posts. This in turn held the moisture near the footings much longer than it should have. The resulting compromise of structural integrity had to be addressed. In some cases, up to 25% of the cross-section of the post had rotted away. My options were to replace the 6×6 support posts or structurally repair them. I chose to repair the deck posts instead of replacing them.
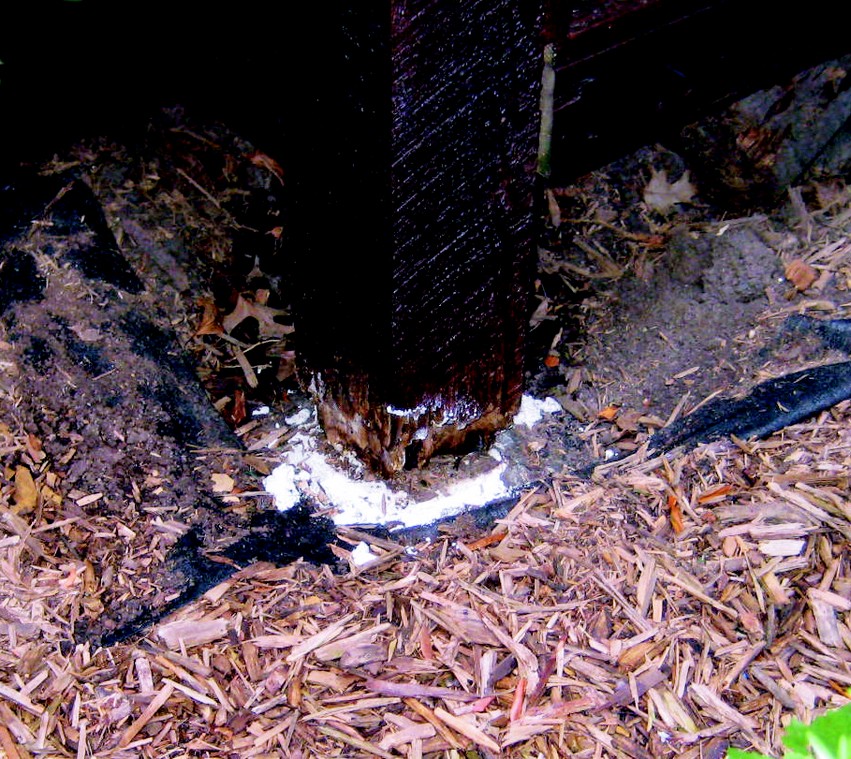
I cleaned out the wood rot as much as possible using a screwdriver and sometimes just getting my fingers into the voids and pulling out the deadwood. Then I used a wood preservative solution of copper naphthenate (green preservative) to halt the rot’s progression. This solution is a spray, but I also poured it on directly when possible. This is one of those situations where more is better.
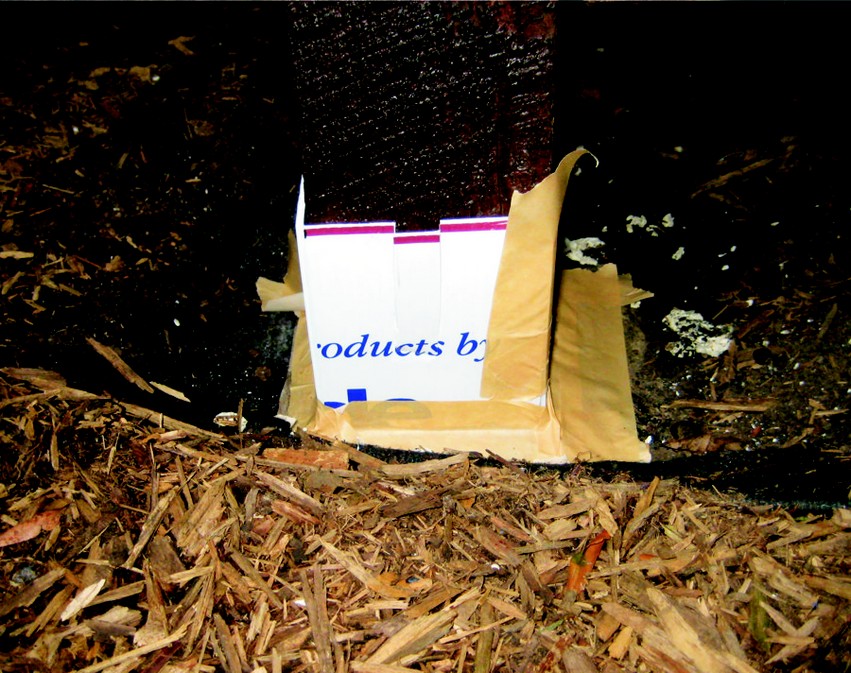
Using an expendable plastic sign, I built small forms to fit around the base of the posts. Each form was 2″–4″ high based upon the wood rot on the posts. My idea was to pour a replacement base that enclosed the rotted section of the post, and then some of the remaining post. I sprayed the plastic forms with silicone spray in hopes of an easier removal process. Then I carefully taped them to the original cement footings to hold the poured epoxy inside of the form.

I mixed WEST SYSTEM 105 Resin with 206 Slow Hardener. This gave me plenty of time to get the epoxy into the forms. I thickened the mixture with 403 Microfibers, which made it much easier to contain in the forms. Before removing the plastic forms, I let the epoxy cure overnight.
The forms came away from the epoxy with a little work, but the ink from the plastic stayed with the cured epoxy. This wasn’t an issue since my next step was to paint the epoxy bases so they blend in with the garden around them. I used a dull brown paint that was created for camouflage work to hide the glossy look of the epoxy.
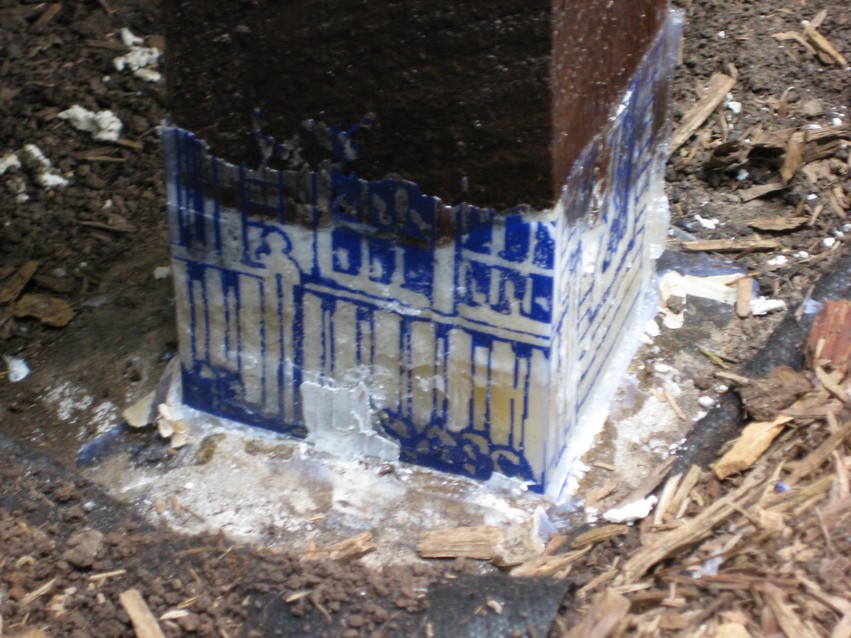
It is not worth the time or effort to sand the epoxy bases. Any finish work needs to be done with hacksaw or grinder. No matter how careful a person is, there always seem to be leaks in the forms. Use plenty of tape to seal the forms, and then tape some more.
The use of epoxy and 403 Microfibers helps immensely when trying to keep the mixture in the forms. All in all, this turned into a very successful repair of the deck with the use of WEST SYSTEM epoxy. This maintenance project should provide another 20 years of life for this deck, and at a significantly lower cost than replacing eight 6×6 support posts ranging from 4′ to 16′.
There are often interesting articles in Epoxyworks magazine illustrating the different uses of the WEST SYSTEM epoxy. I admire the time and effort that goes into some of these handmade boats that are like art projects. But in my particular situation, with rotting posts on high deck that also supports a hot tub, I was most concerned about strength rather than aesthetics.


