


Lesson 4 in our series on Strip Planking
By Ted Moores
Sealing and priming a surface prior to applying the final finish affects how it ages, and how it ages has everything to do with the way the finish is anchored to the wood. Sealers and primers are often taken for granted; we simply read the can and follow directions. There are so many reasons for using a sealer and many methods for applying them. Let’s look at what we learned while sealing Sparks, the electric launch I built.
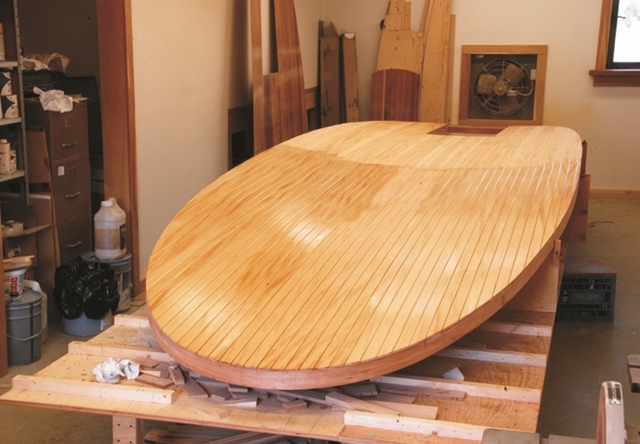
Getting Sparks ready for launching this spring, I thought about sealer and how our sins of omission had come back to bite us. When we built her, finishing the deck was one of the last things on the list. The deck is a veneer of ¼” cherry, basswood and white oak over 1/2″ plywood that had been glassed both sides. My plan was to saturate the deck overlay with WEST SYSTEM® 105 Resin/207 Special Clear Hardener®, bury it under three full coats of this epoxy, then varnish. As can happen to good intentions, we were running out of time when the Windsor Locks opened, so I took a calculated risk to save time. And it almost worked.
I had compromised, eliminating the three buildup coats of epoxy and relying on the epoxy saturation coats only to be a stable base on which to build the varnish. I’d thinned the first coat of epoxy with about 10% lacquer thinner and allowed it to soak in. About five hours later I spread on the second coat of unadulterated epoxy. At this point, the surface was very level with most of the grain filled.
Editors note: While we have cautioned against the thinning of epoxy, Moores is an experienced professional and has produced exceptional results using this technique.
Since the wide blade of the squeegee was controlling the thickness of the epoxy, a quick sand to cut the gloss was all that was needed to get it ready for varnish. Working on this smooth surface meant that building up the varnish went fast. There was little open grain to fill with varnish, so very little sanding was required to keep a high-gloss, smooth surface building. If the three buildup coats of epoxy had been applied, it would have meant a bigger fairing and sanding job to fair the surface.

The Mistake
This technique worked great on the cherry planks and basswood splines because the wood was porous enough to suck up a lot of that first coat of epoxy. The problem was with the white oak covering boards. I have never been a fan of oak, but it was traditional for covering boards on the steam launches in this area so I had to try it. What little epoxy there was over the wood bonded just fine, but the finish split along the grain in quite a number of places. My guess is that because the oak was so hard and open-grained, it absorbed very little of the thinned epoxy. This allowed moisture to escape through the varnish and thin epoxy film, shrink the wood, split the finish and let the water in.
The Fix
The cracks were repaired before launching the second season but the splits opened up again before fall. I just couldn’t see myself chasing cracks in the deck every year on a boat that was intended to require minimal maintenance. The only answer was to strip the varnish and epoxy, sand down to bare wood, go back to plan A (three coats of 105/207) and get it right.
The Interface
Sealer and primers are used for a number of reasons. They can make two finishes chemically compatible, or fill open grain so that the final finish builds faster, or add a pigment close to the final finish to get a jump on building the final color. The most important use is to get some penetration to create a mechanical bond inside the wood that the final finish can attach to.
Cheap Tricks
WEST SYSTEM 105/207 is ideal for saturating the wood fibers and filling the open grain thus creating a tenacious mechanical bond while leveling the surface. A varnish sealer out of the can will enhance the bond between varnish and wood, but epoxy, when used as a sealer, offers several advantages.
Saturating Epoxy Sealer
When epoxy is used as a saturating sealer it greatly increases the density of the surface. This is ideal for softwood that will be getting some abuse. The greater density keeps the softwood from caving in and cracking the finish.
Pre-finishing
One of my most useful cheap tricks is pre-finishing parts that will be both glued and varnished or painted. This saves a lot of time and damage control while improving the final product. Using WEST SYSTEM Epoxy as the sealer means that the whole part can be saturated, yet the surfaces will be compatible with both epoxy and oil-based finishes. Working on individual pieces at the workbench, I can avoid applying and sanding in awkward corners. Hard-to-reach surfaces receive equal protection and finish. Sealing the end grain before assembly saves considerable time; you won’t have to wait for the multiple per-coat applications to soak in before applying thickened epoxy.
Applying Sealer
Note: Most of these techniques are relevant for applying all types of sealer.
Preparing the surface for sealer is not just vanity. Carefully shaping and sanding a wood surface in preparation for finishing is about getting the best bond with the fewest number of steps. The bonus is that it will look good, age gracefully, and simplify refinishing in the future.
Sanding
If it is not going to be seen, why sand? Any piece of wood that is ready to be finished will have been worked in some manner. It could have been run through a planer or plywood sanded at the factory where some of the wood fiber has been compressed into what appears to be a smooth, clean surface. When the sealer is applied, the bruised fiber swells up and stands on end. Sanding this tough, reinforced fuzz can be avoided by dampening the surface with water prior to sanding to bring up the fuzz. When dry, it will be easy to sand. For those who care how a certain surface will appear, dampening it offers a preview of the final finish, revealing any flaws to be taken care of instead of letting them turn up as a surprise at the end.
Machine sanding
When we choose a type of sander for a particular job, we look for one that will best develop the shape we want. This means that to follow that shape it makes sense to use the same sander for all of the subsequent sanding steps. Changing sanders will mean removing more of the coating than necessary to fair the surface and cut all the gloss on the epoxy or finish coating.
Creating Durable Outside Corners
No finish is going to protect a sharp outside corner. The edge is often the most vulnerable area and gets dinged up first. The problem is that the brush applying the finish splits around the corner and deposits very little material. If by chance the finish does follow the corner, the surface tension of the finish will break along the sharp corner and pull the material back from the edge. Then when it comes time to sand between coats, the sandpaper wraps around the corner and takes off anything that might still be there. Fortunately, there are a number of simple things we can do to improve the odds of a durable edge.
Break the Edge
The least you can do is knock off the edge with a block plane and a few aggressive passes with 80-grit sandpaper. We keep a little router with a small round-over bit set up as a quick way of getting a soft corner that still looks crisp yet takes a uniform, durable finish.
Scuff the Edge
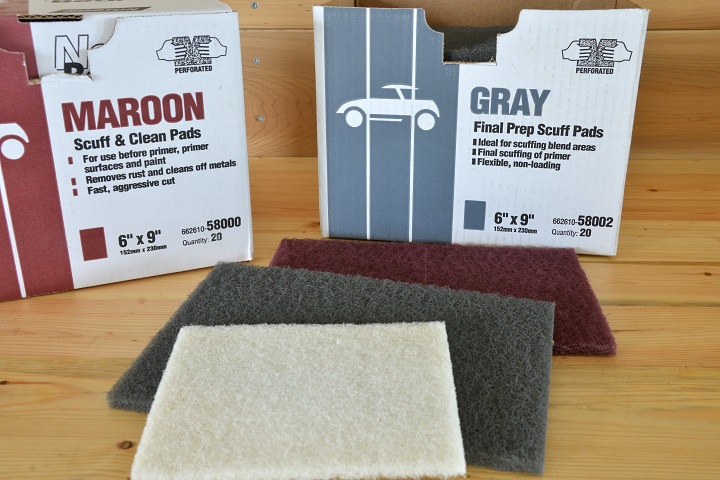
When sanding between coats of sealer or finish, avoid using sandpaper on the edges. The stiff paper will cut a line through the finish rather than cut the gloss evenly around the corner. What you want to use are scuff pads (see sidebar page 4).
Applying the Finish
Apply the finish to the edge first using a diagonal stroke to completely coat the corner. It will run on either side of the corner but by coating the flat surfaces next, the runs are taken care of. By dealing with this hard-to-see and easy-to-miss edge first, we can coat it systematically to ensure complete coverage.
Applying a Penetrating Sealer
The purpose of a penetrating sealer is to saturate the wood fibers and occupy the air space around the fibers with the sealer. Thinned WEST SYSTEM Epoxy is ideal for accomplishing both objectives in one step. Thinning with about 10% lacquer thinner helps the epoxy to quickly saturate the wood fibers and create a wicking action that feeds the epoxy in and forces the air out. Bubbles are good to see because it means that the air is being displaced and the voids are being filled. It doesn’t take long for the thinner to evaporate and the epoxy to gel; the timing is right for performing the void filling function.
Building up epoxy over a surface where the air is being displaced will make bubbles. The more material applied, the bigger the bubble. Breaking the bubbles messes up the surface that was trying to flow out smoothly, especially if the epoxy has gelled enough to hold the wavy brush stroke shapes. But if bubbles are left to harden, sanding will leave pinholes or craters that are fussy and time-consuming to fill. In other words, the surface may be inconsistent and many unpleasant steps away from a smooth and stable base on which to build the next coat.
By keeping the sealer below the surface, bubbles are not an issue as there is little semisolid material to become a bubble. Since epoxy cures by producing heat, air escaping during the curing process should be expected. Leaving the surface open will eliminate the bubble issue and leave a predictable surface that is ready for the next step. By making each step a preparation for the next, we don’t have to wait for the epoxy to cure before moving on to the next step. The ideal time to apply the next coat is when the epoxy hits the ‘green’ or rubbery stage. There will be the least chance for surface contamination, and we’ll get a chemical bond between layers.
One-step Saturation
For the best result and the fewest number of steps, it is important to give the wood as much epoxy as it can absorb in the first application.
Liberally apply this thinned epoxy coat until the surface remains shiny. The shine indicates the wood has taken all it can drink and the epoxy is floating on the surface. If it looks dry, apply more epoxy.
Apply with a brush to small parts and complex shapes. On large surfaces, pour on and move about with a squeegee or roller. Don’t worry about how it looks. Speed is important, and the surface will look good later when the excess epoxy and bubbles are removed. When the epoxy first begins to thicken, pack it in to remove the last of the air, level the surface, and remove the excess epoxy while it is still liquid.
On large surfaces, use a spreader. Hold the spreader at a low angle to create downward pressure to pack the epoxy in and force the air out. Finish with a higher angle to scrape the surface clean and level. Try not to leave ridges, track marks or shiny areas. If the spreader is leaving tracks from nicks in the edge, reshape the edge with a sharp block plane.
Corners, Complex Shapes and Open Grain
When it comes to the cheapest and best Cheap Tricks, the tool with the most gold stars is the scuffing pad. It will grind up any raised grain, some of the surface wood, and uncured epoxy to make a paste filler that will pack into the open grain. At the same time, it is picking up the excess epoxy and bubbles. A quick rub with a dry rag will leave a polished surface with nothing to sand later. Being flexible, the pad wraps around corners and follows complex shapes to treat all surfaces consistently. It blends shapes into a surface that is easy to follow with finer grades of scuffing pad as the finishing progresses. The magic of rubbing down each coat of finish on complex shapes and corners where components join is that at some point, the project stops being a bunch of assembled pieces and becomes one object.
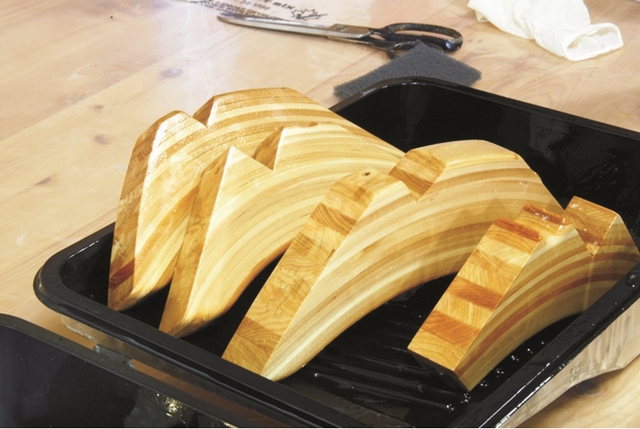
Dry Fitting
When you have components made of several small or hard-to-finish pieces, it can be more efficient to dry fit a group of parts together, then take it apart and seal the pieces individually. When I build something, I find it hard to put all the pieces together and then take them apart to prep it for the next step. I want to keep pieces coming together. I have to remember that when the pieces are individually prepared for finishing before installation, it’s a big step forward with no pain from working in an awkward position or breathing dust while busting my knuckles.
When epoxying the parts together, clean up the excess glue before it cures so the component is ready for the next step. Pick up what you can with a putty knife, then wipe clean with a paper towel dampened with lacquer thinner. Along with saving time while avoiding sanding, joints that fit together clean are the mark of a professional.
See Lesson 1 of the SPARKS series—Strip Planking
See Lesson 2 of the SPARKS series—Fiberglassing a Strip-Planked Boat
See Lesson 3 of the SPARKS series—Skeg Construction
Related article: Ted’s Jewel Box


