Crafting a Decorative Wooden Board
Spring 2023

GET STARTED
FREE PRINT & DIGITAL EDITIONS

Spring 2023
By Don Gutzmer – GBI Technical Advisor
Taking inspiration from charcuterie boards, I decided to craft a decorative wooden board for my kitchen. What else do you do when you have 154 sample size specimens of wood laying around?
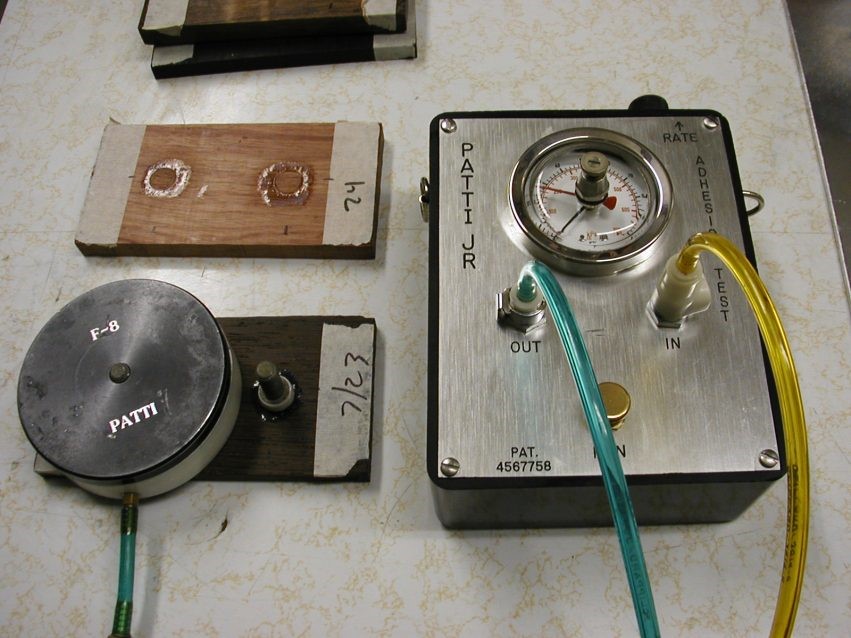
While doing a large shop cleanup here at GBI, we rediscovered a set of 154 samples of wood species from all around the globe. They had previously been used for an Epoxyworks article on adhesion testing. Having served their purpose, they were now sitting around the shop collecting dust. Since the samples were still in good shape, I wanted to turn them into some sort of decorative project. A light bulb went off in my head. I should make a decorative piece for my kitchen inspired by a charcuterie board. (Note: WEST SYSTEM® Epoxies are not certified as food safe).
The first thing that I did was select 20 wood pieces that caught my eye with their color variations. When the samples were tested for tensile adhesion, a portion of wood was removed with it, leaving a small divot. I sanded each of the wood samples until the divot was gone. Next, it was time to determine the pattern. I knew I wanted my pattern to stand out, so I decided to alternate lighter and darker colors for higher contrast. Once I was happy with the order of my pieces, it was time to bond them together.
I chose to use 105 Epoxy Resin® with 207 Special Clear Hardener® to bond the wood samples together. This would give me ample time to assemble all my pieces at once. Fortunately, 105/207 is exactly the epoxy that was in the shop’s 306-Metering Pump. I love the convenience of being able to dispense the proper ratio of both the resin and hardener in a single pump stroke.
I laid the first wood sample flat on the workbench and coated the top of it with a layer of mixed epoxy. Then I set my next piece in the wet epoxy and applied a layer of epoxy to the top of that piece as well. I worked my way through the pile of samples, stacking one on top of the next like making a sandwich. Once I had two stacks of ten samples each, I lightly clamped the wood pieces to the workbench and allowed them to cure.
Now that I had my solid wood blocks, it was time to resaw them down into smaller slices. I cut the blocks into ¼” thick strips on the band saw, perpendicular to the epoxy line. I took these banded strips back to the sander to smooth each side.
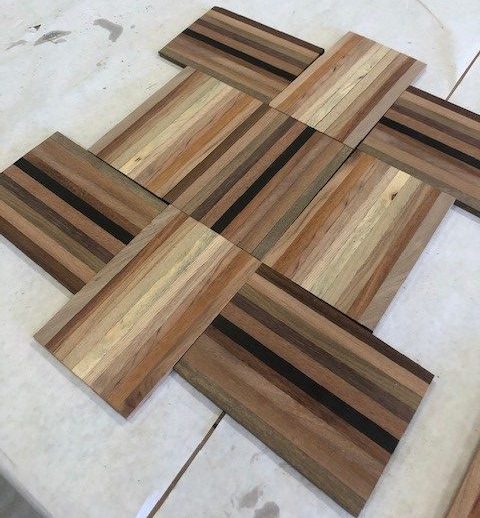
Here’s where I could really begin to see the final pattern for the board. I played around with the banded strips until I discovered a pattern that I found appealing (and one that hopefully my wife would like too!) I did a little additional sanding so the pieces fit together neatly, then edge bonded them with G/5® Five-Minute Adhesive.
My approach was to epoxy each row of three pieces together first, so I only had two glue joints to worry about at one time. Then I bonded each of these rows together to make the finished size of the board. Once the epoxy had cured, I rounded the corners and cut out a handle with a sabre saw.

I wanted the finish to be high-gloss, similar to a bar top, so I flood coated the board with epoxy. Drips are inevitable in this process, and make sanding more difficult, so I took the preventative approach. I taped the edges to prevent any drips of epoxy from getting on the backside.
Using the 306 pump, I dispensed, then mixed a batch of 105/207. I used a squeegee to spread a thin seal coat of epoxy on the wood before the flood coat. The seal coat was to prevent air bubbles outgassing from the wood into the flood coat. As the epoxy exotherms, or as ambient conditions warm up the wood, air bubbles can be released from the wood into the thick epoxy coat.
I waited about four hours before I poured the next batch of epoxy in a flood coat. I poured the epoxy in the middle of the board and gently spread it out to the edges with a bristle brush until it was running off all sides. Since the epoxy was about 1/8″ thick, I waved a propane torch over the surface to break the surface tension and release any air bubbles. I removed the drip tape along the edge once the epoxy had stopped dripping. Both sides of the board were done the same way so it had the same finish on both sides.
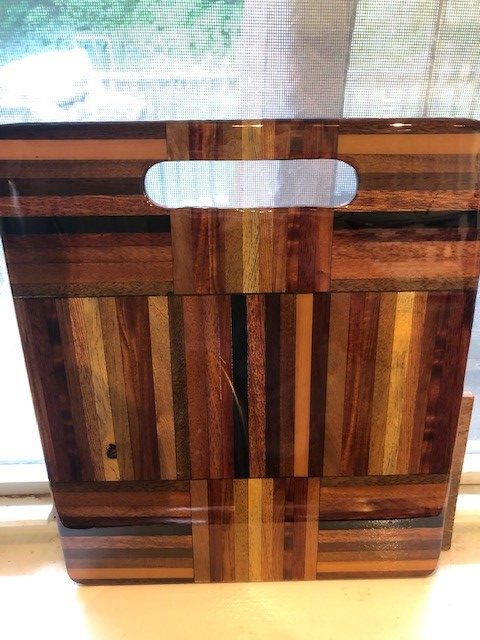
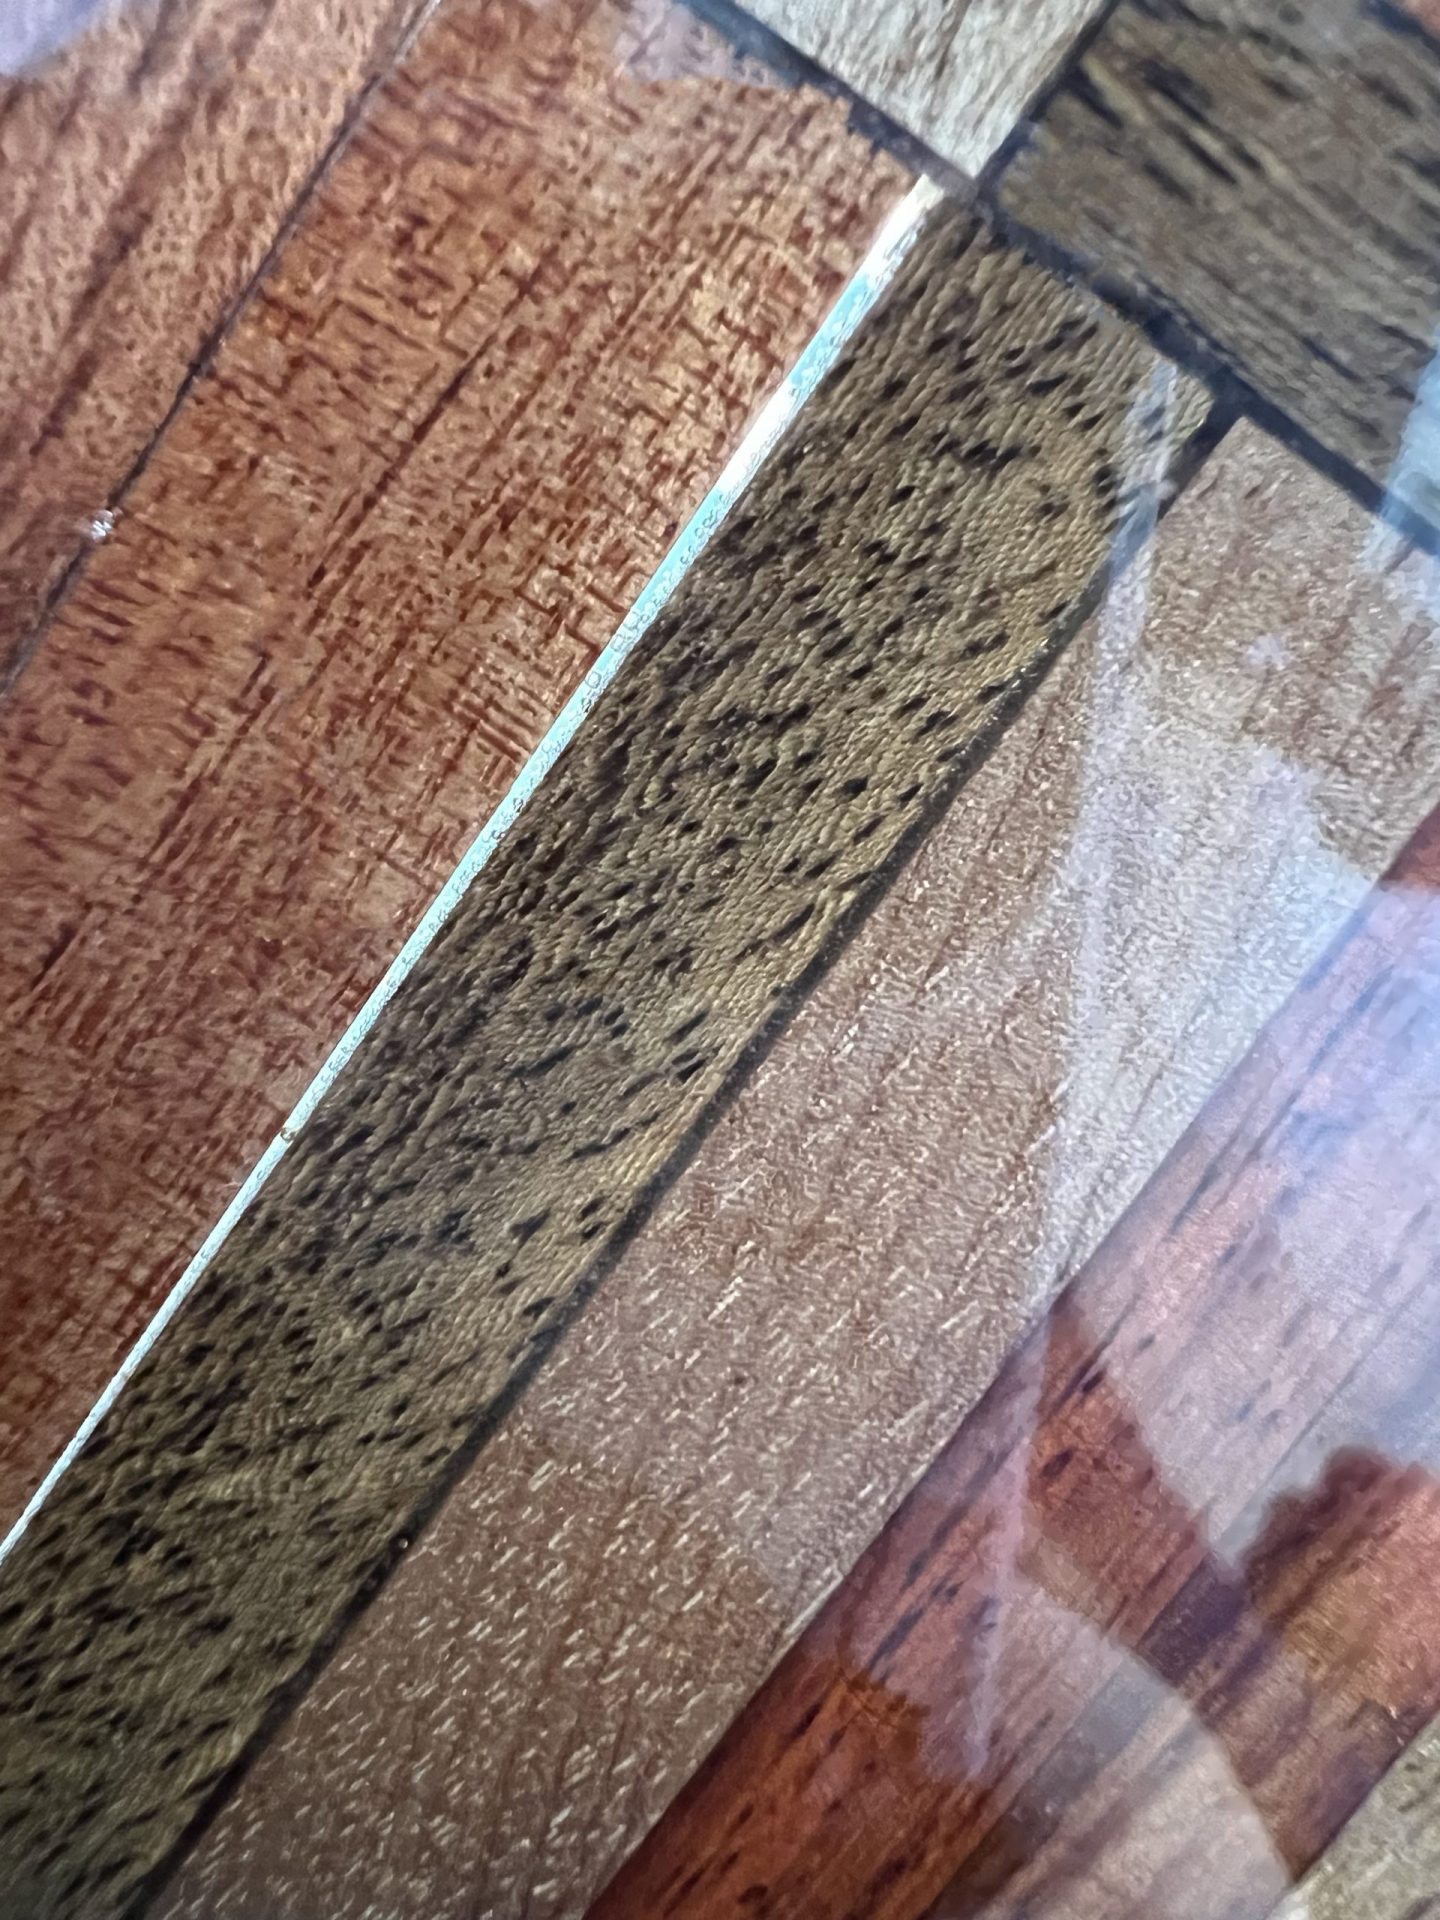
I’m delighted with my decorative board. If you look closely between some of the wood strips, you can see completely through the board. Some may not like that, but I think it gives the board unique character (and it’s a good reminder to have a bit more clamping pressure next time). I love that I was able to find a way to give these discarded blocks a new, artful purpose.
Want to learn about wood epoxy adhesion? Take a look at this article.


