

By Tom Pawlak — GBI Technical Advisor
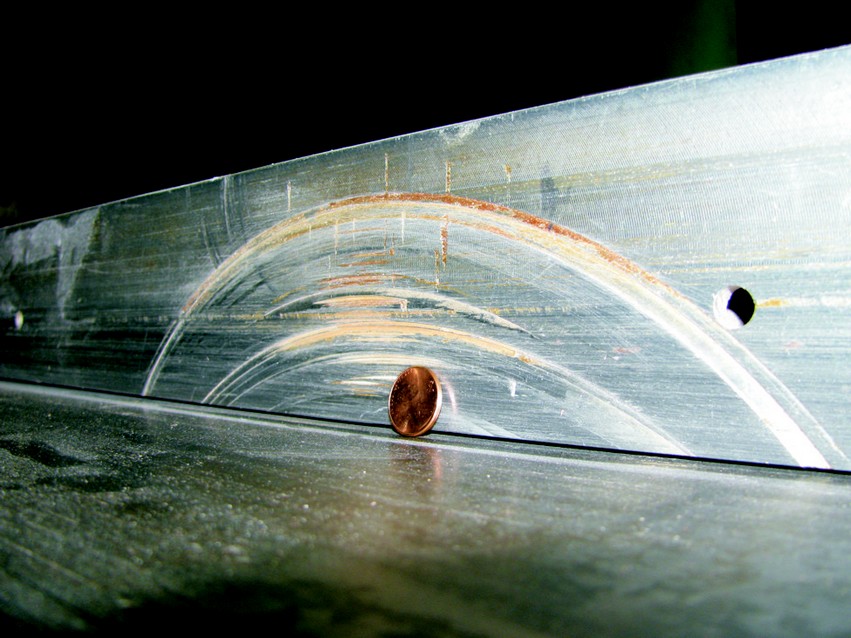
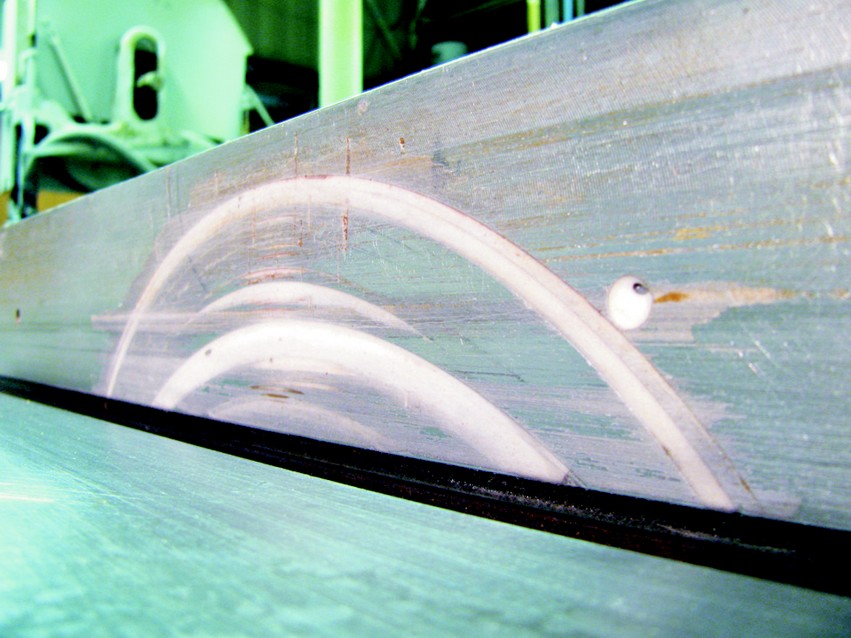
25 years of use (some might say abuse) had taken its toll on the heavy aluminum rip fence on our Delta Rockwell 12″–14″ Tilting Arbor Saw. Deep saw kerf grooves on the face of the fence had become a hazard because wood occasionally got hung up on it when ripping stock. Over a few months, each time I used the saw I thought about how it could be repaired. While the plan was still developing in my head, more than once I clamped a flat piece of plywood to the rip fence face to temporarily create the smooth surface that I needed.
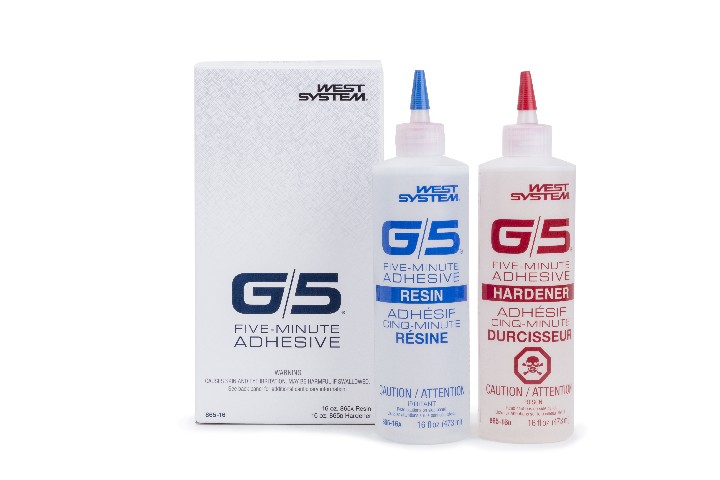
In the end, I decided to permanently repair the damage with thickened epoxy. To make the repair smooth and simple I used a smooth board covered with plastic as a mold release to reform a flat surface. Just about any of our epoxy products would have worked for filling the grooves, but I chose G/5® Five-Minute Adhesive® thickened with 403 Microfibers so the saw would not be out of service for long.
The photos pretty much tell the story. In the end, we have a rip fence just as smooth as new. The good news is if similar damage occurs in the future it can easily be repaired by repeating the process.
Rip Fence Repair Steps
- Clean the aluminum surface
Scour the surface of the aluminum with an abrasive pad.
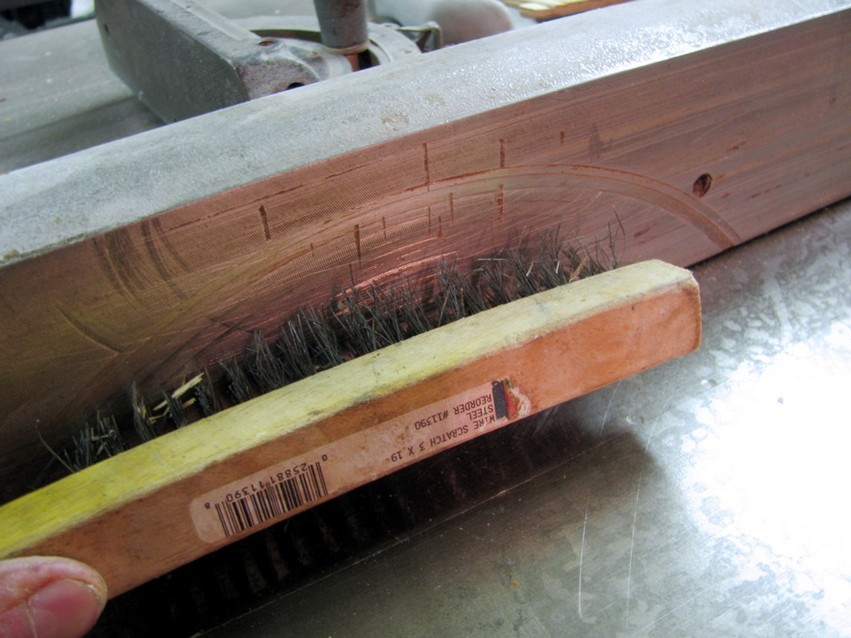
- Abrade the surface
Use a wire brush to abrade the surface, taking care to remove dirt in the grooves.

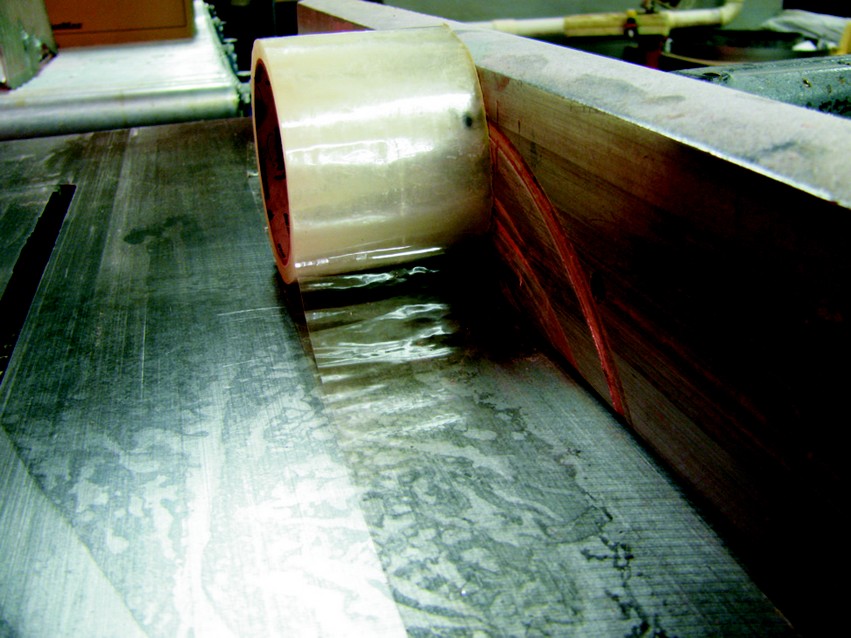
- Protect the deck
Use a plastic drop cloth to protect the deck of the saw. Alternatively, you can protect it by covering it with wide, shiny packaging tape.
- Find a flat, smooth object
Locate something flat and smooth to use as the form for molding the epoxy into a smooth surface.
- Cover the form
Cover the form with shiny plastic packaging tape (this will be the mold release surface).
- Mix a batch of G/5 Five-Minute Adhesive
Mix an appropriately sized batch of G/5 and thicken it with 403 Microfibers to a mayonnaise consistency. (Additionally, 420 Aluminum Powder could be added if you are trying to make your repair less noticeable.)

- Apply the G/5 Adhesive
Quickly apply the mixture to the damaged section on the rip fence.
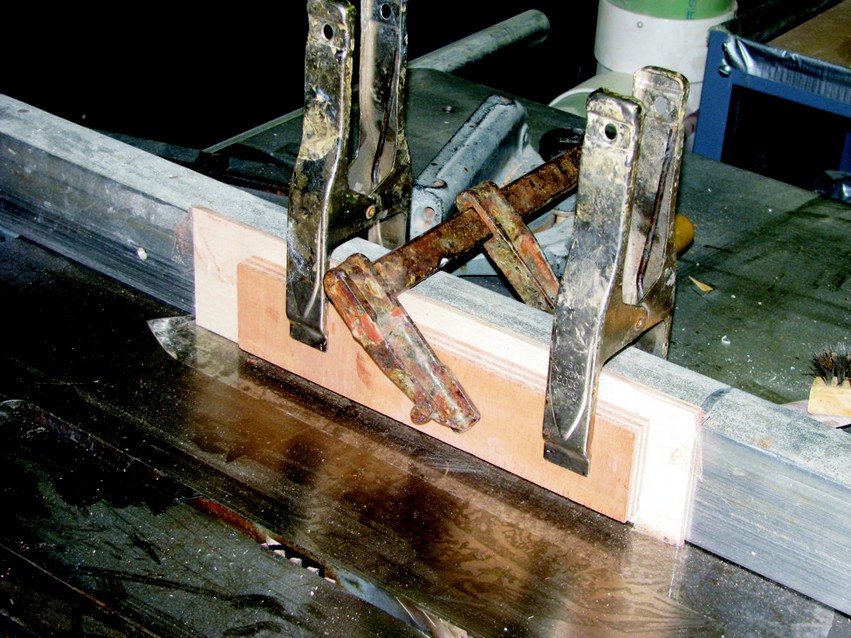
- Position the flatform
Immediately position the flatform on the face of the rip fence and clamp it in place.
- Remove excess epoxy
Clean up any excess epoxy that squeezes out before it hardens.
- Wait 15 minutes
Allow 15 minutes for the G/5 Adhesive to fully cure.
- Remove the mold
Remove the smooth & flat mold form by working wood wedges under the edges.
- Sand away any irregularities
Clean up any slight irregularities on the surface of the fence with a flat scraper or with 120-grit sandpaper wrapped around a hard & flat sanding block. The surface of your rip fence should now be a smooth as new.


