

By Terry Monville – GBI Technical Advisor
Typically, when a fastener fails on a boat, it pulls out of the wood or fiberglass that it was screwed into. There are many causes for this failure: shock loading, fatigued from being pulled on one too many times, or moisture softening the wood. Let’s take a look at how using WEST SYSTEM® Epoxy can improve the holding power of a fastener in wood to give you fewer troubles on the water.
Saturating the Wood
Saturating the wood with epoxy is the simplest way to improve your fastener’s holding power. You start by drilling a standard pilot hole, just as you would have to do even if you were not using epoxy. Using an 807 Syringe, fill the hole to the top with your chosen 105 Epoxy Resin® and 200 series hardener combination. Allow the epoxy to saturate the wood. For 206 Slow Hardener® at room temperature, I typically wait about 20 minutes. Then coat your fastener threads with epoxy and screw your fastener in by hand.
In warmer weather, the epoxy will cure faster, so do not wait too long. In cooler weather (40°F-60°F), use 205 Fast Hardener® so it will cure in the cooler environment.
Saturating the wood is a very simple method to get some added moisture resistance and additional holding power without any additional drilling. This makes it a great technique for quickly replacing existing hardware. When the hole is drilled into a horizontal surface, this method works very well, but if you are coating a hole in a vertical surface, it can be tricky. Use a piece of packing tape or duct tape over the opening to prevent the epoxy from running out of the hole.
Oversizing the Hole
You can further improve the load-carrying capability of the fastener by increasing the amount of epoxy that surrounds the fastener. This takes advantage of the fact that WEST SYSTEM Epoxy has much higher density and strength than the wood fiber itself.
Start by drilling an oversized hole for the fastener. For fasteners larger than 3/8″, this should be about ¼” larger than the shaft dimensions. For smaller fasteners, the hole should be about twice the diameter of the shaft. Your hole should be drilled between 2/3 and ¾ of the depth you plan to embed the fastener. At the bottom of the hole, drill a normal size pilot hole to the full length of the fastener. This allows the threads to bite into the wood so the fastener stays in place while the epoxy cures.
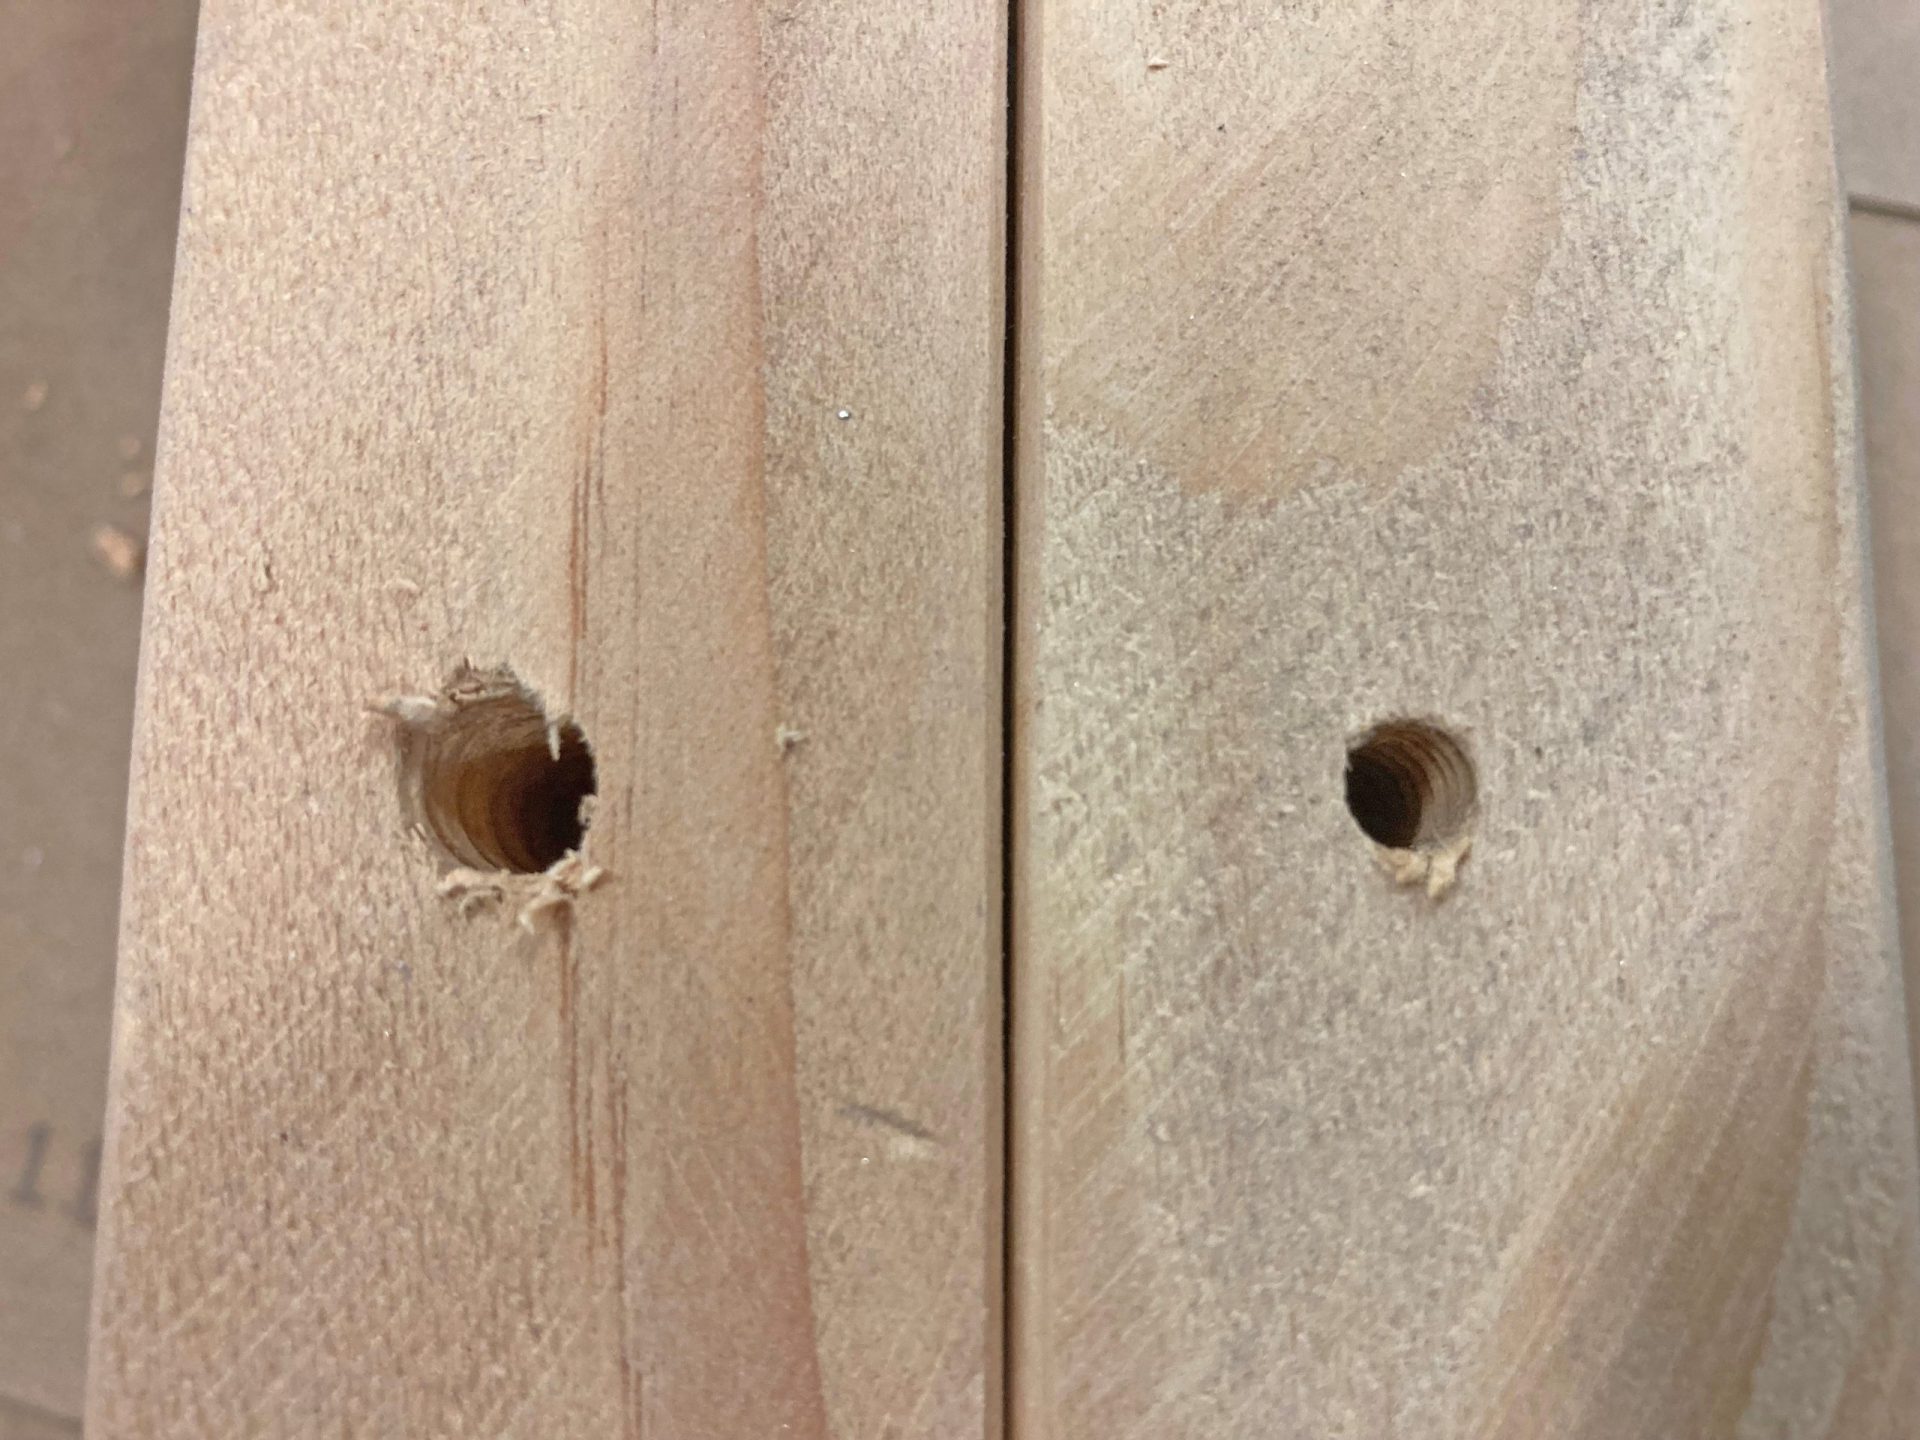
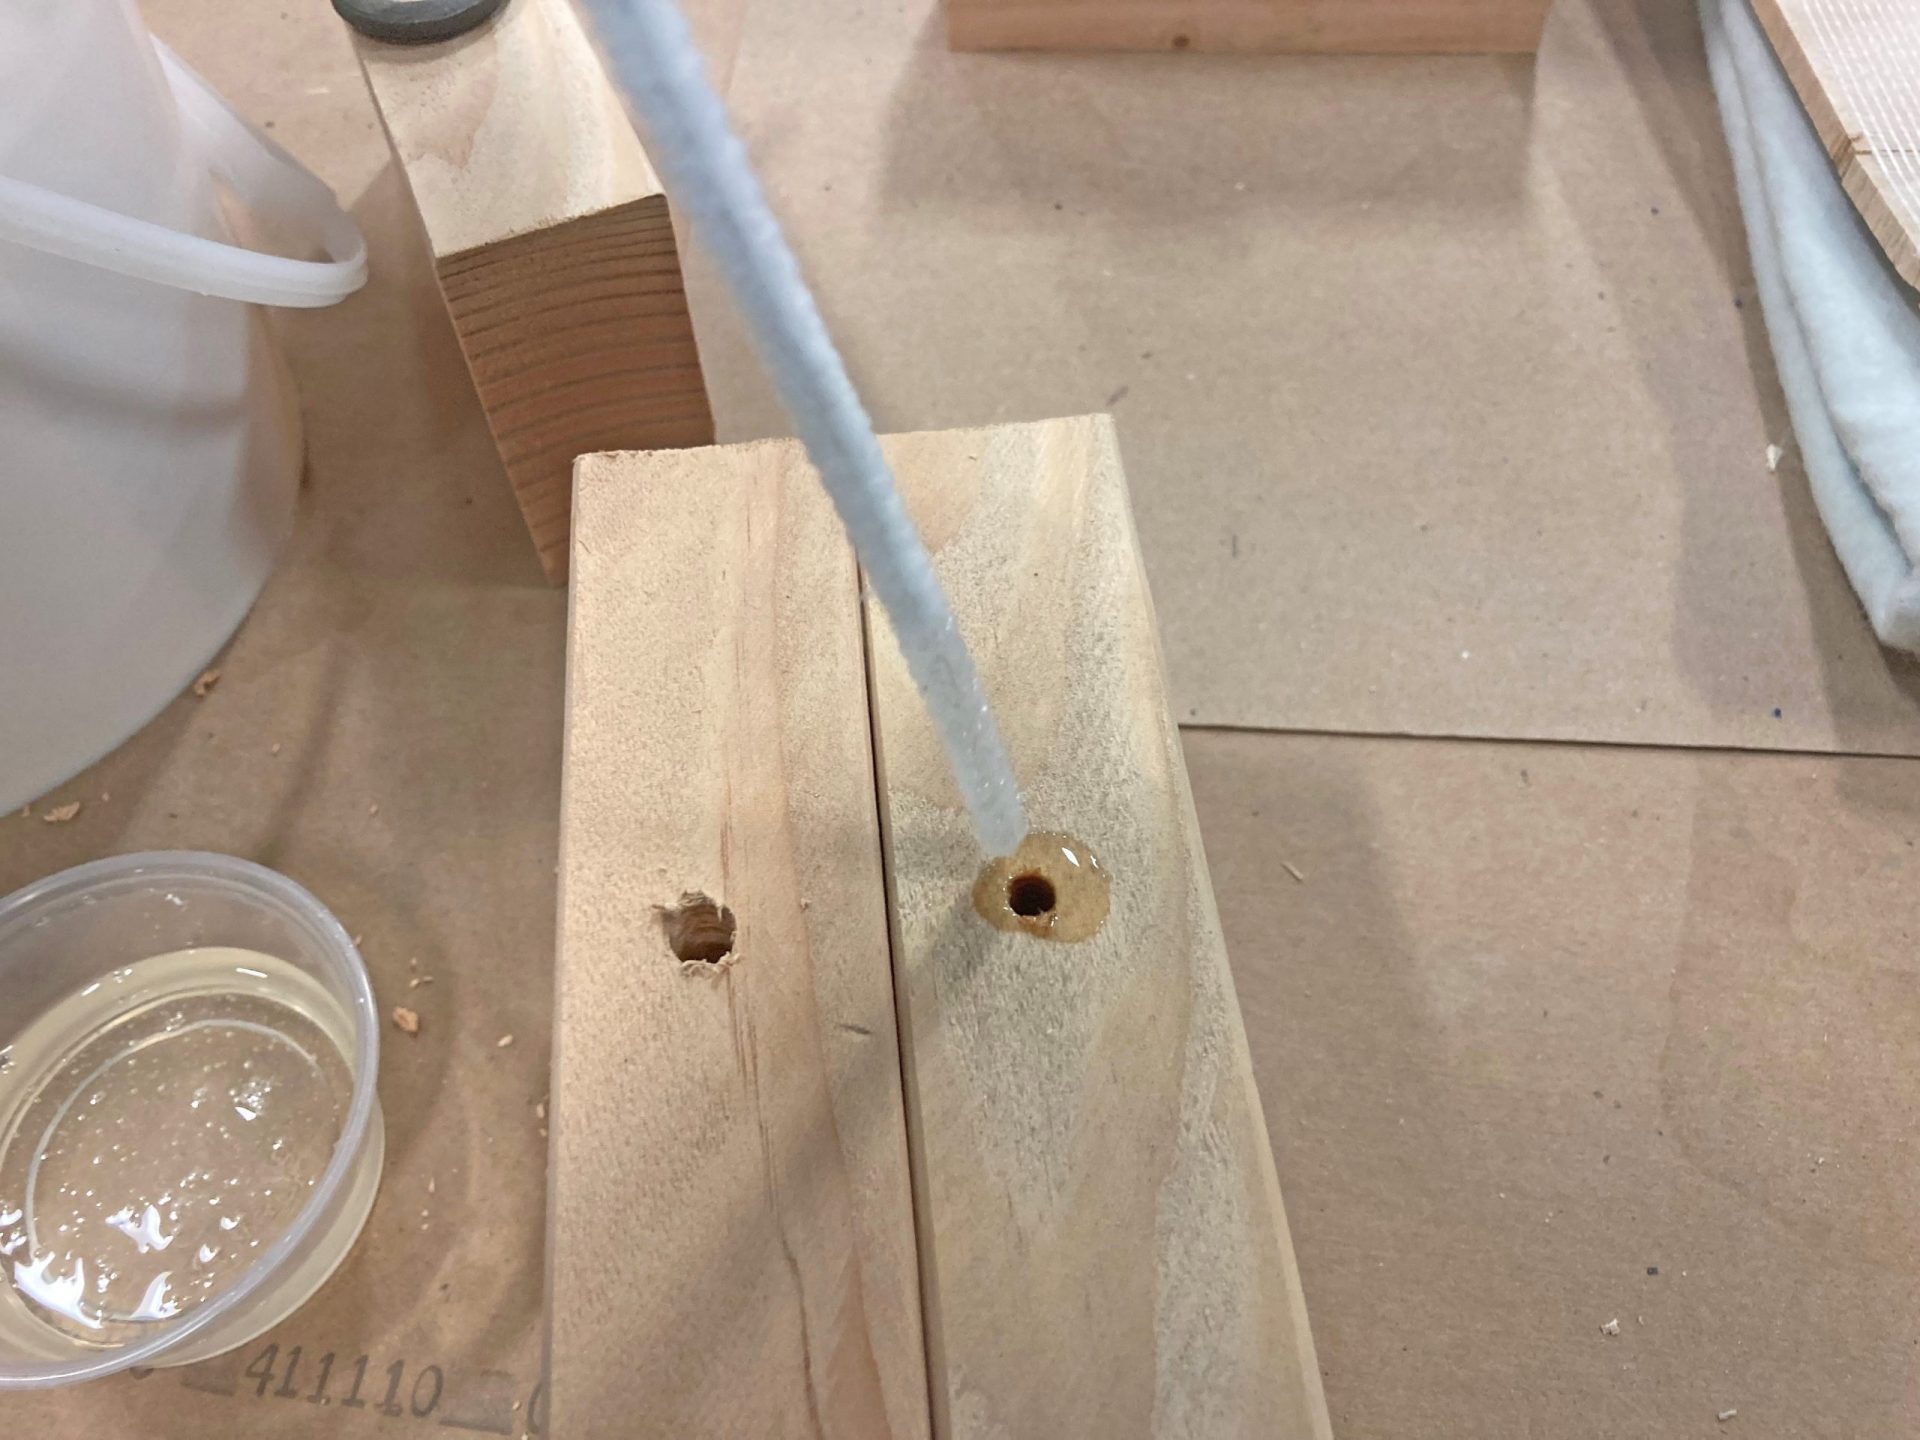
Fill the hole with a mix of 105 Epoxy Resin/200 series hardener. Allow the epoxy to soak into the wood/core. After 5 to 20 minutes, remove any liquid epoxy that has not soaked in with an 807 Syringe.

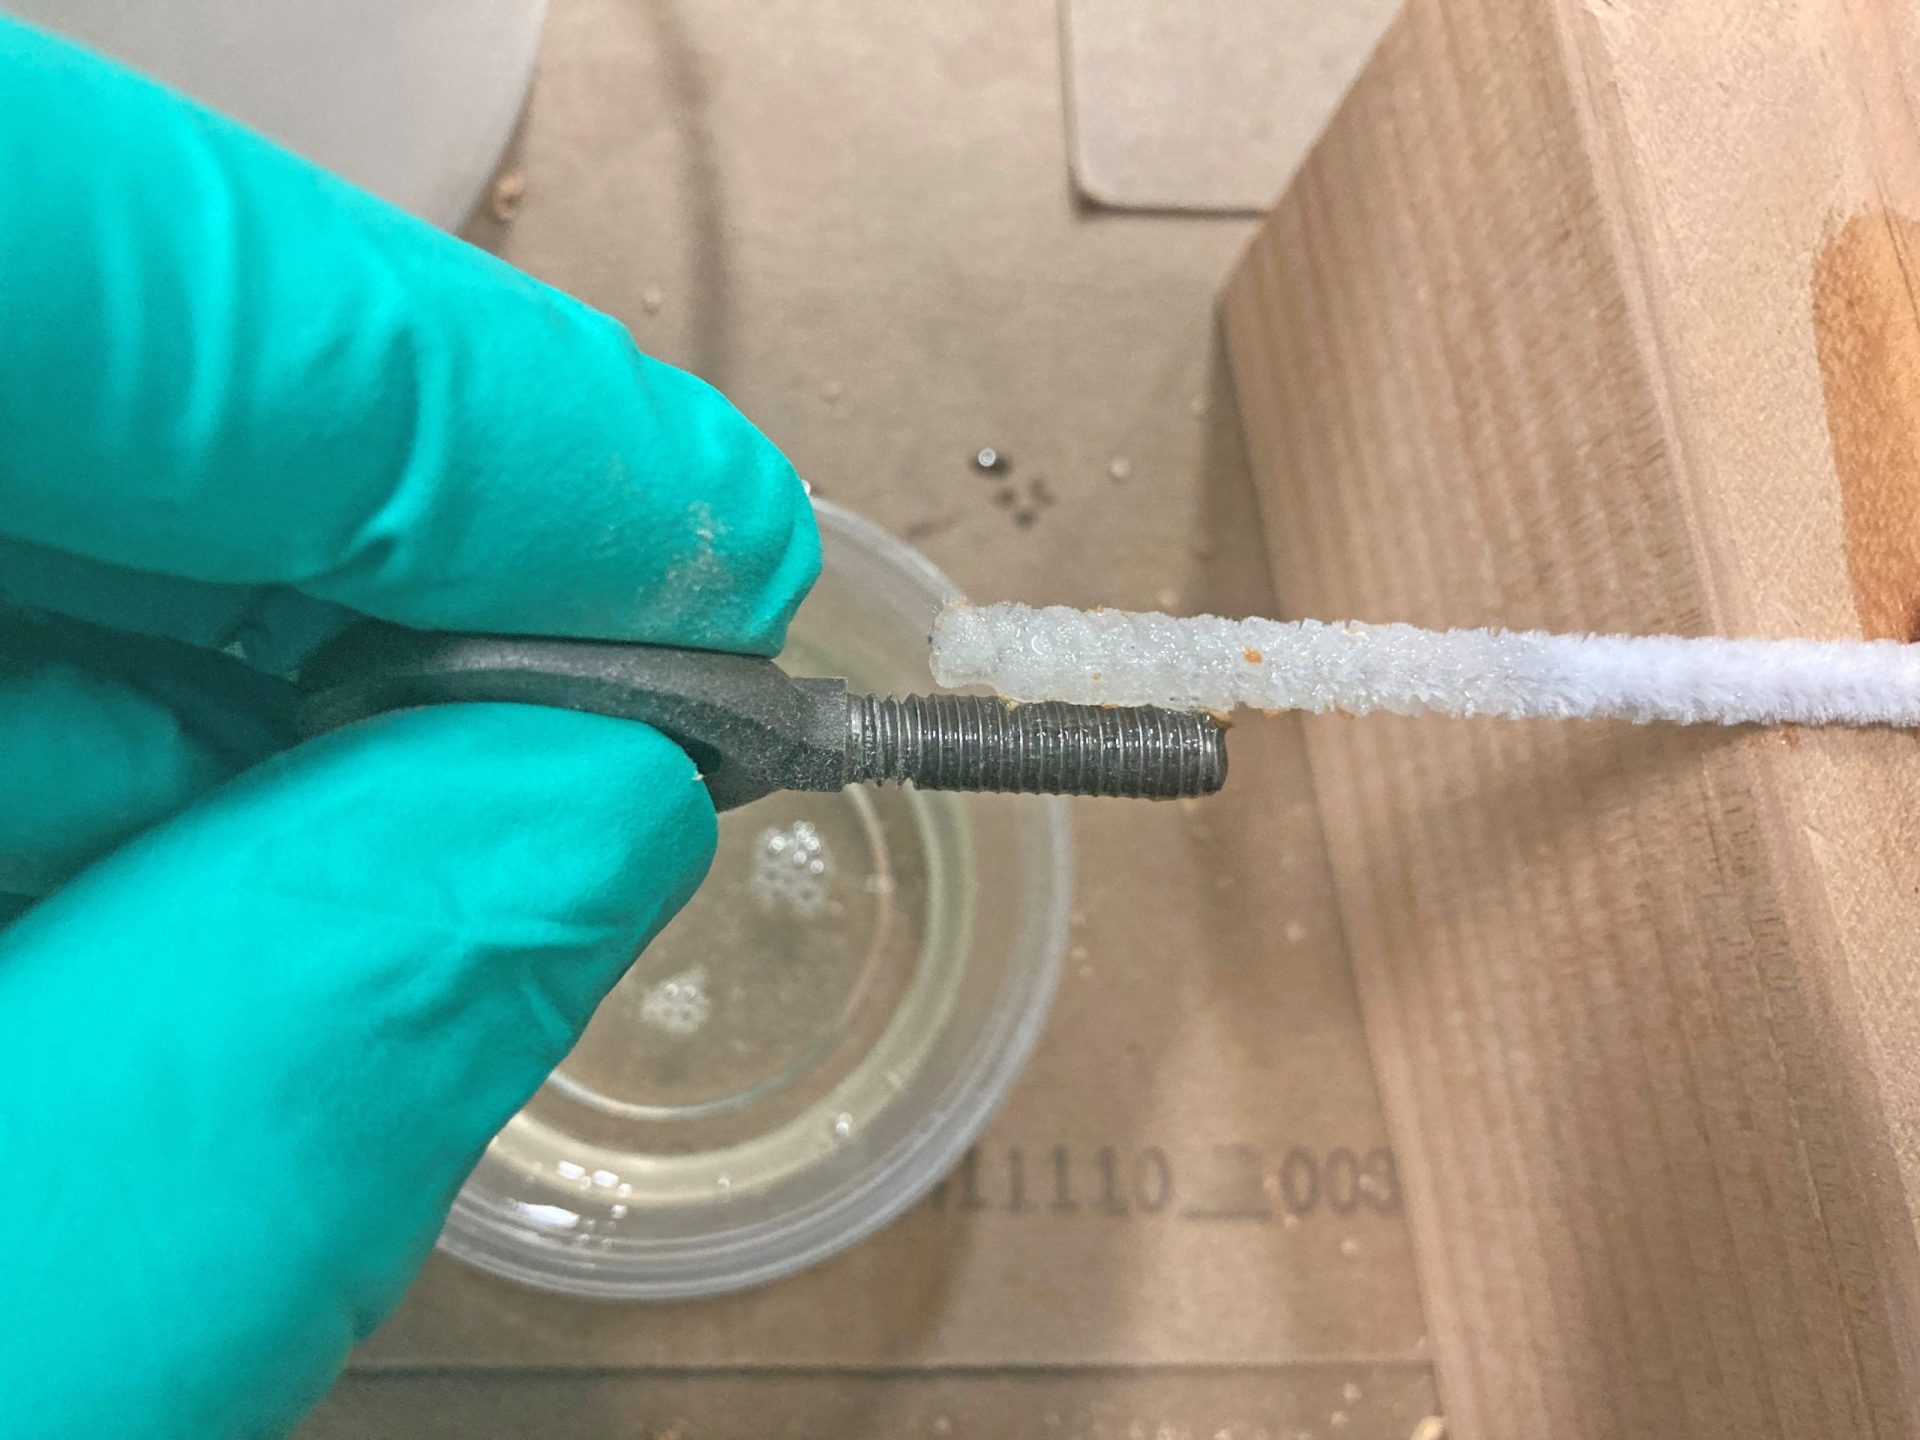
Fill the hole with a mix of 105 Epoxy Resin/200 series hardener thickened with 404 High-Density Filler to a non-sagging consistency. You can reuse your syringe to dispense the mixture. The mix should be thin enough to go through the syringe, but you may need to cut the tip slightly larger. Using the syringe allows you to fill the hole from the bottom to the top to prevent air voids. Coat the fastener with the 105/200/404 mixture before installing it.
This technique spreads the fastener’s load out to the larger diameter of the epoxy annulus. The larger hole creates more bonding surface area.
Again, vertical or inverted surfaces can be tricky, so the process is a little different. You’ll want to thicken your epoxy with 404 until you reach a non-sag consistency so it will hang in the hole well. (You could also use Six10®, which has a great gel consistency and can be dispensed from the cartridge fully mixed). Use tape to hold the epoxy in the hole until it has cured.
Removable Hardware
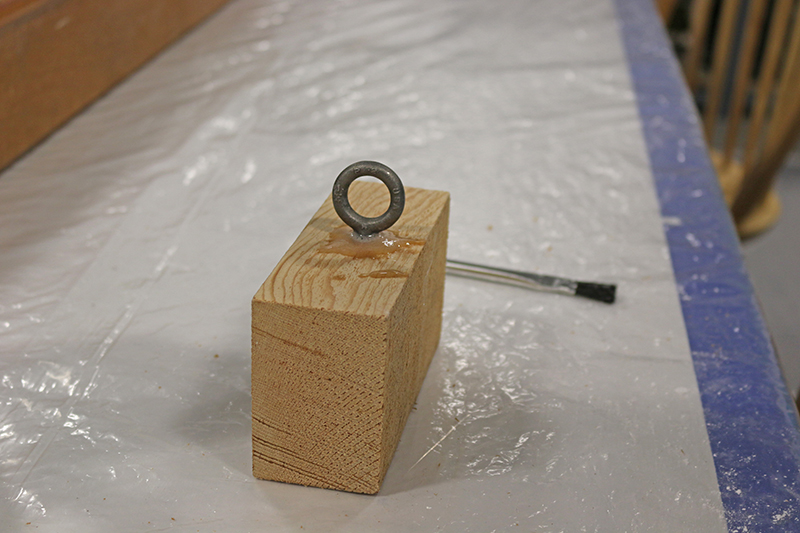
For some applications, your fastener or bracket needs to be removable. A motor mount would be a great example. There are two ways to achieve this. One is embedding a stud in epoxy and using a nut to tighten down your bracket onto the stud. The other is bonding a nut into the epoxy with cast threads (basically creating a threaded insert out of epoxy).
Embedding a stud uses the same basic steps that we used for bonding in a fastener in an oversized hole. The primary difference is that you have to make sure the oversized hole is large enough to accommodate a nut on the threaded rod. We recommend threading a nut onto your stud in a position where it will remain slightly proud of the final epoxy surface. By leaving the nut slightly proud, it will be easier to clamp down your hardware or motor mount. Once you’ve determined the correct position of your nut, fill the hole with epoxy, insert your stud, and allow it to cure.
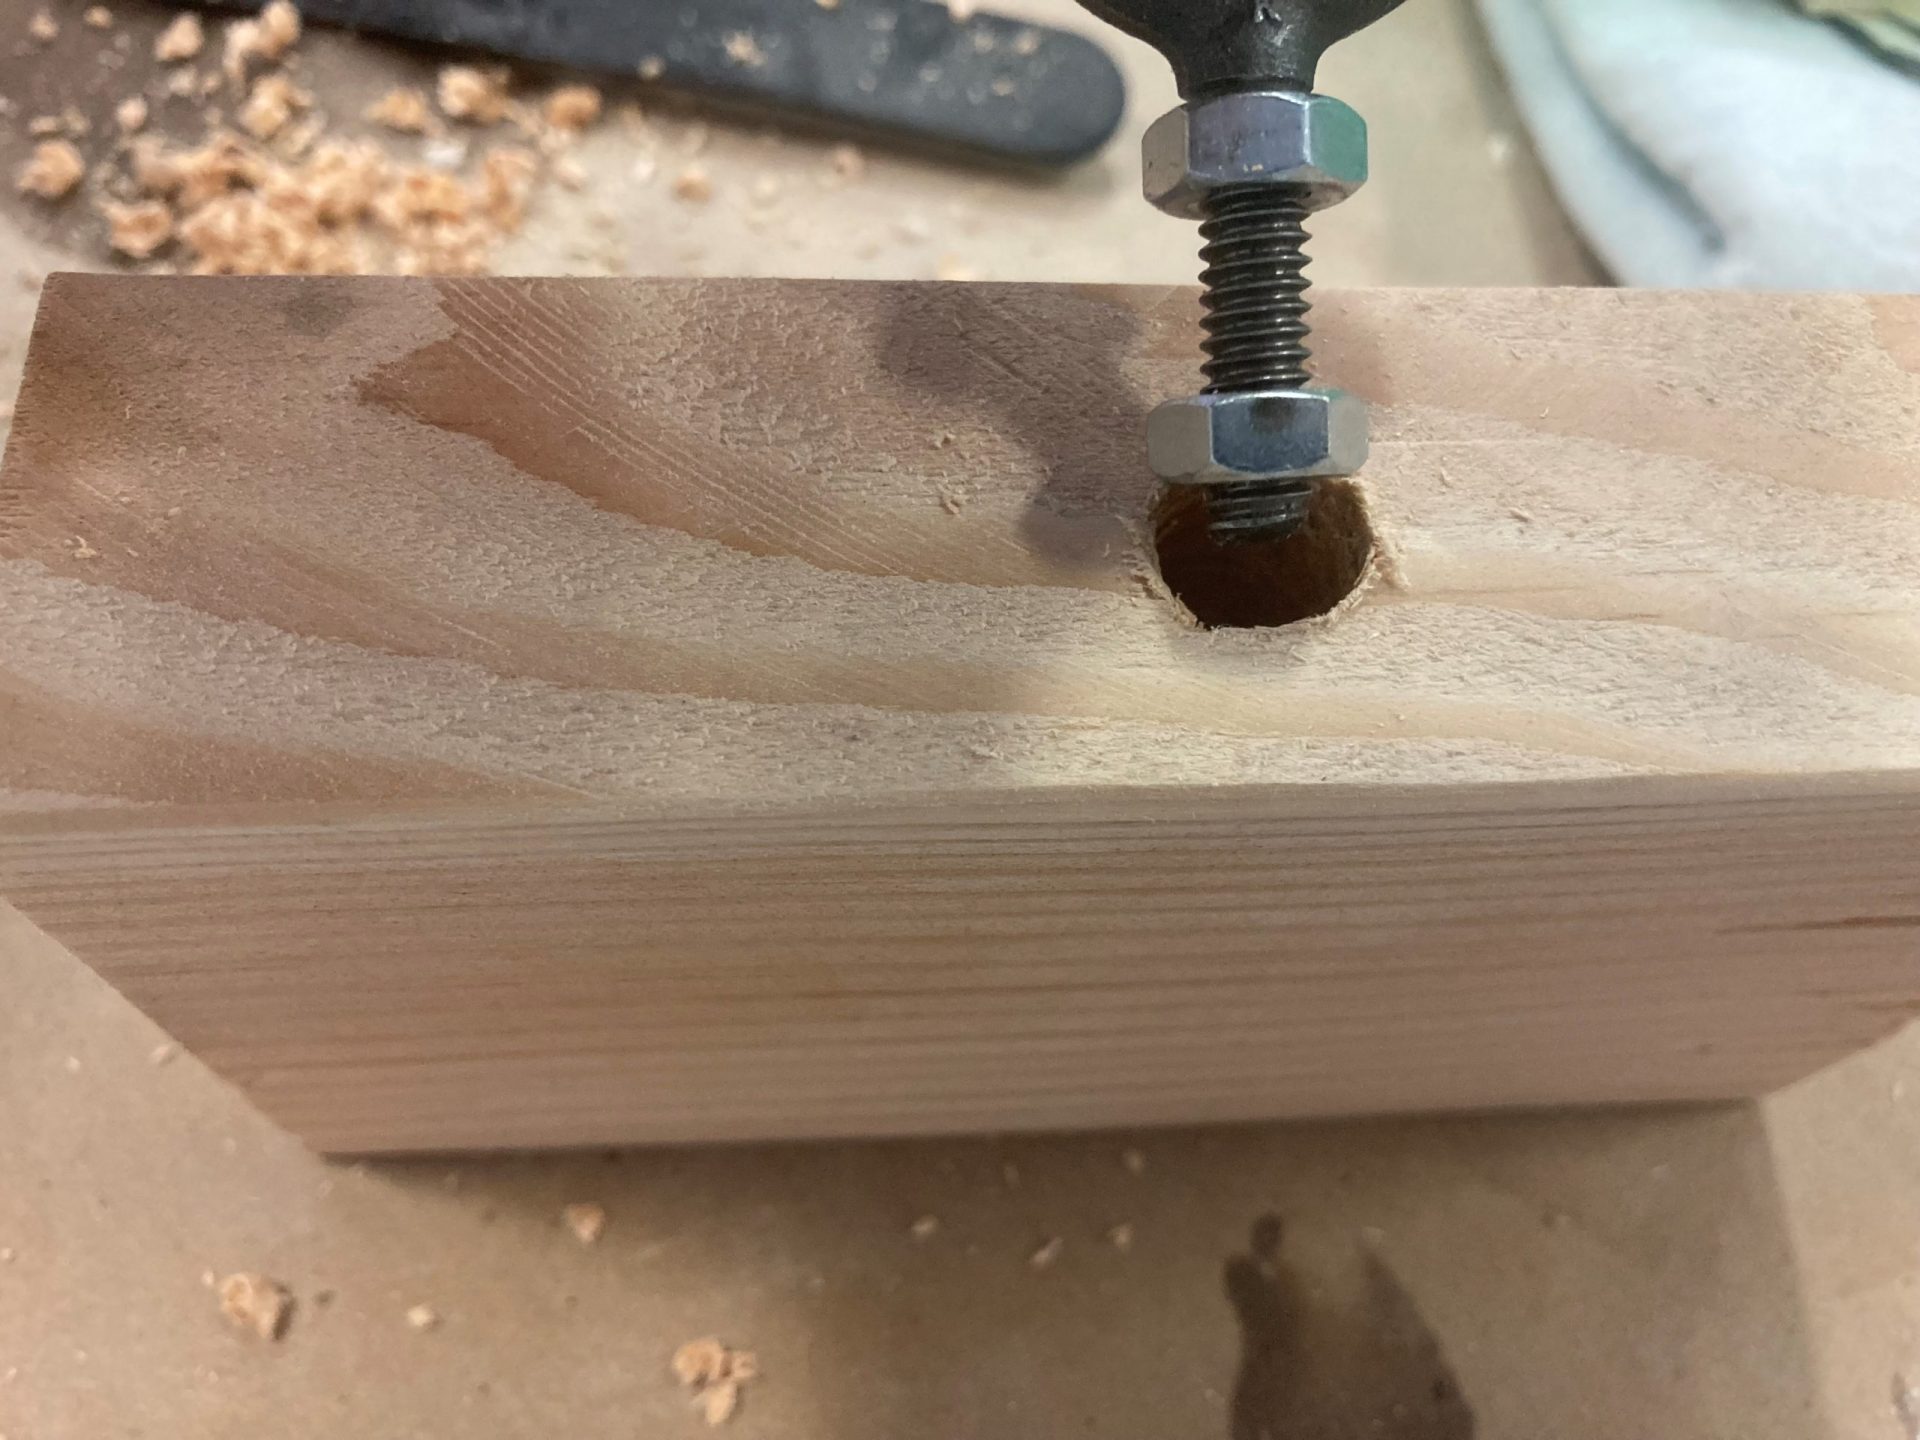
In some applications, a stud may not work or may be undesirable. This is when we recommend our second technique. Using a nut and bolt, we set up the hole and nut as we did for the stud, leaving the nut slightly proud. Before casting the nut and bolt in the epoxy, use a release agent on the threads that will be encased in epoxy. I like to use cooking spray because it’s cheap and we always have some in the house, but wax or silicon spray can also be used. After the epoxy has cured, you can back the bolt out and mount your hardware. The nut bonded into the surface of the epoxy works as a clamping point as well as preventing thread wear. You will lose 5 to 10% holding power compared to having a fixed stud.
Putting it to the Test
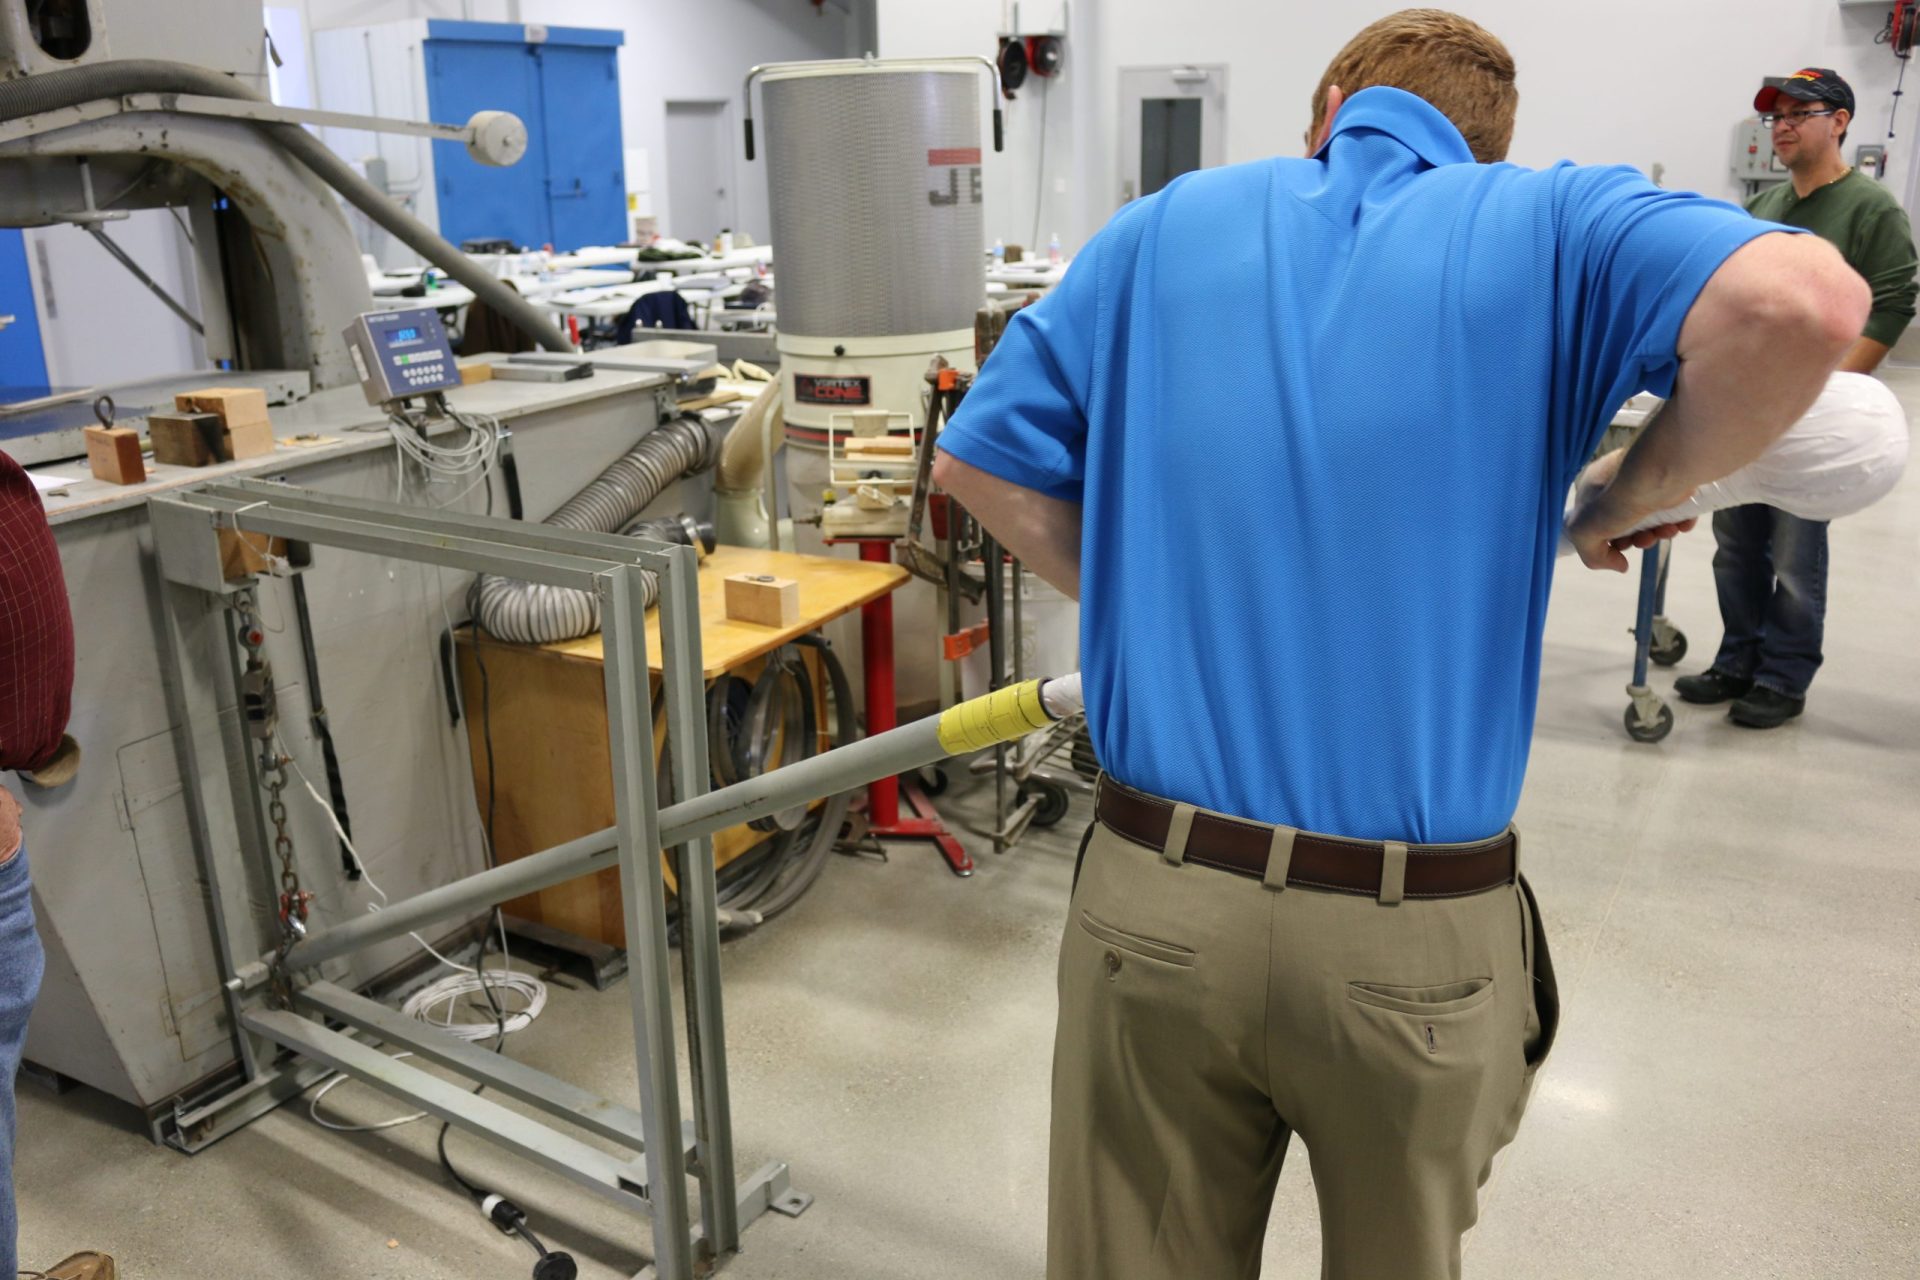
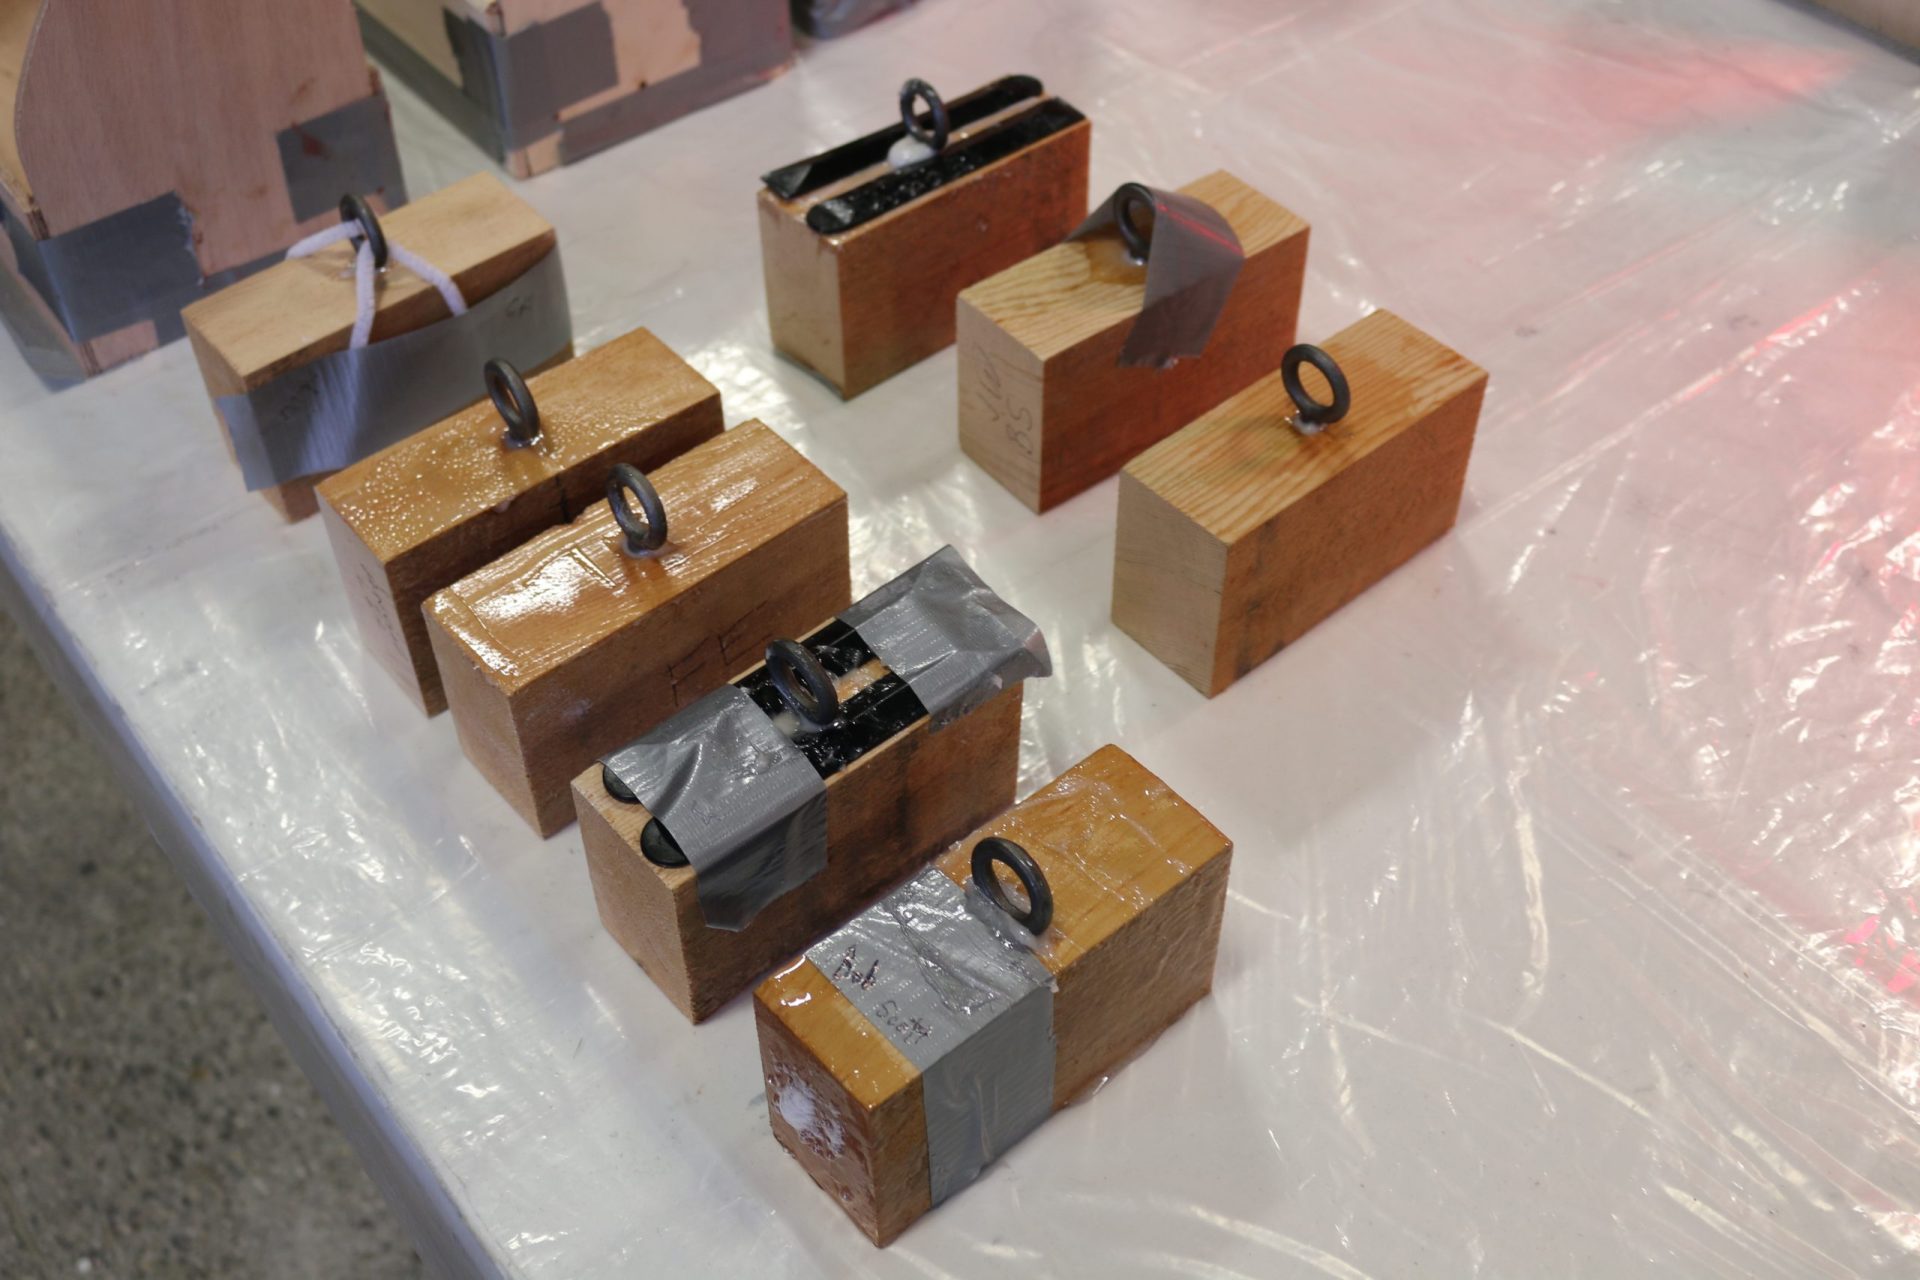
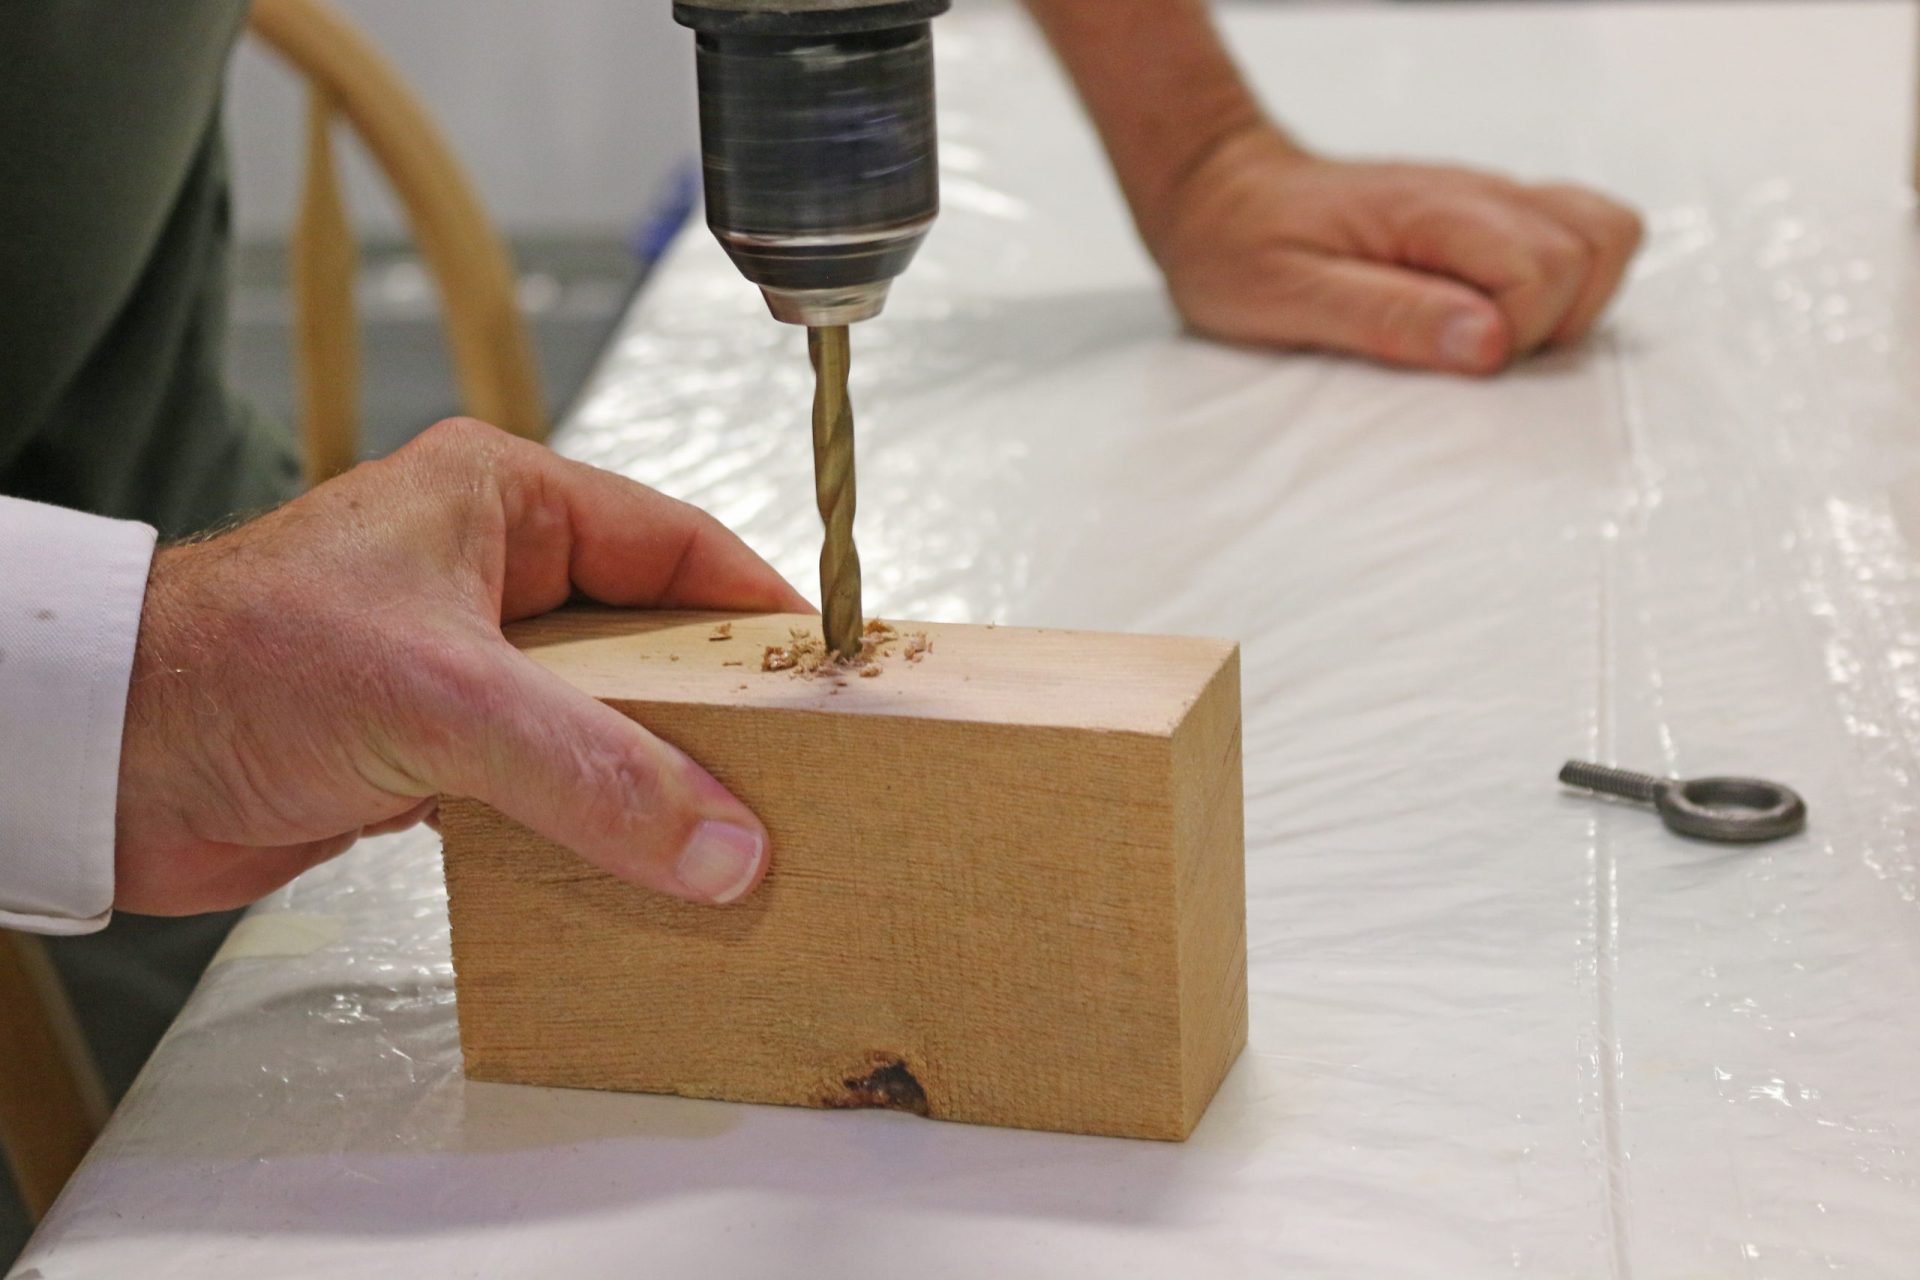
To demonstrate the effectiveness of these techniques, I set up an experiment using Douglas fir wood blocks. The species and grain of the wood plays a large part in the holding power of the fastener. For this reason, I used blocks cut from the same Douglas fir 2×4. All the eyebolts were solvent washed, and I scuffed the threads using a 3M® Maroon Scotchbrite™ pad. For my baseline block, I pre-drilled one block to 7/32″, just over an inch deep, to accommodate the threads on the ¼”x1″ eyebolt. The remaining blocks were each prepared using one of the previously mentioned methods.
After allowing the samples to cure for 7 days, it was time to pull the eyebolts. We have a simple device with a steel frame where we can mount the block. Using the lever arm with a load cell, we can measure the pounds of force applied to the eyebolt before it fails. In this demonstration, the load was pulling the eyebolt straight out of the block. Keep in mind, a sheer load, like that on a deck cleat, pulls across the grain line, so the holding strengths in those situations would be even higher.
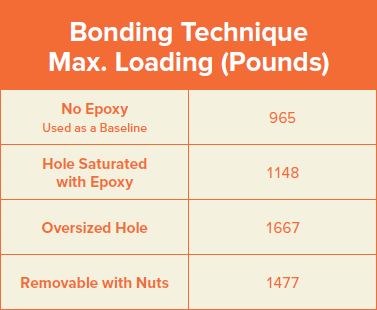
As you can see in the results from this demonstration, saturating the wood with WEST SYSTEM Epoxy increased the eyebolt’s holding power by 18% over the one installed without epoxy.
When I used an oversized hole, with WEST SYSTEM Epoxy thickened with 404 High-Density Filler, we increased the holding power by more than 70% compared to a standard installation. That’s 45% more than soaking with epoxy alone. By oversizing the hole, we exposed more wood fiber, increasing the bond area for the epoxy.
When making the fastener removable, you do give up 5 to 10% of the holding power compared to bonding the fastener using the oversized hole method. Depending on your use, making the hardware removable may be well worth the sacrifice.
We have focused on how fastener-bonding increases the holding power, but it also helps keep moisture out of the substrate regardless of whether it’s solid wood, a composite core, or a solid fiberglass laminate. Bonding fasteners with WEST SYSTEM Epoxy helps prevent moisture from wicking down the fastener, creating unseen corrosion of the fastener. This is particularly important in salt-water areas.
Epoxy is a great way you maximize your fastener’s holding power while minimizing or preventing water intrusion. When bonding fasteners, as with anything, overkill is not always the right answer.
It is much better to assess the situation and determine which technique will work best for your application. Using the information we’ve covered, you are now armed with the tools you need to make an educated decision on which technique to choose and how to execute it successfully.
You can find more on fastener and hardware bonding in Chapter 7 of our Fiberglass Boat Repair and Maintenance manual or Chapter 6 in our Wooden Boat Restoration and Repair manual. Click the links to download the manuals.


