- Arts & Crafts
- Bonding
- Home Repair, Restoration & Improvement
- Epoxy Products
- Weird & Wonderful
- Techniques & Tips
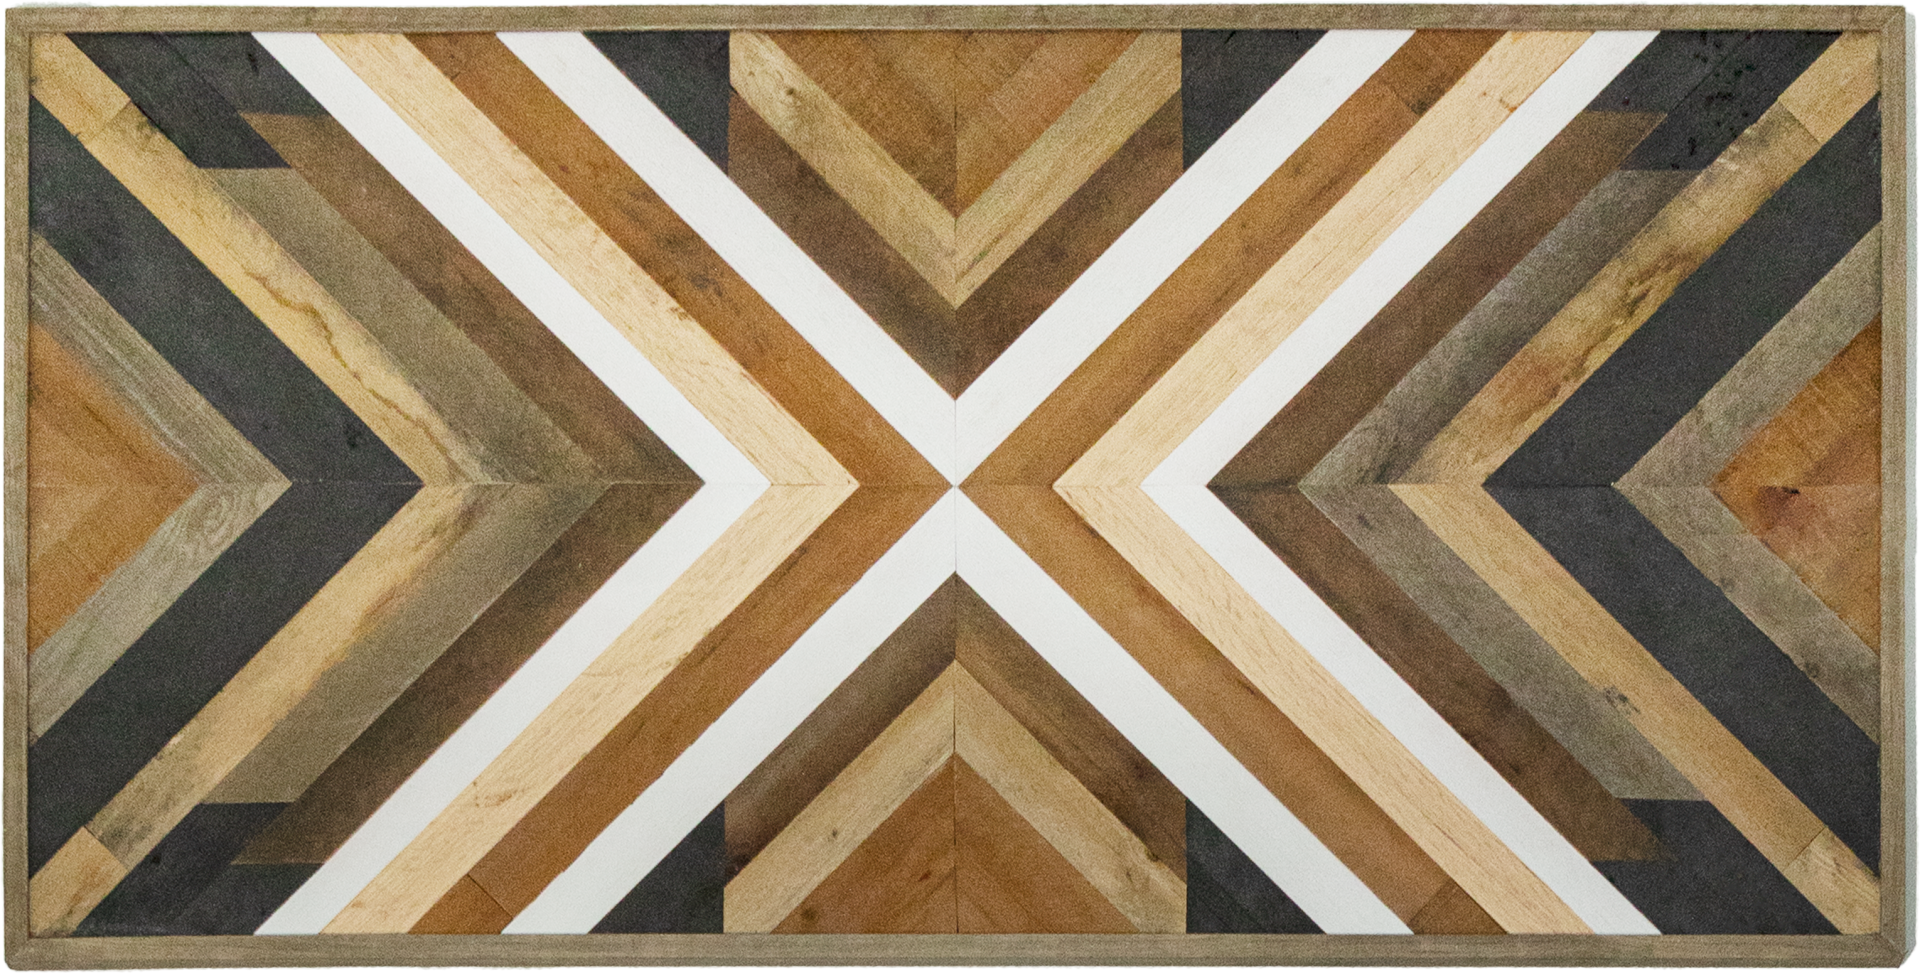
Rustic Wood Wall Art:
A Pinterest® Success Story

GET STARTED
FREE PRINT & DIGITAL EDITIONS
A Pinterest® Success Story
If you’ve ever used Pinterest, then you know that it is filled with projects that give a false sense of confidence in your own artistic abilities. Hence, the wildly entertaining “Pinterest fails”. Mindlessly scrolling one day, when I probably should have been doing something productive, I stumbled across a rustic wood wall art piece. A little epoxy, some scrap wood, and I can build that. No problem.

The first step was to source some wood. It just so happens that at Gougeon Brothers, there are lots of pallets coming and going daily that have just about the right size wood needed for the project. Feeling clever, I asked one of our operators to alert me next time he stumbled across a broken pallet that I could “help him dispose of.” To my surprise, he took me to a stack and asked if I could take all of them. Well, that turned out way easier than I thought.
The next step was to break down the pallet. Maybe it was my confused face trying to figure out the best approach, but our technical advisor, Don took pity on me and volunteered to break down the pallet. Little did he know, he had just volunteered for the bulk of the labor on this project. Thanks, Don!
Using the shop bandsaw, Don cut the pallet’s top boards away from the frame. This created a stack of boards 3″ x ½” that were generally about 2′ long. Then he ripped each board in half lengthwise on the tablesaw, resulting in 1 ½”-wide boards. Now it was time to address the thickness. He ran them through again, ripping them down to a thickness of 1/8″. This process yielded four finished boards; two which had a natural patina on one side and two which showed freshly cut wood on both sides.

With a mountain of lumber at my fingertips… okay, well maybe more like a knoll, it was time to let the creativity flow. Taking a cue from my Pinterest inspiration, I started by establishing a couple of accent strips. For these I used the strips with two freshly cut faces that I would later paint white. After sorting the strips into piles according to the patina color, I started laying out a design based on the variation in colors I was looking for. I laid out and marked the board lengths so that all the ends were staggered. Once I was satisfied, I began laying out the filler pieces around this design. These pieces would be painted black and act as the background. Again, these were the freshly cut boards.
My design complete, I now needed something to epoxy it to. I got a ½” sheet of plywood and rolled on two coats of WEST SYSTEM® 105 Epoxy Resin®/206 Slow Hardener® tinted with 502 Black Pigment. The pigment was to better hide the inevitable gaps that would occur due to my lack of fine craftsmanship and the rough boards of this rustic project. I coated the backer board in epoxy to provide a more secure bond than painting the surface.
If I had painted the board, I would be relying on the strength of the paint’s adhesion to the wood to hold my piece together. Paint adheres strongly enough to hold itself to the wood but not enough to hold the weight of the wood plus any stresses that might be applied to that wood. An epoxy-to-wood bond is much stronger. Though this piece would eventually just hang on a wall, I was concerned with how resilient it would be as I wrestled it into the trunk of my car and it bounced over the 500 potholes on the way to my house.
With my final pigmented coat of epoxy cured, I used an abrasive pad to scuff the surface, then struck my grid lines for the design. A silver marker showed up nicely on my black backer board. It was important that these lines were precise, ensuring everything fits as perfectly as possible.


Time to paint. For the white accent strips, I sprayed one coat of spray paint. I liked that the paint didn’t quite fill all the grain of the wood, providing a rustic nod to help tie the piece together. However, I wanted the black strips to recede into the background, so I sprayed the heck out of them.
Work got busy, so I had to let my project sit idle in the shop for a week. Low and behold, when I returned, an elf had helpfully trimmed all of my pieces to fit together perfectly, exactly how I had left them laid out. The pieces covered the entire backer board with just a little extra material hanging over the sides to be trimmed flush later. I suspect it was Don, but he has yet to fess up to it, so magical shop elves get the credit!
Finally, it was epoxy time, one of my favorite parts. I wanted to epoxy all of the pieces down in one day. The Technical Department needed my table for developmental work, and I was beginning to overstay my welcome. My plan was to epoxy down the first four white strips and let them cure, providing a secure edge to tightly fit the subsequent pieces against.

How did I manage this feat? It was G/5 Five-Minute Epoxy Adhesive® to the rescue. One at a time, I applied a light coating of G/5 on the back of each of the four accent strips to use as anchors for the rest of the design. As I went, I cleaned up any squeezed out epoxy so the neighboring pieces would lie flat and flush when butted up to the anchor pieces. By the time I had placed the last strip, the first had cured, and I was ready to assemble all of the filler pieces.
I wanted to use G/flex® for bonding the remaining pieces. Not knowing what types of wood the pallet had been made from made G/flex the best bet in case any of the wood types were oily. Plus, the trunk of my car and the 500 potholes would surely introduce some stresses that the G/flex could easily absorb. As I mixed my batch of G/flex, Don came by looking curious, so I put him to work. Using the smallest notch size (1/8″) of an 809 Notched Spreader, we applied the epoxy to a section between the anchor pieces. We used the Notched Spreader to apply a consistent coating thickness across the entire section to help ensure a more consistent board height across the entire piece.
Carefully, we set the pieces in place, working from the anchor pieces outward. We started with a small section to limit damage if we ran into issues.
Knowing our unofficial rules of the project, we were ready to tackle the other sections. All went swimmingly.
The next day, when the epoxy had cured, we trimmed the edges flush (you didn’t think I was going to lift that big, heavy board and cut it by myself did you?) To finish the edges, I found some L-shaped, rounded vinyl edging strips to match the rustic aesthetic. I used these to frame the wall art.

The finished piece ended up being pretty heavy. To allow for the piece to be mounted to the studs when I hung it up at home, I determined the hanging mechanism should be a cleat. I found one on Amazon® that would do the trick. All it took was for half of the cleat to be mounted to the back of the board with a thin coat of epoxy and a couple of screws.
I checked that the screws were long enough to bite into the backer board but short enough that they couldn’t poke through the face of the art before drilling. After all that work, a screw poking through the front really would have wrecked my day. The other half of the cleat went home with me in preparation for installation.
The project was now ready for transportation over the 500 potholes to its new home. I’m in love with the outcome of this project! Instead of being relegated to the guest bedroom where no one will see it, I’ll proudly display in my living room so I can brag about how well I did, with the help of an elf… okay, okay, let’s be honest, it was Don. It was pretty much all Don. Even still, this is one project that won’t get marked as a Pinterest fail.
Watch a timelapse video of the assembly process!


