
By Don Gutzmer — GBI Technical Advisor
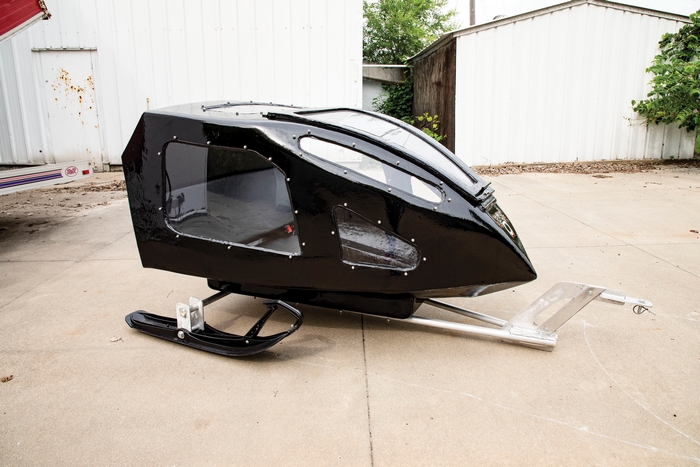
A picture of an Equinox Snowcoach 685 inspired me to build a similar snow sled for my young kids. Growing up in Michigan, I learned to appreciate the outdoors. I remember snowmobiling with my family at a young age and those memories stayed with me as I got older. I still look forward to the few times each year I go up north to trail ride. I want my kids to appreciate snowmobiling as much as I do so, I decided to build an enclosed sled to pull behind my snowmobile.
Instead of spending $1,200 – $1,600 to buy a used enclosed snow sled, I figured I could build one myself. As the saying goes, a picture is worth a thousand words, so I made sure to capture as many pictures of this project as possible.
In order to save money, I used materials that I had readily available. I didn’t want to fall into the trap of spending $2,000 to build a sled when I could buy a used one for around $1,200.
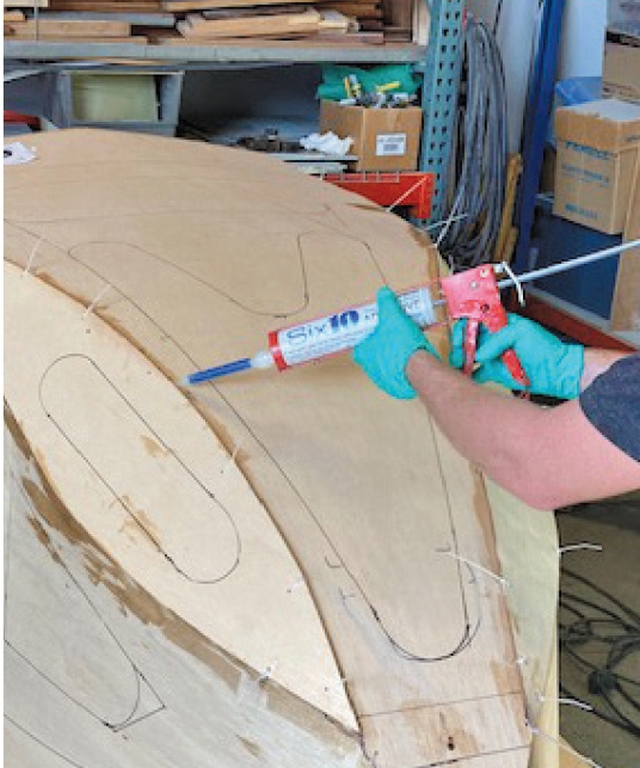
To create the shell of the snow sled I started with a few sheets of 1/8″-thick plywood left over from another project. The thin plywood could be bent into shape to help maintain a fair surface for applying fiberglass to build strength. I temporarily held the plywood in position by fastening it to a plywood form. Holding the plywood in place with zip ties, I injected West System® Six10® Thickened Epoxy Adhesive into the seams. After the epoxy cured, I removed the form to fiberglass the inside of the shell, strengthening the bond between its panels.
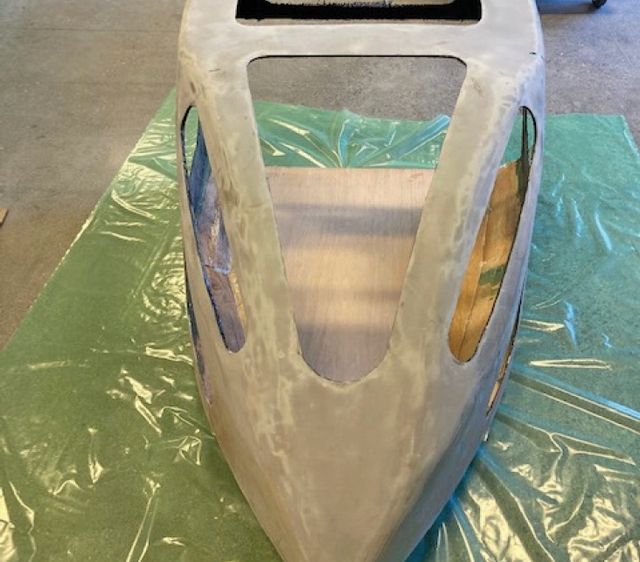
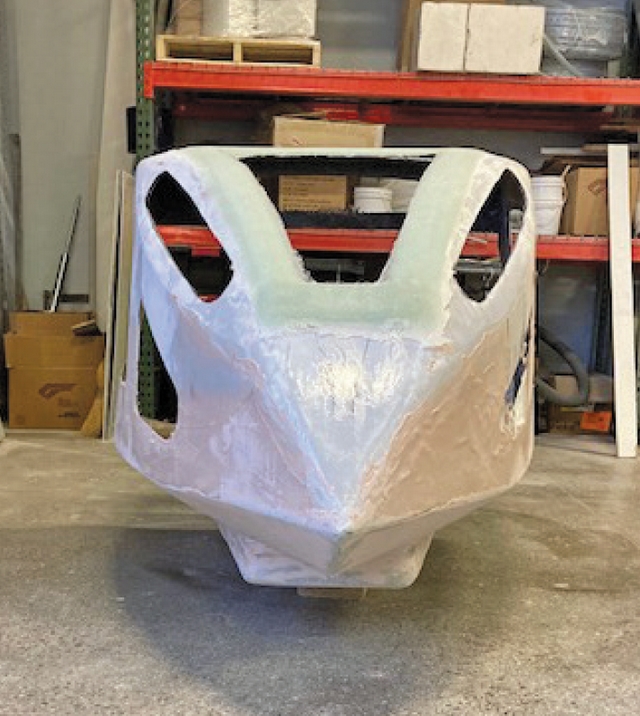
The outside of the shell was prepared with a grinder and orbital sander to smooth the corners, creating a radius edge for the fiberglass cloth. I applied one layer of 10 oz. fiberglass fabric over all of the plywood using West System 105 Resin® and 206 Slow Hardener®. On the corners, I added a layer of 17 oz., 727 biaxial fiberglass tape.
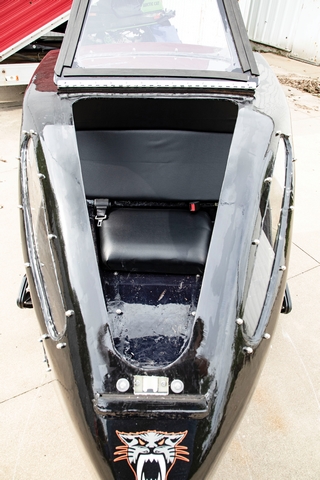
I wanted more headroom inside the snow sled to allow an adult to ride, so I cut part of the bottom to accommodate a footwell. Using ¾”-thick plywood I made a box that is 6″ deep and attached it to the sled with multiple layers of 17 oz. biaxial fabric.
I tinted 105 Resin and 207 Special Clear Hardener® with 502 Black Pigment and used it as the final finish. Because we would only use the sled a few times each year, I was not concerned about preventing UV degradation.
I found some used plastic snowmobile skis that would work great for the snow sled. I drilled a row of four ½”-diameter holes in the bottom of the sled, epoxied in metal bushings, and then bolted on a crossbar longer than the width of the sled to serve as the axle. To attach the skis, I built custom brackets and welded them onto the crossbar. The skis were then bolted to the bracket.
I created windows with 1/8″ thick Plexiglas®. It was a learning process, cutting the Plexiglas slowly, using a jigsaw with a fine-tooth blade to avoid cracking it. Straight cuts work best. I used stainless steel bolts to fasten the panels to the shell. To seal the windows I applied butyl tape on the edge of the Plexiglas panels. The front window has a piano hinge to let the rider climb into the sled. Finally, I used a plastic cabinet catch to lock the front hatch closed so it could be opened from inside or outside.
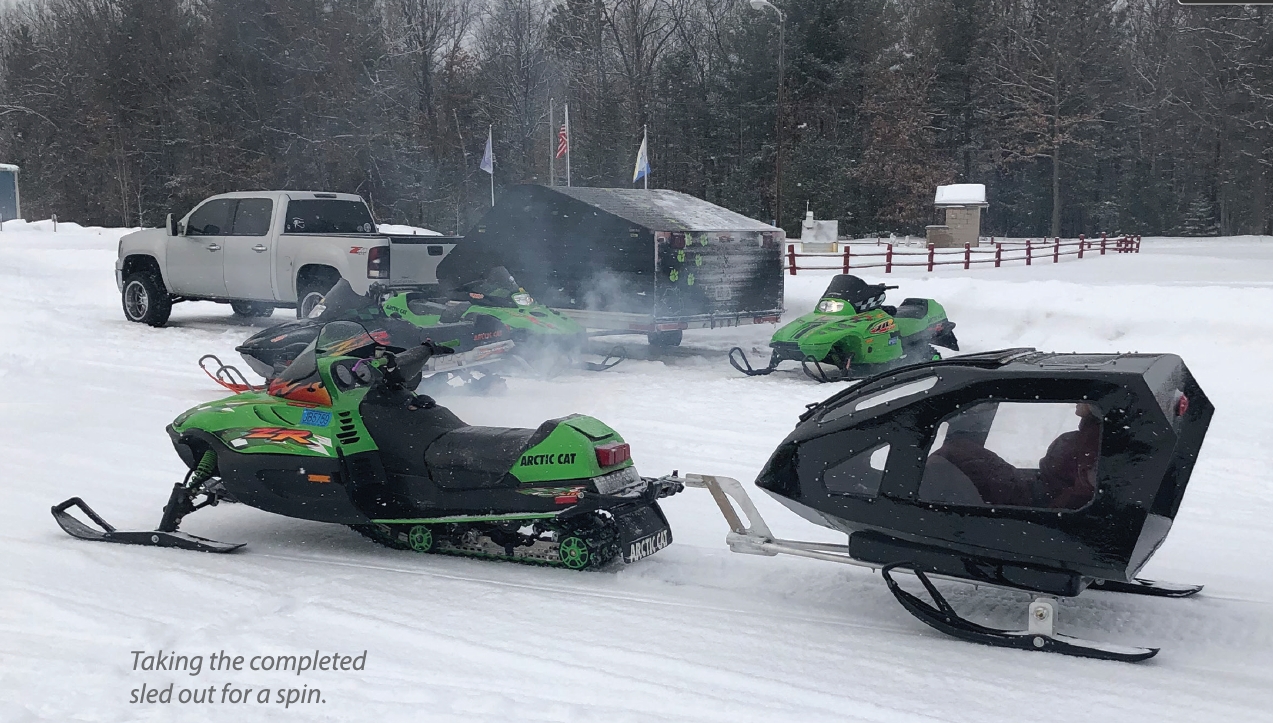
Building this enclosed snow sled was a fun project, and the nice thing is, I put only $600 into building it. That’s probably about half the cost of a used sled. The sled pulls easily and the kids think it is the coolest thing ever. There are endless possibilities to building and repairing when using West System Epoxy products.