Go with the Faux
Spring 2021

GET STARTED
FREE PRINT & DIGITAL EDITIONS
Spring 2021
River tables? Love them! Think they’re cool… know I’d never have the patience to make one… too cheap to buy one.
Lately, I’ve been on a refurbish/re-do jag and am obsessed with Facebook Marketplace. Things I never even knew I needed I can find everywhere! It really is a curse (for my family) and a blessing (to me!).
After weeks of searching, I found and bought a sweet sectional. I started visualizing the new living room layout and quickly was in search of a cool looking, round coffee table. It didn’t take me long to score an outdated, glass-topped baby for $25! I figured, at that price I could not go wrong—but then something did.
As I was coming down from my bargain score high, it dawned on me….I cannot stand glass-topped coffee tables. No offense to all of the glass table lovers out there. They are beautiful. But apparently, my lifestyle is not conducive to maintaining a shiny, smudge-free tabletop. What to do? My brain immediately fired up in high gear on how to right this wrong. After the initial smoke cleared, I thought, how cool would it be to make this into a faux river table?
Research time! I didn’t find a whole lot out there when I hit the internet for ideas such as mine but had a plan in my head: wood veneer, colorants, and epoxy. I found inspiration in my beverage coasters, which then led me in the direction I wanted to go. I was excited to share my idea with my colleagues; they’re all so knowledgeable and creative. I knew they would kindly let me know what was wrong with my idea and what I really should do. Here is what went down (literally):
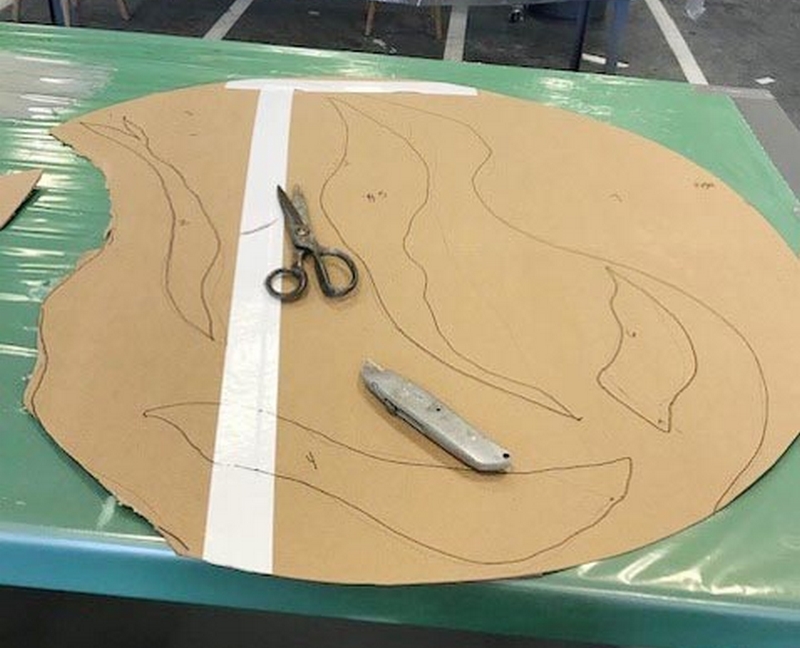

Once I had all of the veneer cut out, I did a dry run on the glass to see if I liked it. It was a bit tough for me to visualize the outcome of the final product. Yes, I could have spent some extra time creating a table “stunt double” in order to mess around with the design but that’s just not my style. I opted for the crapshoot approach instead.
This seemed like a good time to weigh down the veneer. Mine came on a roll and actually could’ve used a full day of being weighed down to keep it from rolling back up. But that would’ve meant waiting, and I was too excited to do such a silly thing.
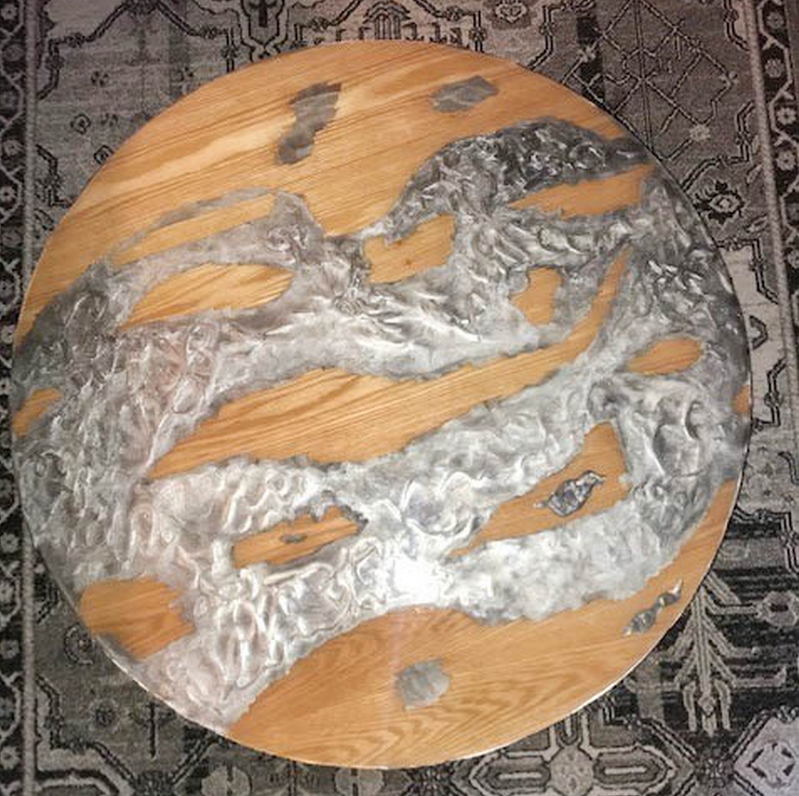
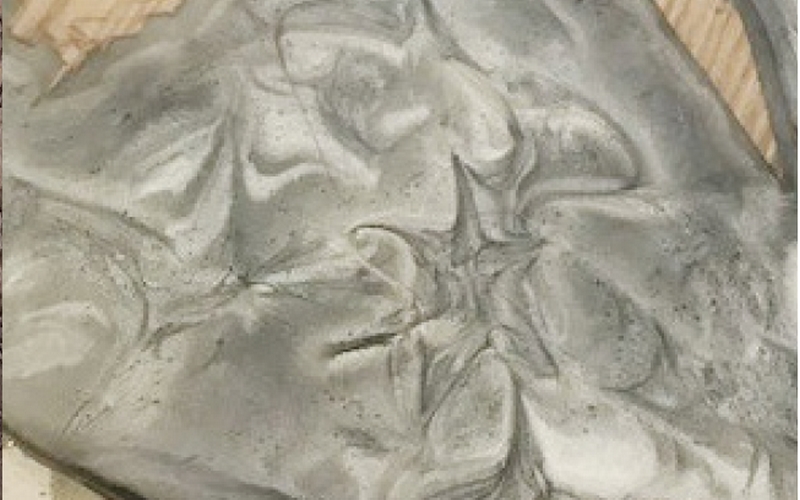
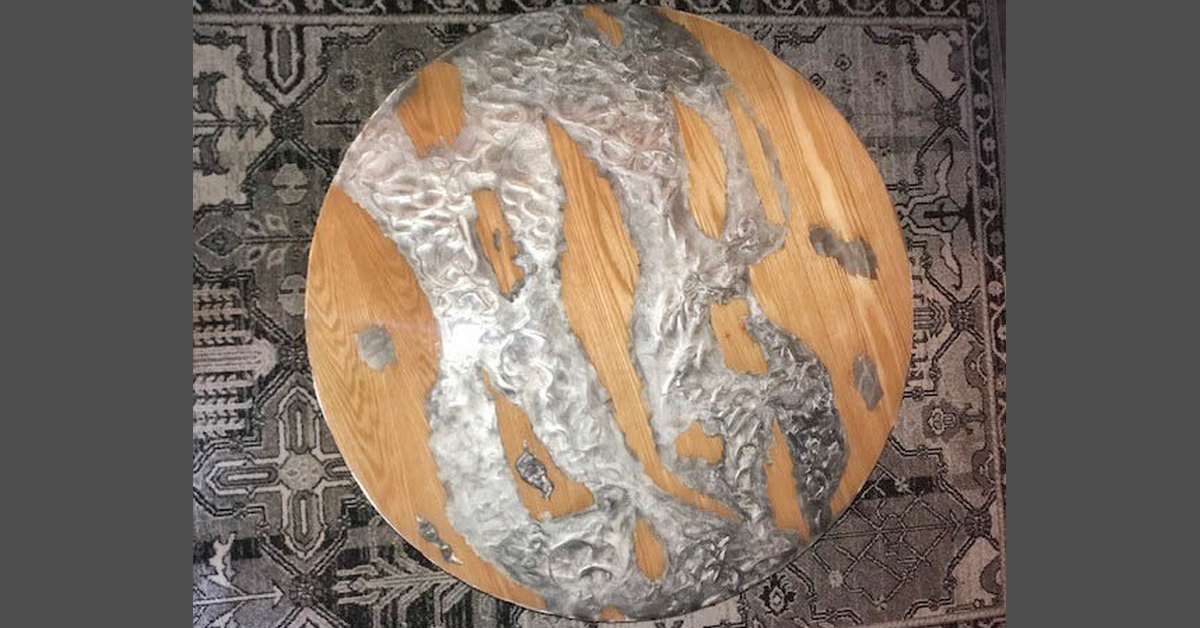
For the first layer, I mixed WEST SYSTEM® 105 Epoxy Resin® with 207 Special Clear Hardener® and then added a couple of colored powdered pigments of my liking. I realize colors in river tables are typically bright, most times translucent, and look like a river. I was going more for an opaque, stone/chrome-type look to match my décor and the “river” is more of a tributary.
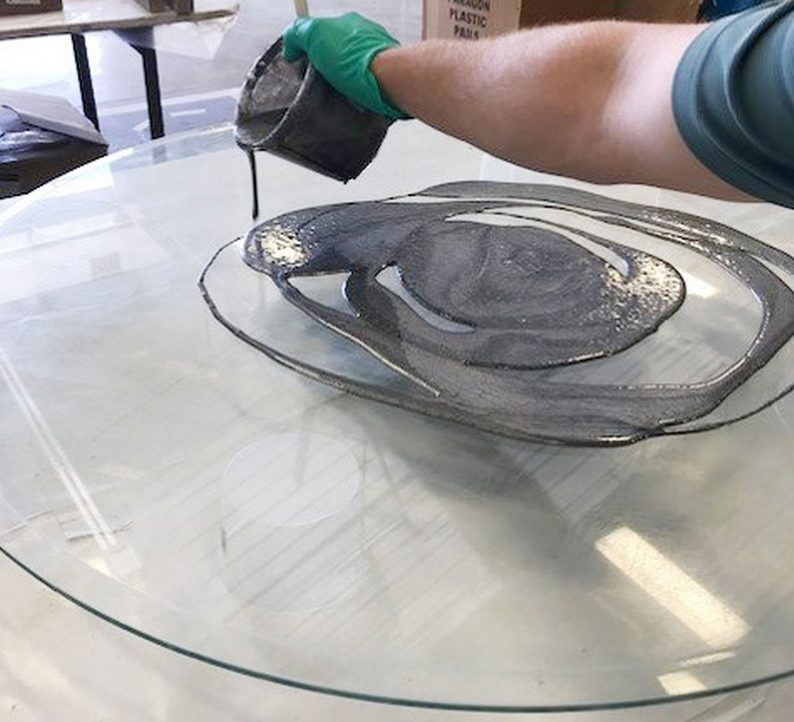
After properly mixing the resin and hardener, I poured it over the glass and troweled it to ensure that the entire surface was sufficiently coated.
I then “torched” the tabletop to alleviate any air bubbles that had formed (following the directions in the Epoxyworks 49 article, Casting Epoxy).
At this time the veneer was still not lying flat (yes… I know why). I let the epoxy gel for approximately two hours so it would be nice and tacky and would grab ahold of the veneer better.
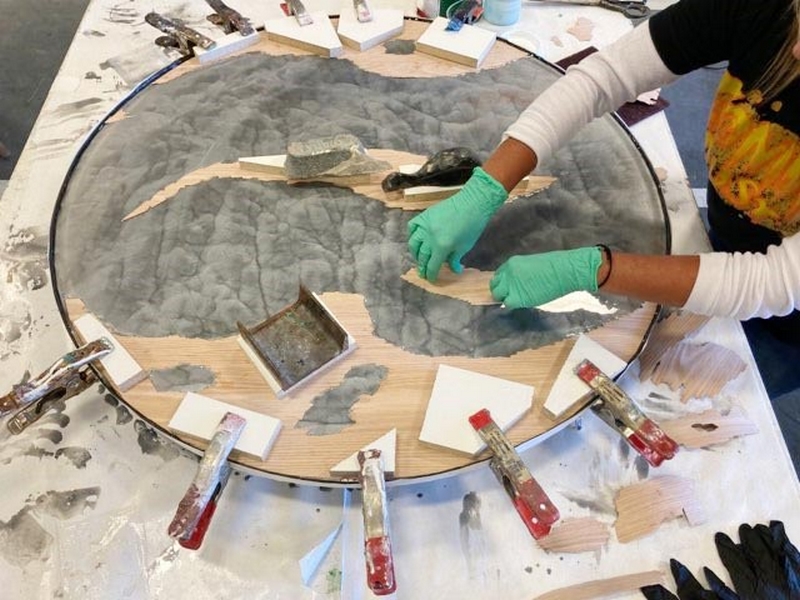
Time for the wood veneer! It’s not like you can pick it up and keep moving it all over the place if you don’t like the placement, so this was one of the most stressful parts for me. At some point, you just have to go for it and hope it’s not another one of those “live and learn” experiences.
As I put the veneer into place, I used blocks of wood to clamp around the outside area and placed weights (and other heavy things) on top of the veneer to keep it from rolling and lifting up.
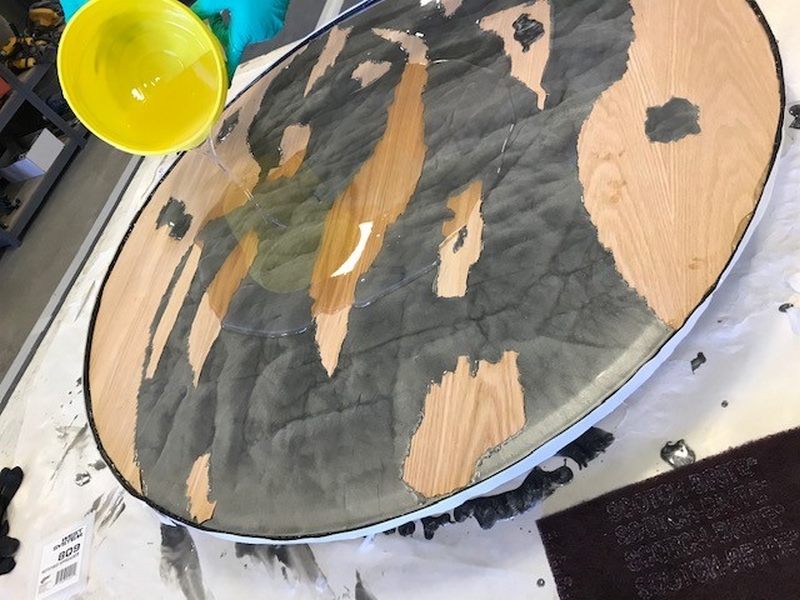
Once the veneer was in place, and the epoxy set up a little more, I removed the weights and poured the final coat of 105/207, tilting the glass to allow the epoxy to flow evenly to the edges.
Just as with the initial coat, this coat was also followed by a nice, hot bath of fire with the propane torch to rid the epoxy of any bubbles that had formed.
After letting the epoxy cure over the weekend, I sanded the crap out of it with an orbital sander. First I used 100-grit to get the rough patches out, then 320-grit to smooth it out and to help hide all the scratches I’d made with the 100-grit (doh!). Note to self: keep the sander level and do not go all balls-to-the-wall in one spot. Yet another one of those annoying, yet informative, “live and learn” moments.
To remove the sanding residue, I wiped the surface down with a plain paper towel and a tack cloth.
Last but not least, I applied two thin coats of polyurethane over the top, sanding with a 3M Scotch-Brite™ General Purpose Hand Pad in between coats.
Bam! Is it perfect? Well, of course not. This is my first crack at anything like this and there are definitely things I’d change, but it was fun to make! If you have a glass table and find yourself cleaning it more than enjoying it, you can do this too. Just let your imagination lead you to your inspiration.