A Professional Technique
By Tom Pawlak — GBI Technical Advisor
When repairing or replacing missing sections of damaged wood trim such as in wood moldings, it helps to have a way to do it efficiently. If you’re repairing historically significant architecture, your method should disturb as little of the original wood as possible.
Sections of wood may be missing due to rot or wood splitting and pieces falling away. Professional repairers sometimes fill these missing sections with new wood glued in place with epoxy, but more often the missing sections are replaced with epoxy thickened with low-density fillers.
If the original carved details are unique, the repairer may opt to use thickened epoxy as a sculpting putty and carve the repair to the shape of the missing section. Epoxy thickened with low-density filler like 410 Microlight® is easy to sand and carve after the epoxy cures. When thickened with 410 Microlight to a putty consistency and allowed to cure, epoxy carves as easily as basswood.
Rotted wood molding may have originally been milled on a wood shaper with special cutters. These cutters are costly to reproduce, so making replacement trim is prohibitively expensive. Localized damage to this sort of trim is easily repaired with thickened epoxy. But, if you have lots of damaged trim, you may want to repair it with a mold from an undamaged section of trim using epoxy and fiberglass, cotton, or polyester fabric.

Using this technique will allow you to do professional-quality repairs to damaged wood trim, making it look as good as new.
- Protect the Repair Area
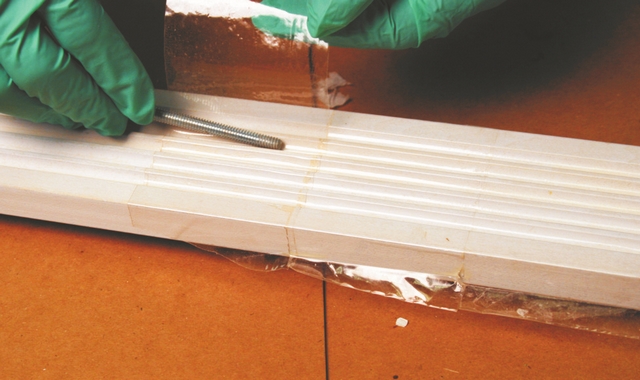
Cover the area you are taking the mold from with 2″ wide cellophane packaging tape.

- Apply Thickened Epoxy
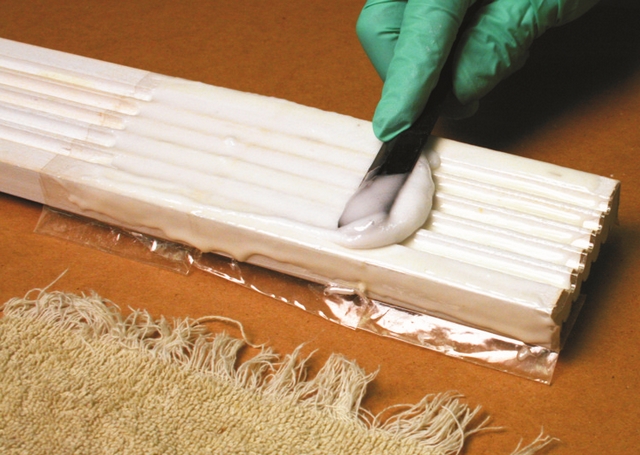
Apply epoxy thickened to a ketchup consistency with 406 Colloidal Silica or other high-density filler to fill the voids in the surface.

- Apply Reinforcing Fabric
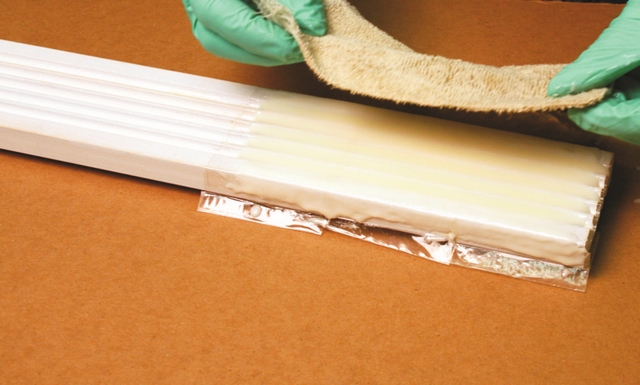
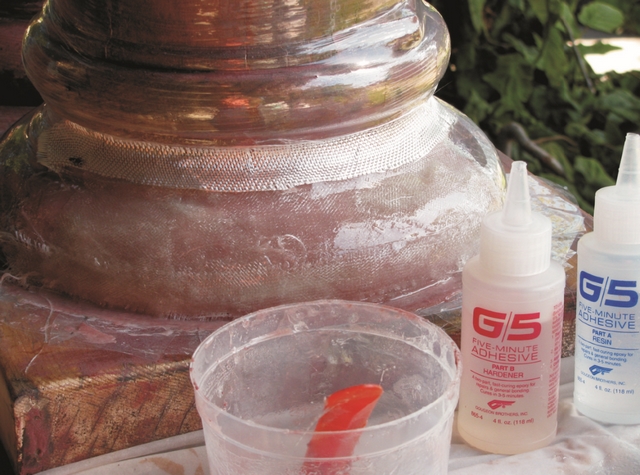
Apply a layer of fabric reinforcing material. In this case, a piece of old terrycloth was used.

- Wet Out the Fabric
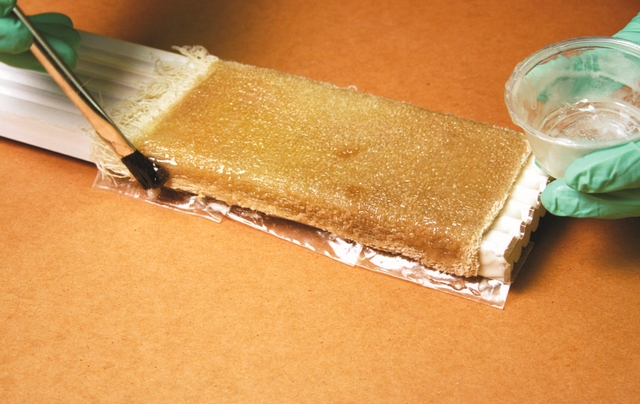
Wet out the fabric with epoxy and allow it to cure. G/5® can be used for these steps to make a mold quickly.

- Begin Removing the Mold
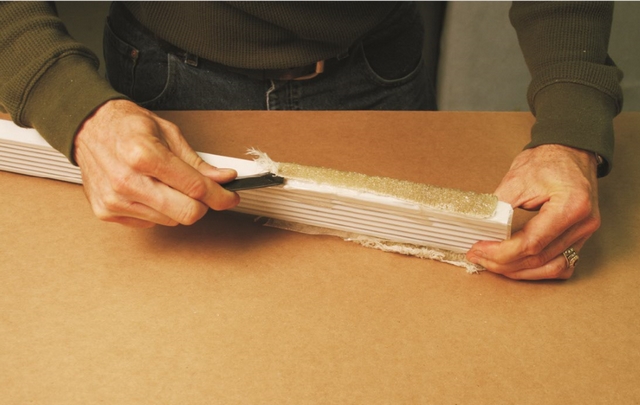
Remove the mold by working wood or plastic wedges under the perimeter until it releases. The 804 Mixing Stick is a good tool for this.

- Pop the Mold Off
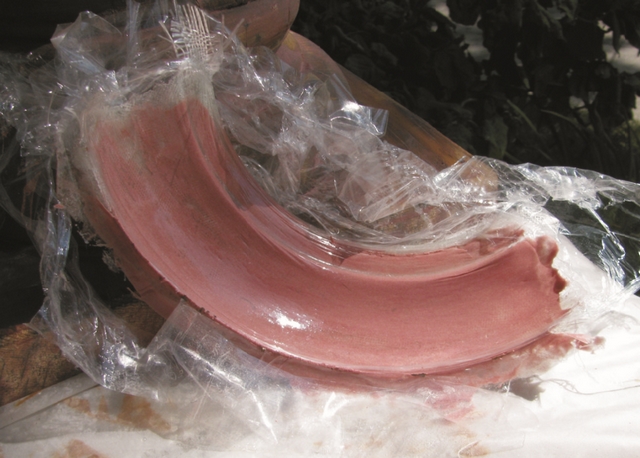
The mold should pop off cleanly—a perfect reflection of the taped surface.

- Trim Away Excess
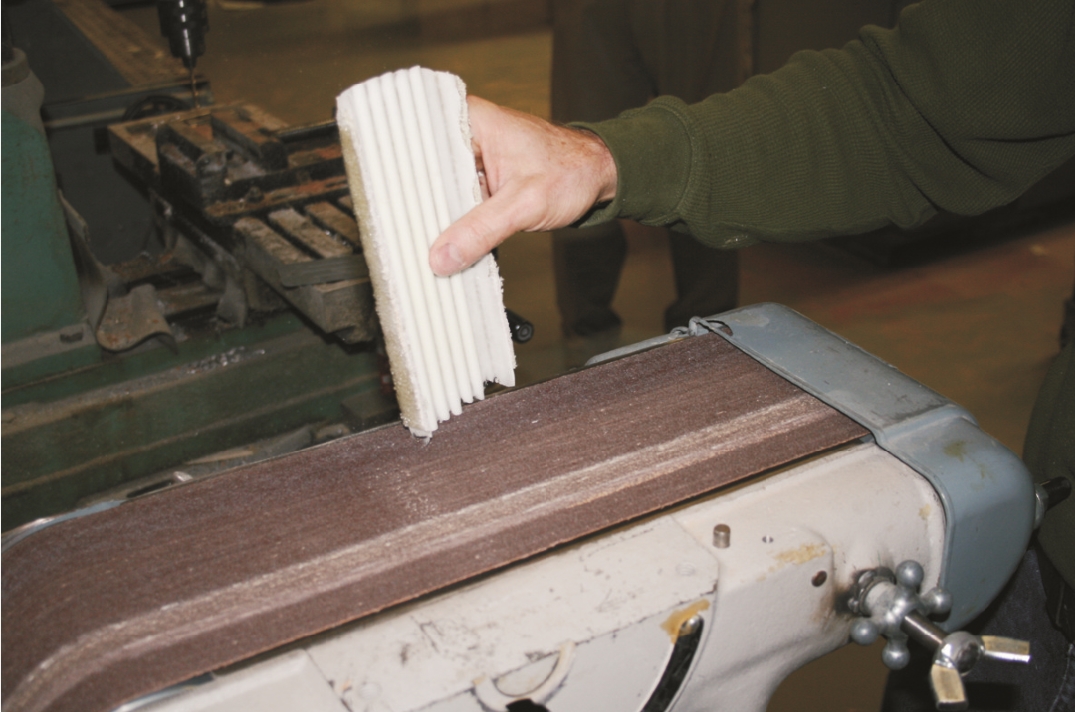
Before using the mold, trim the excess off with a band saw and smooth ragged edges with a belt sander.

- Prep the Mold for Release
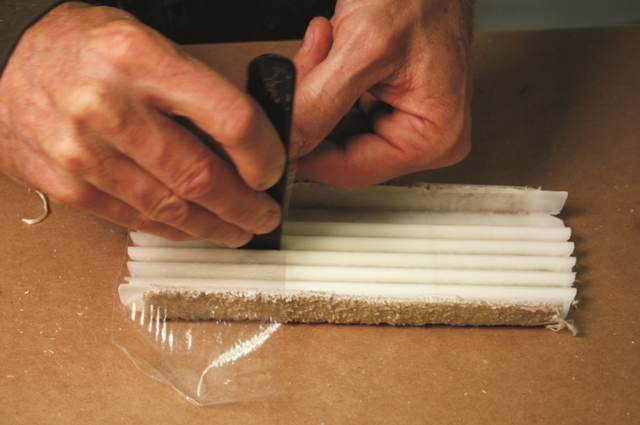
Cover the mold with a mold-release like cellophane tape (pressing the tape into the recesses in the mold) or apply automotive paste wax.

- Fill Void with Epoxy
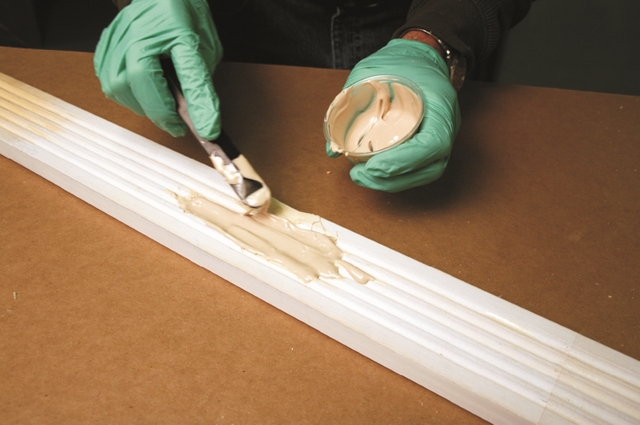
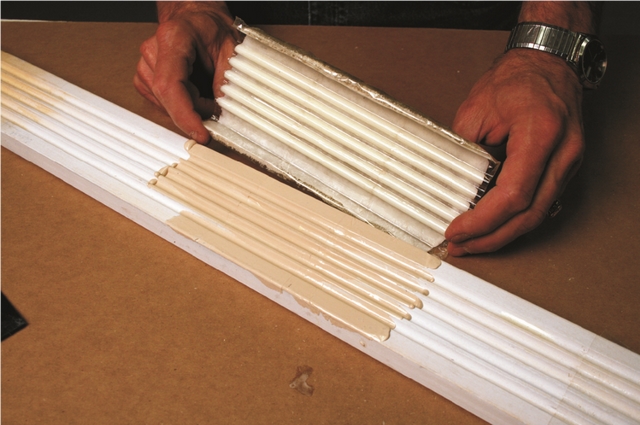
After wetting out the damaged area with unthickened epoxy, fill the void with thickened epoxy. 410 Filler will be the easiest to shape and sand when cured.

- Clamp Into Position
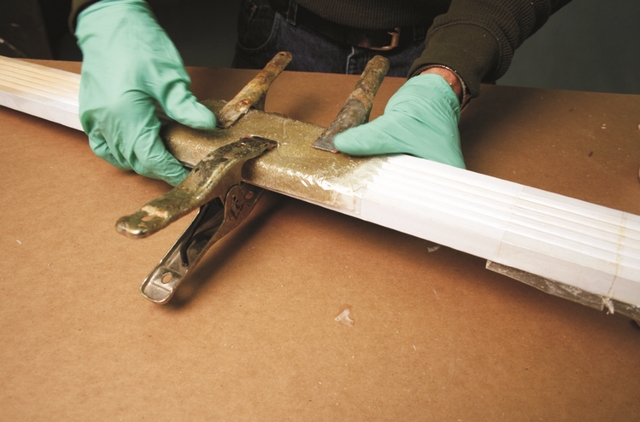
Press the mold firmly into position, displacing excess epoxy. Clamp the mold in place and allow the epoxy to cure thoroughly.

- Pry Away Mold
Pry the mold from the surface with plastic or wooden wedges inserted around the perimeter.

- Carve or Sand as Needed
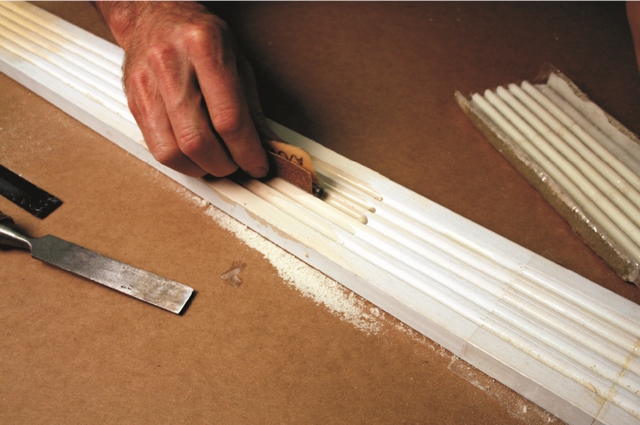
The cast epoxy can be carved with chisels or sanded to match the trim and prepare the surface for paint.

- Apply Primer
Apply a quality latex or fast-drying oil-based primer and finish as you would any wood surface.

To make one of these light-duty molds, begin by selecting an undamaged section of trim, sand away bumps, or paint drips and fill indentations with wood putty or thickened epoxy. Cover the molding or trim with 2″ wide cellophane packaging tape overlapping the tape slightly. The shiny plastic tape acts as a mold release so you can remove the mold after the epoxy cures. Be sure to let enough extend beyond the mold so you can grab onto it when it’s time to pull the mold off.
Apply epoxy thickened to a ketchup consistency with 406 Colloidal Silica or other high-density filler. When this reaches a soft, tacky cure apply a layer of fabric with WEST SYSTEM® Epoxy. If you’re in a hurry, try G/5 Five-Minute Adhesive for this step.
To achieve adequate stiffness, add layers of fabric wet out with epoxy. Nearly any fabric will work. It should end up around 1/16″ to 1/8″ (1.5mm–3 mm) thick. Allow it to cure.
Remove your mold by working wood or plastic wedges under the perimeter until it releases, or by pulling up on the mold release tape you’ve left extended beyond the mold. Before using the mold, smooth ragged edges with sandpaper to avoid bloodletting via epoxy splinters.
To use this mold, first cover it with a mold-release such as cellophane tape or apply a more typical release agent like automotive paste wax. Position the mold over the area you wish to restore, making sure that the mold fits to adjacent undamaged trim. For best results, the mold should extend beyond the damaged section and engage with the undamaged trim on either side of the repair. Sand away any paint drips or bumps to achieve a good fit.
Prepare damaged wood sections by removing any damaged wood. Use a chisel or coarse sandpaper to slightly bevel the perimeter of the area. Be sure the area is thoroughly dry.
Apply unthickened epoxy to the damaged section, allowing a few minutes for it to soak in. Reapply epoxy as it’s absorbed. Fill the void with epoxy thickened with one or more of the powdered fillers, over-filling the void slightly before positioning the mold. Press into position, displacing excess epoxy.
To keep the mold in place, clamp it or drive tacks through pre-drilled holes at the mold’s ends. Leave them slightly proud of the surface to allow for easy removal later.
Filling large voids with epoxy can generate excessive heat or exotherm. You can avoid this by filling most of a large void with a wood plug glued in with epoxy. Make sure the wood plug is set a bit low so there is room for thickened epoxy to be placed over it prior to positioning the mold. If the wood plug stands proud of the surrounding area the mold will not engage correctly and the resulting casting will require a great deal of sanding and/or carving to shape.
If the void is large and you wish to fill it with epoxy, thicken it first with 404 High-Density Filler. Of all the fillers, it works best to reduce epoxy exotherm. If the void isn’t deep, 410 Microlight is your best choice for thickener because it extends the epoxy considerably, more than doubling the volume of epoxy when enough is added to achieve a mayonnaise viscosity. Conversely, because Microlight is a very low-density filler, it is more prone to exotherm if used in deep cavities.
You can use these trim molds over and over to efficiently reproduce missing sections of trim as long as you properly maintain them by replacing the mold release tape between each use.
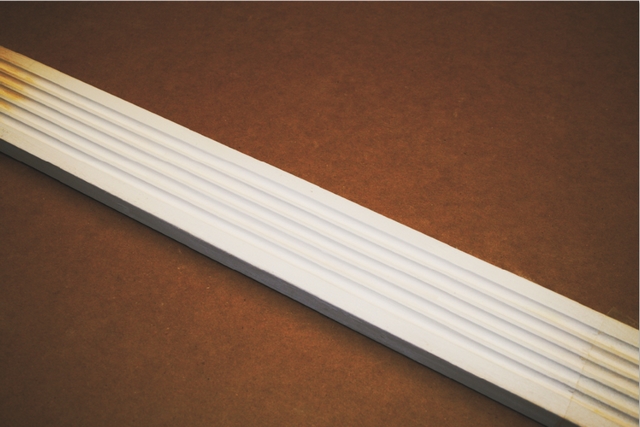
After removing the mold, sand the epoxy dull and apply quality latex or fast-drying oil-based paint to protect the epoxy repair from sunlight. If air bubbles are trapped on the surface of the repair, use latex caulk or epoxy putty to touch it up before painting.
Using this technique will allow you to do professional-quality repairs to damaged wood trim, making it look as good as new.

